A Sea-Green English Back Gown (Robe a l'Anglaise), 1770-1775
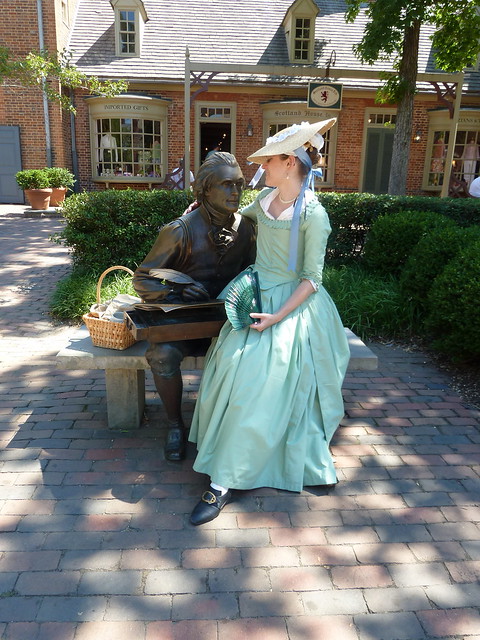
Thomas Jefferson at Merchants Square, Williamsburg
This is one of my favorite efforts. Of course, that’s partially (largely!) due to the fact that Mark Hutter, the tailor at CW, gave the entire ensemble, from the gown cut and draping to the fabric choice, a thumbs up for accuracy after close inspection when Ashley wore it in there one afternoon back in July. The only mistake I made (which he pointed out, and which I had noticed as soon as she got dressed that morning), was that I had made the waist ever-so-slightly too long. This is the result of finishing it at 2 in the morning in the hotel room, without getting her to try it on over all the period underthings, so I wasn’t too surprised. Thankfully it’s an easy fix, though, which I’ll get around to…one of these days!
The pattern: Draped by me. The sleeve shape is taken from the Janet Arnold polonaise pattern on pg. 39 of Patterns of Fashion 1.
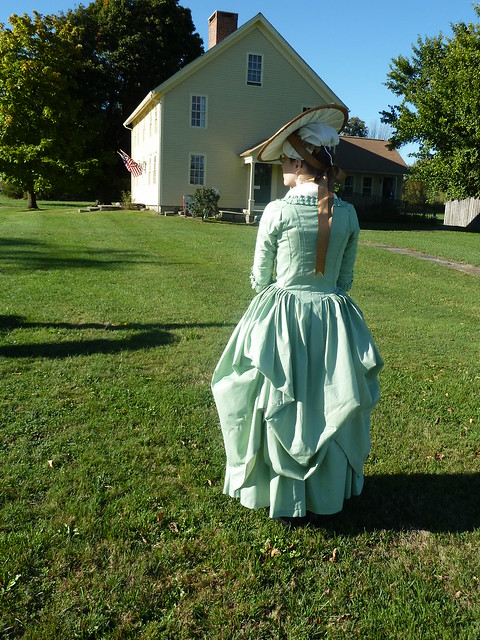
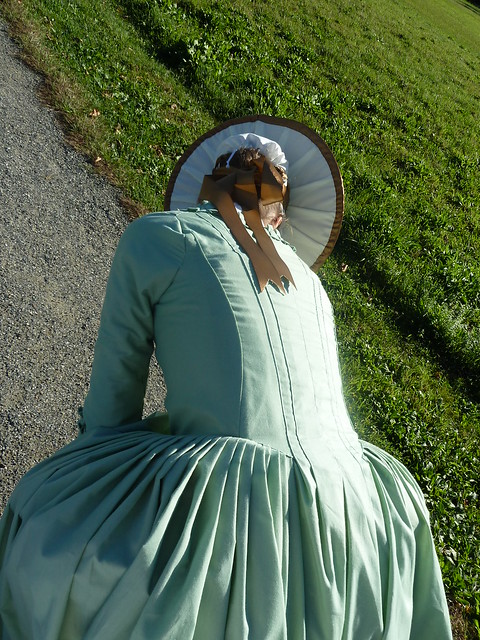
The back of the gown, taken in front of the
Jonathan Trumbull, Jr. House in Lebanon, CT
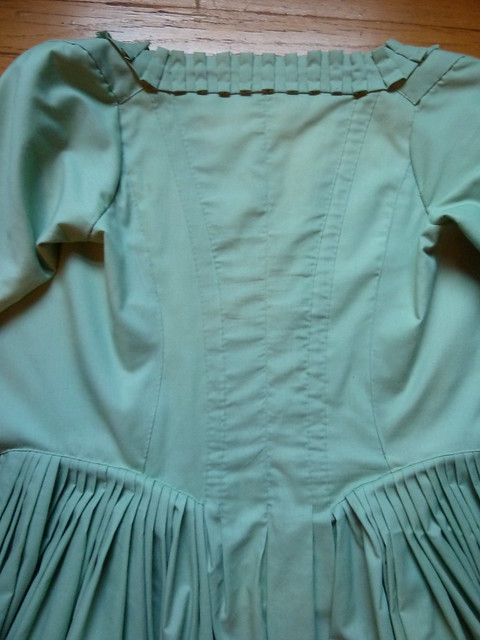
Construction details: This gown is entirely hand-sewn using period construction techniques. First, I draped the back into "en fourreau" pleats, which extend from the shoulders down through the length of the skirt, and top-stitched the pleats to the back bodice lining.
Detail of the back en fourreau pleats
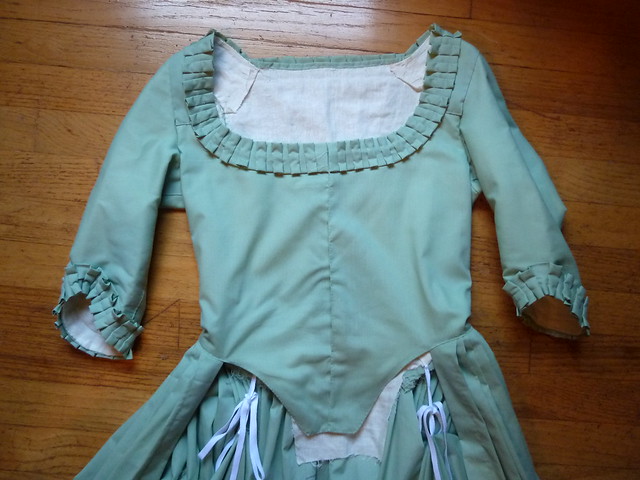
Then I fitted the front/side bodice pieces, turned the edges under, and top-stitched them down as a lapped seam to the back piece; the front/side lining pieces were then inserted in a similar way and whipstitched into place on the inside.
Interior of the bodice, showing the linen lining whipstitched into place
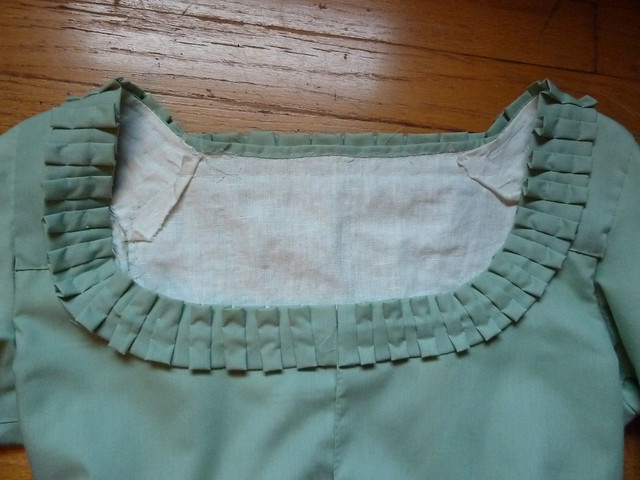
The neckline and front edges of the bodice were then turned in towards each other and finished using “le point a rabattre sous la main,” which both finishes the edges and secures the lining to the fashion fabric at the same time.
Detail of box-pleated trim around the neckline
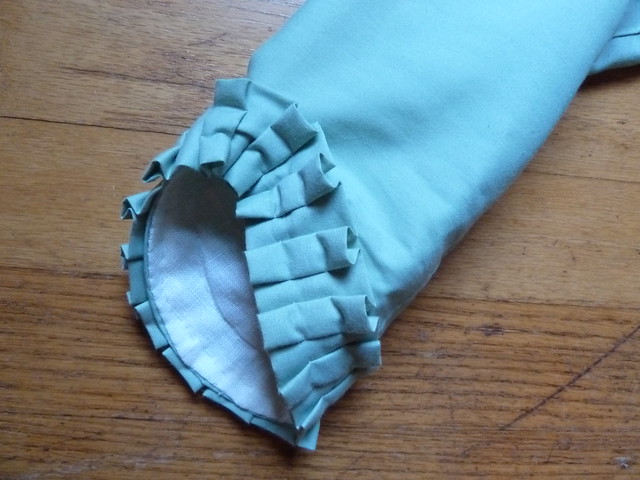
Detail of box-pleated trim around sleeve end
To give it some weight and make the hem more aesthetically pleasing when it is worn a la polonaise, the bottom 9” of the gown skirt is lined with cream china silk. The bodice closes in front with straight pins.
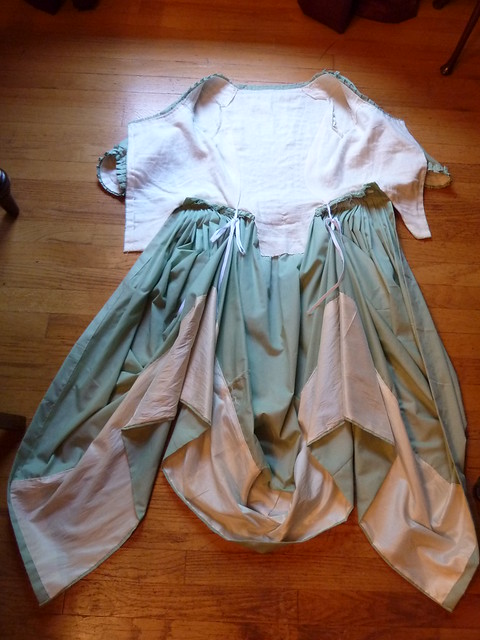
The inside of the gown, showing the linen bodice lining,
the cotton tape ties used to polonaise the skirts,
and the china silk hem facing
The fabric: The gown was made using a light-weight sea green cotton. The color is appropriate for a cotton or silk textile of the period, since these fibers took to certain colored dyes more easily than either wool or linen.
Finishing the look: The gown and petticoat are made to be worn over a small oval hoop like the one below, reproduced by the CW CDC, based on one in the collection of Colonial Williamsburg.
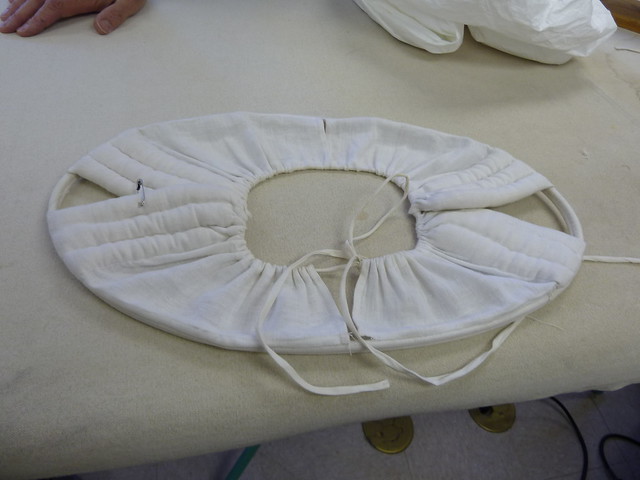
Small hoops, reproduced by the CW CDC. The original is in the CW collection.
The outer garments are worn over a white linen shift, fully boned stays, the hoop, and two linen petticoats to give the skirts more volume and prevent the ridges from the hoops from showing through. A white cotton lawn handkerchief is worn to fill in the low, wide neckline. To complete an upper-middling class look, Ashley wears this accessorized with pearl drop earrings by Janice Erickson Smith of Historic Delights and a triple-strand necklace Ashley made of tiny round pearls, knotted on silk thread and tied with a silk ribbon.
In front of the Jonathan Trumbull, Jr. House in Lebanon, CT
Under the Redcoat 2010, Williamsburg
Under the Redcoat 2010, Williamsburg
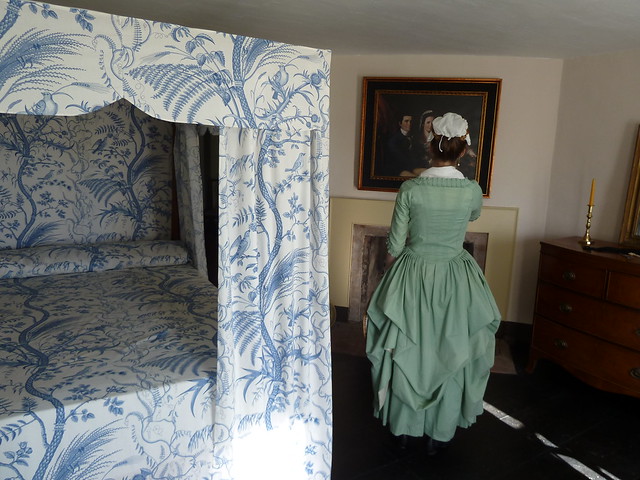
The front bedchamber of the Jonathan Trumbull, Jr. House, Lebanon, CT





This will make a great reference when I make another gown. The underside of her hat looks pleated. Is it?
ReplyDeleteLaurie
Yes! The hat worn in the Trumbull House pictures is covered in cream china silk that is pleated in a pinwheel sort of design on the top and underneath. We should do a hat post, huh? :-)
ReplyDeletePlease do! Where did you get China Silk?
ReplyDeleteChina silk is pretty easy to find cheaply online (just watch out for the poly imitations that go by the same name). I stumbled on this piece a long time ago at a small local fabric store and was saving it for just the right project!
ReplyDeleteHi! I'm making a robe a la polonaise for my prom but i can´t find info about how you are supposed to make the skirt part that is attached to the jacket. Maybe a tutorial:)?
ReplyDeleteHi "Anonymous,"
ReplyDeleteGood for you making your own gown! I always wanted to do that for my prom, but back then, I didn't have the skills! Congrats to you!
I'm not quite sure what you mean when you refer to the "skirt part that is attached to the jacket." Do you mean the en fourreau pleats, that are stitched down to the bodice back from the shoulders to the waist, and then are released to flow into the gown's skirt at the waistline?
Hi again. I take a clothing and fashion program at school.
ReplyDeleteYes, where are you supposed to put the loops so you can pull it up to get it to be polonaise? Sorry about my poor english;)
I'm about the start another en fourreau gown, so I'll do my best to take some in-progress photos and post them as I go along. Hopefully that will help! The pleats are actually part of the bodice, not just attached to it. If you look at the third photo down, the center back part of the bodice is actually a single panel, pleated to fit the lining piece. The front pieces are then lapped and attached to that back panel to form the full bodice. Do you have access to any costume books like Costume Close-up or Janet Arnold's Patterns of Fashion? If you look at the en fourreau gown patterns in them, you can get a good overview of how that single pleated back panel is cut. But I'd definitely try to get up some in-progress pictures if I can!
ReplyDeleteAs for the draping of the skirts, there are many ways to do it. Some techniques use multiple loops and a single tie woven through them, while others use a series of ties. In the example in this post, I just used a set of ties on each side. One tie I attached to the bottom of the bodice, and the other I attached to the skirt, and then I tied them together to get the draped effect. Check out the 6th photo down. It's basically just a matter of taste where exactly you want to place the ties on the bodice and the skirt. Try pinning them first and tying them at various heights, and you'll get a sense of where you like them best. Good luck!
Thank you!:D
ReplyDeleteYour costumes are gorgeous! I love all the period detail. Thank you for sharing!
ReplyDeleteHello! How did you place the ties for the polonaise?
ReplyDelete