Blue and Yellow Changeable Taffeta
Robe a la Francaise (sacque back gown),
1765-1775
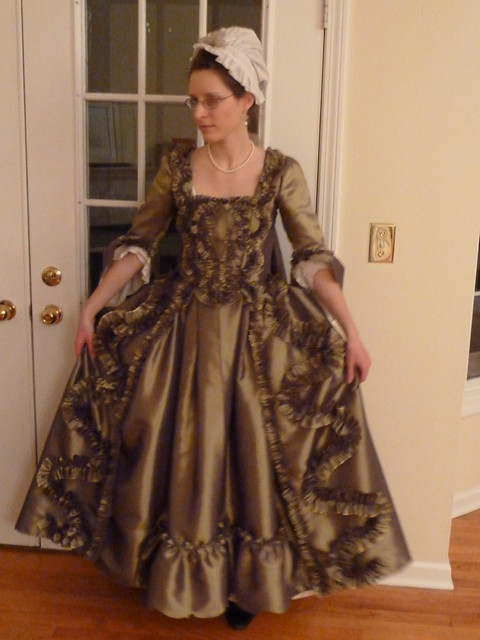
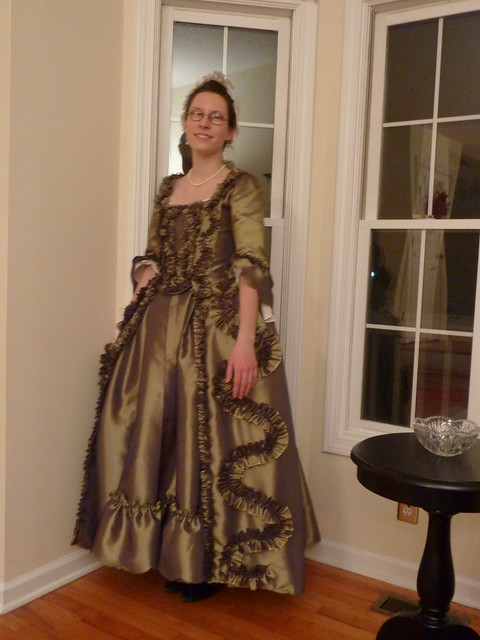
Ashley dressed in the gown for a recent ECD ball.
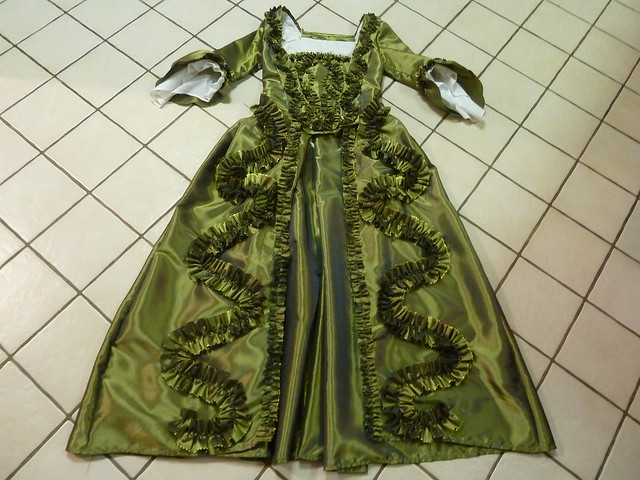
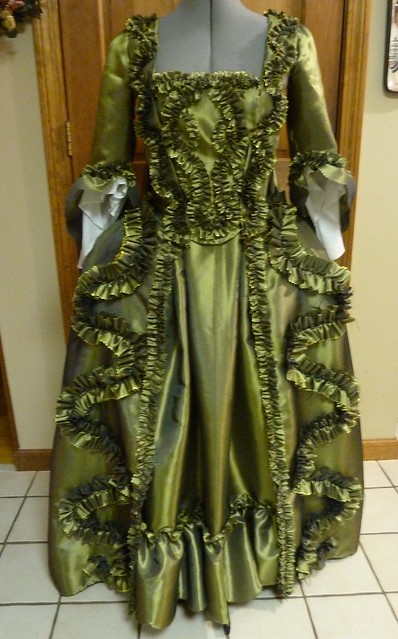
The Pattern: Draped by me directly on Ashley. Because this was my first draped sacque, I used the general shapes and seam placements of the pattern pieces from the gowns in Patterns of Fashion I, pgs. 34-5 and Costume Close-up, pgs. 16-22 as my guide as I cut and fit the fabric panels. The trim design is based on the serpantine curves from the Costume Close-up gown, which were fashionable from the 1760s into the beginning of the 1770s.
Construction Details: The gown is entirely hand-sewn. Alas, I forgot (again!) to take in-progress photos. It's just that I work by fits and starts, and never think to stop to snap some pictures when the urge to sew comes on! Next time I promise some in-progress pictures to help explain the construction steps! Mind you, this is not to claim any kind of authority with my draping or construction processes, as I am entirely self-taught, but it works well for me for the present, until I'm lucky enough to learn the real techniques from a professional. :-)
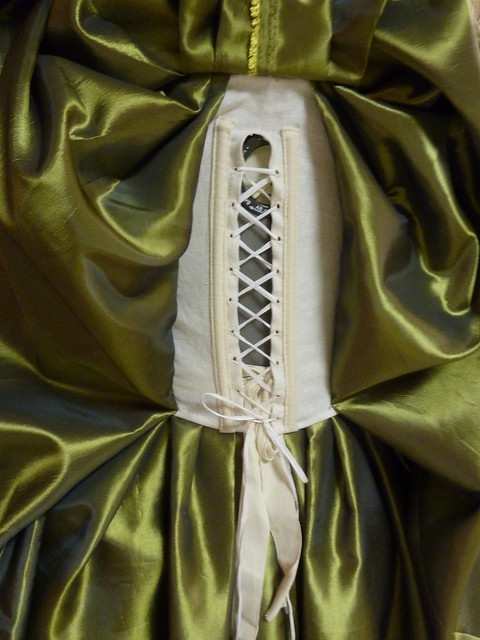
I started by fitting the linen lining, then split the back lining piece up the center back. Boning channels of cotton twill tape, boned with reed, and a row of eyelets were placed on either side of the slash to allow for greater flexibility in the size of the finished garment. This feature is frequently seen on sacque gowns (as well as on pet-en-l'airs), and I love using it because it makes fitting so much easier!
Center back lacing, which is concealed beneath the full
pleats of the gown's back panels. This allows the gown
to be adjusted after it has been donned by the wearer.
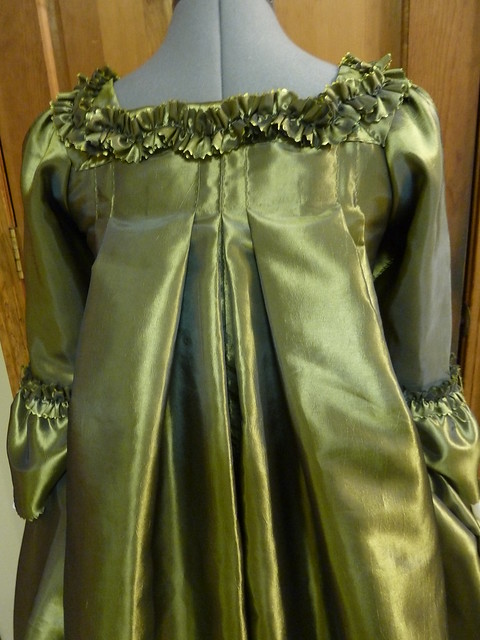
I then pleated the center back panels of the taffeta and secured them to the back lining along the top of the pleats with a strip of self-fabric. The pleats were then stitched down to the lining for about 4 inches from the top to help them maintain their shape as they fall loosely from the shoulders.
Back of the sacque with the secured pleats.
Next, I fit the front part of the gown, which was a teensy bit complicated because I had to account for the robings (the strips of fabric that run down the front, under which the stomacher is pinned) and because I had to do darts (completely period correct) just at the line at the top of the stays, hidden beneath the robings, to help shape the front pieces over the bust and shoulder. I also folded the front panels at the waistline to create a front waist seam, which I prefer to the smooth, single panel fronts more typical of earlier gowns. The front bodice pieces were then lapped and sewn to the back panels, and I pleated up the sides of the skirts to accomodate the side hoops.
The front waist seam, though it's mostly hidden by the
robings and all the trim!
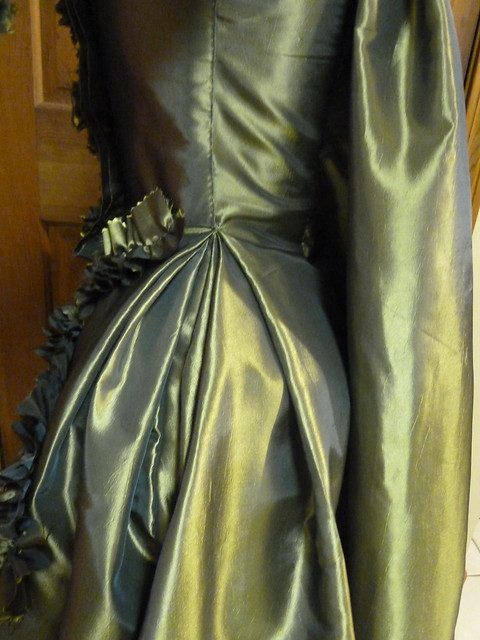
Detail of the side pleats, which accomodate the
hoops worn at the hips.
I still haven't mastered the nack of draping sleeves, so I borrowed the sleeve pattern from the gown in Patterns of Fashion, modifying it slightly to fit the cut of my gown. The sleeve ends are finished with a single scalloped and pinked flounce and a strip of ruched and pinked self-fabric. I backstitched in the bottom half of the sleeve, then pleated the top of the sleeve cap to Ashley's shoulders while she had the gown on, and topstitched them down to the strip of linen lining covering the shoulder. I then covered them with the strip of taffeta that extended from the bodice front. More often than not in original gowns, an additional strip of fabric did not cover the pleated sleeve cap; only the robings were used to conceal it. When I cut the front pieces of the bodice, however, I made sure to allow for some extra fabric there, because I didn't trust my robings to cover everything completely!
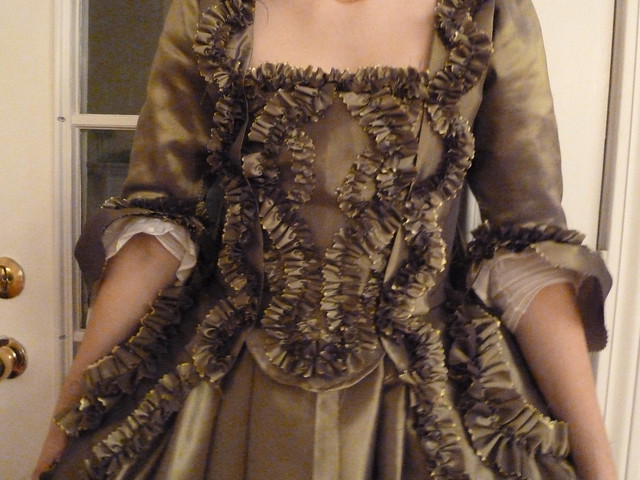
The last step was the trim, whichby itself took just about as long as the assembly process, there was so much of it! I tacked on the robings down the front of the gown and along the back neckline
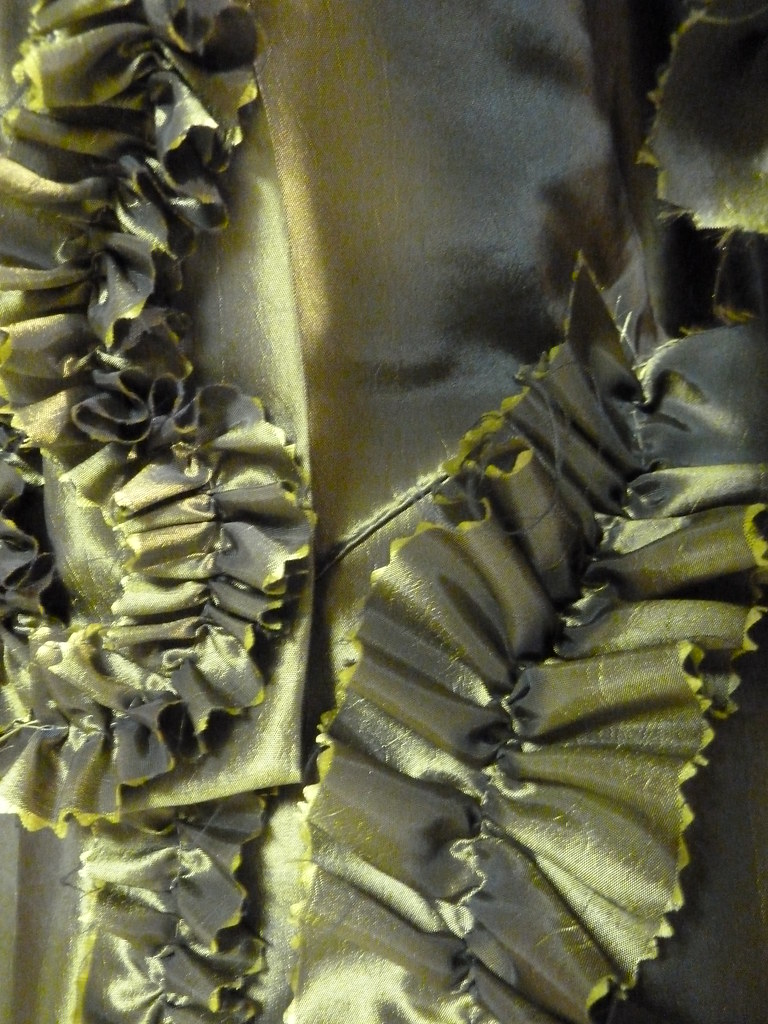
, and then covered them with a curved strip of pinked and ruched self-fabric. This same curve is echoed in the trim of the skirts, which also have a straight line of trim extending down the center fronts to frame the petticoat opening.
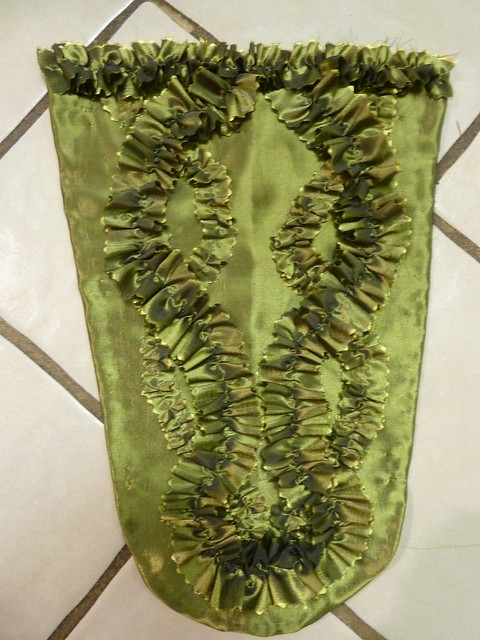
The stomacher is backed with linen and covered in the same kind of curved and ruched trim as the gown. Using the stomacher of this gown from the Met's collection as my inspiration, I first made one set of curves in a narrower trim. Then I overlaid those curves with curves moving in the opposite direction made of a slightly wider trim, which gives the stomacher a more three-dimensional appearance. The stomacher is secured to the gown front with straight pins, concealed beneath the robings.
Stomacher detail.
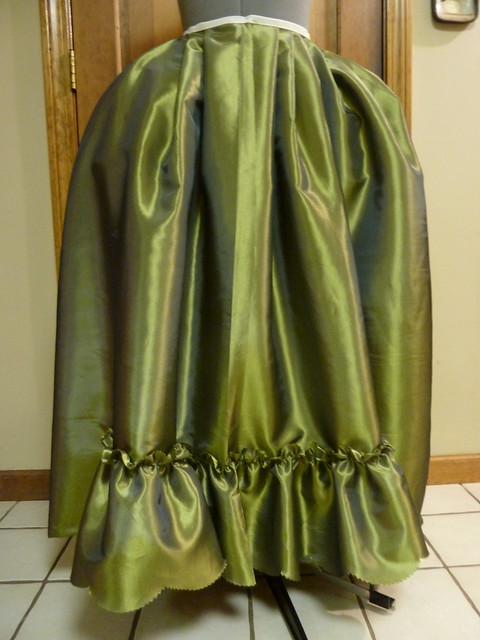
The petticoat is constructed of two panels, shaped at the waist to accomodate the fullness of the side hoops. As with both of my reference gowns' petticoats, this petticoat's ruffle only covers the center front of the front panel, so that only the exposed bit of the petticoat requires the use of this extra fabric. The bottom of the ruffle is scalloped and pinked to match the sleeve flounce.
The Fabric: This blue and yellow changeable taffeta gives the effect of green. In the low (mock!) candlelight of our recent English country dance ball, the gown took on a lovely goldish hue. It almost looks like two different gowns in the photos here; the real color falls right in between. Ashley purchased 9 1/2 yards of the 54" taffeta, and we ended up using all but about 1/2 a yard of it! The bodice is lined in a cream medium-weight linen to support all of the pleated fabric that hangs from it.
Finishing the Look: By the late 1760s and early 1770s, both the sacque gown and the extremely wide sillouette popular from the 1740s into the 1760s were gradually waning in popularity. Smaller side hoops replaced the wider hoop skirts, and were increasingly reserved for more formal gowns and occassions. My pocket hoops are drafted from the pattern in Corsets and Crinolines, but I scaled them down quite a bit to give the gown an upper-class, rather than strictly formal, function.
Side hoops, modeled by my dressform. I forgot to get a shot of them
on Ashley with the proper period underthings beneath!
In the ball photos, Ashley wears the gown over a shift and fully-boned stays, the side hoops, and a linen petticoat. White lawn flounces are tacked into the sleeves, and a white lawn cap embellished with olive green organza ribbon completes the finished look. Her hand-knotted pearl necklace is secured with a matching organza ribbon, and her reproduction pearl earrings are by Janice Erickson Smith of Historic Delights.
As always, if you would like to see more photos of this gown that couldn't fit into the post, check out the full photo set on flickr.


Gorgeoous work, Rebecca! To drape 100% so technically correct and beautifully for the first time ever, with changeable silk, is a testament to your incredible skills!
ReplyDeleteLaurie
Beautiful!!!
ReplyDeleteBeautiful work on the trim!
ReplyDeleteThanks, Kim! The only problem now is that it's fraying like nobody's business! I wish I had through to fray-check it beforehand. Live and learn!
ReplyDelete