Costumes

Thursday, April 28, 2011

The Royal Wedding Countdown Begins!

For those of you feeling the royal frenzy as the hours tick down to tomorrow morning, here are a couple wedding necessities, in case you've missed them:

- The official Royal Wedding website provides some great details, videos, and updates, including the official program for the ceremony and the procession to follow.

The cover of the official wedding program,

- In this age of multi-media, you've got a choice as to how and where to catch your glimpse of the ceremony.  For those "traditionalists" (like us!) who prefer the television screen to the computer screen, the wedding will be broadcast live States-side by a number of television networks.  Both PBS and BBC America will host a simulcast of BBC One programming, beginning at 3am Eastern.  ABC begins their live coverage of the event at 4am Eastern.  And for those of you who prefer the "modern" method of watching the big day, the BBC will stream their coverage live online.  Youtube's Royal Channel will also be streaming live, as will ABC

- As a lovely complement to our previous post on British royal wedding gowns of the past, the BBC recently posted a slideshow on their website, which offers another glimpse of some of these stunning pieces of history worn by the fashion icons of days gone by.  Another fun page, also posted by the BBC, is this fascinating overview of eight royal weddings, full of fun little tidbits of trivia including everything from what they ate to the various controversies surrounding each day, to some of the memorable gifts each royal couple received.

So let's take a poll: who else plans to be up at 4am tomorrow?  "See" you then!  :-)

Wednesday, April 27, 2011

Noah Webster, "The Forgotten Founding Father"

Last Thursday, I attended a lecture and book signing given by Joshua Kendall at the New Haven Museum.  Mr. Kendall's latest publication, The Forgotten Founding Father: Noah Webster's Obsession and the Creation of an American Culture, explores the life of American dictionary author Noah Webster.  I have yet to read this book, so I will definitely be back to share more once I do.  I volunteer occasionally (which is not as much as I'd like!) as an interpreter at the Noah Webster House in West Hartford, Connecticut.  Besides the materials provided by the staff, it is surprisingly difficult to find resources about Webster.  The most comprehensive biography that I have seen so far is Harlow Giles Unger's 2000 publication, Noah Webster: The Life and Times of an American Patriot, so you can all imagine my delight when I heard that there was a new book being published about one of our best known local historic personages.

Joshua Kendall shares his insights about Noah Webster.
Photo courtesy of the New Haven Museum facebook page.

Mr. Kendall shared a brief overview of Noah Webster's life that included a sprinkling of facts which were new to me.  Most interesting, though, was Mr. Kendall's claim that Mr. Webster suffered from obsessive-compulsive personality disorder.  This is offered as a possible explanation for Webster's preoccupation with compiling lists.  In addition to his constant work with etymological lists, during his early "book tour" to promote his speller, he counted every house in each of the cities where he stopped (these lists subsequently became part of the first census).  He was also constantly working on large projects, which Mr. Kendall predicts kept him sane.  Webster was viewed by some as quite the curmudgeon and he managed to make a number of political foes as well, one of them being fellow federalist Alexander Hamilton.  I was not aware of his overbearing nature towards his children, which is apparently evident in some of his later correspondence with them.  I am very much looking forward to reading this new work and learning even more that I didn't know about Webster.

Noah in Connecticut 

This book and its corresponding lecture is especially relevant to our home state of Connecticut, as Noah Webster spent most of his life here.  I'll probably end up doing some more in depth posts about Mr. Webster in CT, so for now here is a brief overview.  He was born in the western division of Hartford (now the town of West Hartford) in a four room farm house built by his father.  This home was inherited by Noah's younger brother and remained in private hands until the 1960s.  Now, as the home of the West Hartford Historical Society, visitors can explore this historic house and hear stories about the Webster family and life in 18th century New England.  As the oldest son, Noah was fortunate to receive a college education at Yale.  He then moved around Connecticut working as a lawyer and a teacher.  He moved to New Haven with his wife and daughters in 1799 into what was known as the Arnold House, named for none other than Benedict Arnold (this home was unfortunately demolished in 1917).  In 1812, he moved to Amherst, Massachusetts for a brief time before returning to a newly built home in New Haven in 1823.  He died in this home, which eventually became part of Yale.  In the 1930s, Yale was scheduled to demolish the home, but Henry Ford uprooted the house and moved it to his Greenfield Village where visitors can see it today.  Today, Yale's Silliman College stands on the house's property.  Noah Webster is buried in the Grove Street Cemetery, just two blocks from where his last home stood.

 The site of Noah Webster's grave in the Grove Street Cemetery.

Tuesday, April 26, 2011

The Tiaras of Queen Victoria

In honor of Friday's royal nuptials (and my fondness for Queen Victoria), here's a look at some of the elegant tiaras that graced the head of Britain's longest reigning monarch. Queen Victoria's collection of jewels was massive; as Queen, Empress of India, and ruler of an empire over which the sun famously never set, Victoria amassed an unrivaled set of precious jewels and stones from across the world. Some of these have been integrated into the Crown Jewels and are thus the perpetual property of the people of Great Britain, while others were the personal property of Victoria and Albert and have been passed down through the various branches of their very large and extended family. That family, of course, includes the present Queen Elizabeth II, who is often seen wearing one of these stunning pieces of history.

1) The Oriental Circlet, 1853

Photo linked from coloreddiamond.info.

This ruby and diamond tiara, made by Garrard's, was designed by Prince Albert for his wife.  Originally, the rubies were opals, which were Albert's favorite stone (and one of mine as well!), but Queen Alexandra later replaced them with rubies that had been given to Victoria in 1873.  The design, which includes lotus flowers and Moghul arches, was inspired by the Indian jewellry gifted to Queen Victoria during the Great Exhibition of 1851.  The circlet was passed down through Victoria's family line and was one of the Queen Mother's favorites.  It is currently owned by the Queen, who still wears it on occassion.


2) The Emerald and Diamond Tiara, 1845


Photo linked from The Anglophile blog.

This tiara (more appropriately a diadem) is part of a set which also includes earrings and two brooches.  All were designed by Prince Albert in the Gothic revival style popular during the period.  The set was produced by Joseph Kitching in 1845 and Albert allegedly paid a total of £1,150 for it.  In 1846, Victoria wrote in her diary, ""My beloved one gave me such a lovely unexpected present - a wreath, going right around the head, made to match the brooch and earrings he gave me at Christmas."

The Royal Family (1846), by Franz Xaver Winterhalter.
Image linked from the Royal Collection website.

Detail of the above painting, showing the emerald and diamond
tiara, along with the matching earrings and brooches.

The current owner and location of this tiara are unknown.


3) The Diamond and Sapphire Tiara, 1842

Photo linked from The Royal Forum.

Another Gothic-revival-inspired design by Prince Albert, this tiara features diamonds set in silver and kite- and cushion-shaped sapphires set in gold.  It cost the Prince Consort £415 when he commissioned it in 1842.  It was later given as a gift to the Princess Royal by her mother Queen Victoria, and then passed down through the family over the years.  It is now currently owned by the Earl and Countess of Harewood.

Queen Victoria (1842), by Franz Xaver Winterhalter.
Image linked from the Royal Collection website.

Detail of the above painting, showing a close-up of the diamond
and sapphire diadem, worn at the back of the head.


And one honorable mention: the "Girls of Great Britain and Ireland" tiara, 1893

Photo linked from GoldenAgedRegina blog.

Even though this piece was not worn or even gifted by Queen Victoria, I have to include it here anyway because it's my favorite of all the British royal tiaras.  This tiara was a wedding present to Princess May of Teck when she married Victoria's grandson; she became Queen Mary when her husband came to the throne as George V and she was thus the present Queen's grandmother.  The tiara is named for the group of women who collected a total of five thousand pounds to contribute this unforgettable gift to their future Queen Consort.  Made by Garrard's of diamonds mounted on silver, the tiara originally featured pearl finials, which Queen Mary later replaced with diamonds. 

Queen Mary with the "Girls of Great Britain and Ireland" tiara.
Photo linked from Golden Aged Regina blog.

"Granny's tiara" was later given by Queen Mary as a wedding present to her granddaughter Princess Elizabeth (Queen Elizabeth II) to celebrate her wedding in 1947.  Though Elizabeth chose the stunning fringe tiara for her special day instead, she has frequently worn her grandmother's piece for formal and state occassions throughout her reign.  And if you think it looks a little familiar, you're right: this is the tiara featured in the Queen portrait on British currency!

The Queen wearing the tiara, her favorite.
Photo linked from The Daily Mail.

So which one is your favorite?  And who else besides me is getting out her tiara for Friday morning's celebration?  :-)

For more on the British royal weddings of the past, be sure to check out our earlier post.  And for more on the tiaras of the British and European royal families, see this great "Tiara-pedia" on Mad Hattery.

Printed Sources featuring some of these tiaras:
- Tiaras: Past and Present, by Geoffrey Munn - This book is a re-release of the exhibit catalogue for "Tiaras," an exhibition staged at the V&A in 2002; it includes photos of several of the tiaras profiled above, with loads of stunning detail shots.
- Tiaras: A History of Splendor, by Geoffrey Munn - I'm honestly not sure how this book relates to the one above, other than that it's four times as long.  I personally have not seen a copy, though I'm sorely tempted to buy one now...!
- The Queen's Jewels: The Personal Collection of Elizabeth II, by Leslie Field - While most accounts of British royal jewels focus on the Crown Jewels, this one is unique in that it offers a rare glimpse at the personal, privately-owned collection of the Queen.

Wednesday, April 20, 2011

Threaded Bliss

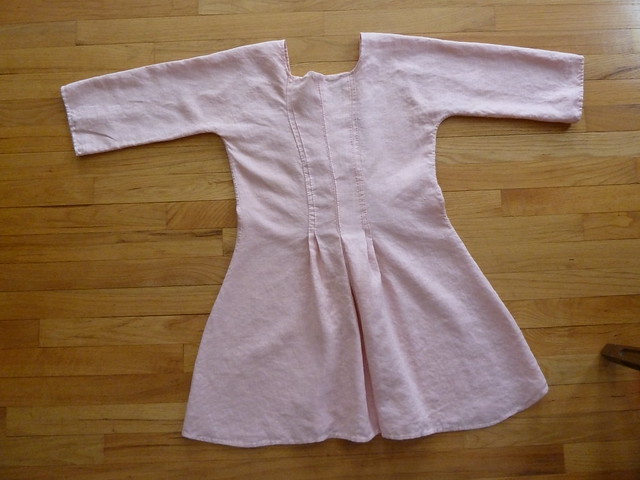
A Pink Linen Shortgown,
last third of the eighteenth century

The back of the shortgown, showing its T-shape,
front, back, and sleeves cut entirely from one length of cloth.

Typically described as a T-shaped garment because its sleeves are cut as one with the body and it has no shoulder seams, the shortgown (or short gown, both spellings seem to have been used in the period, though whether they refer to the same garment remains unclear) was presumably worn as informal or working wear.  It features a shaped neckline and was often (though not always) semi-fitted by means of pleats in back (and sometimes in front as well); drawstrings at the neckline and/or waist have also been found.  Extant examples tend to fall between low-hip to mid-thigh length, and the waist height and length of the sleeves fluctuate depending on the general part of the period (generally, a higher waist and longer sleeves points to a later date).  They can be either lined or unlined.  There has been some considerable debate amongst scholars, researchers, and re-enactors regarding how common and widespread the shortgown was in the second half of the eighteenth century.  Some argue that it might have been a regional garment (mid-Atlantic and/or Quaker), while others point to the difficulty of pinning down written references in which "short gown" could mean anything from the T-shaped item above to a jacket or caraco-type piece that is more nearly and more simply a shorter version of a gown.  Because no surviving period image exists which positively identifies or describes a depicted garment as a "shortgown," the term has become the "modern" name used to distinguish a garment with these specific characteristics.  Whether we've matched the correct name with the garment remains to seen as research continues to delve into this enduring mystery!

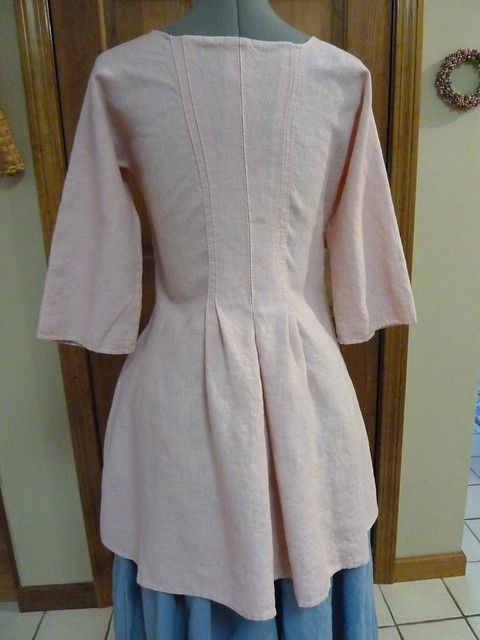
Back of the shortgown

The pattern: Because shortgowns are pretty consistent in shape, cut, and construction, it was very easy to adapt a single pattern and give it some variation based off of other examples.  I scaled up one of the patterns in Fitting and Proper and slightly altered the front neckline (I prefer it slightly more square, though rounded is perfectly accurate as well) and changed the pleating pattern in back.  I also lengthened it from the hip-length of the original to the mid-thigh length of the shortgown patterned in Costume Close-up (again, that's a change dictated by nothing more than personal choice).

General references on this type of garment and its history:
- Baumgarten, Linda and John Waston. Costume Close-up: Clothing Construction and Pattern 1750-1790. Williamsburg: Colonial Williamsburg Foundation, 1999, pp. 43-46.
- Baumgarten, Linda. Eighteenth-Century Clothing at Williamsburg. Williamsburg: Colonial Williamsburg Foundation, 1986, pp. 30-32.
- Burnston, Sharon Ann. Fitting and Proper: 18th Century Clothing from the Collection of the Chester County Historical Society. Texarcana: Scurlock Publishing Co., pp. 20-25.
- Felshin, Sue. "Of Gowns, Jackets, "Shortgowns, and Bedgowns: What Should I Really Be Wearing?" BAR Courier Jan/Feb 2001; reprinted here at 18th Century New England Life.
- Hersh, Tandy and Charles. Cloth and Costume 1750 to 1800. Carlisle: Cumberland County Historical Society, pp. 142-4.
- Kidwell, Claudia. "Short Gowns." Dress Vol. 4, 1978, pp. 30-65.
- McConnon, Rhonda. "The Shortgown and Bedgown." Online. http://www.18cnewenglandlife.org/short_gown.htm
For additional resources and patterns, see our earlier post on shortgowns.

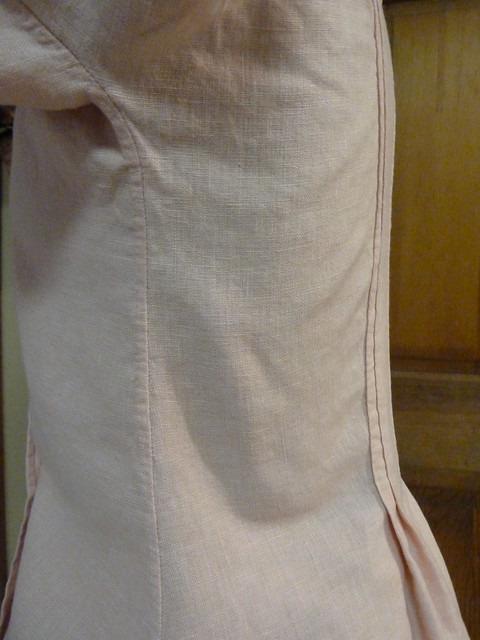
Construction details: As always, this garment is entirely constructed by hand.  It is by far one of the easiest and quickest projects I've ever done, from drafting to completion.  First, I scaled up the pattern of the second shortgown in Fitting and Proper.  Then I lengthened the pattern several inches so that I would fall at my mid-thigh, and cut it out.  The next step was to sew the side seams, which closes both the sleeve and body seams because of the way the garment is structured.  Because I was doing an unlined example, like the first short gown in Fitting and Proper, I used flat-felled seams to prevent the edges from raveling, with is consistent with that example.

The side seam, which extends from the end of the sleeve to
the bottom hem of the shortgown.

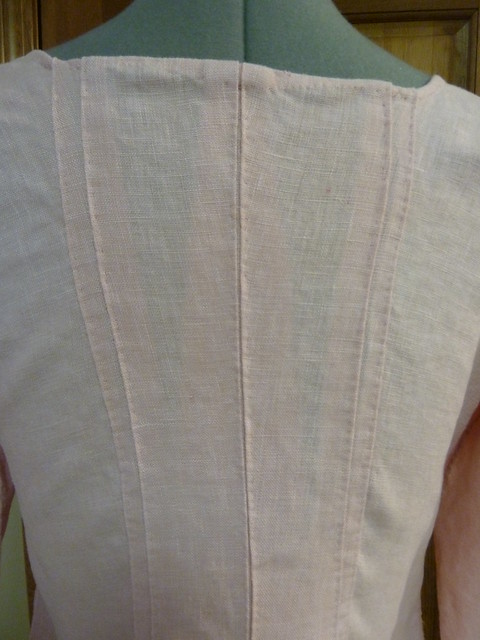
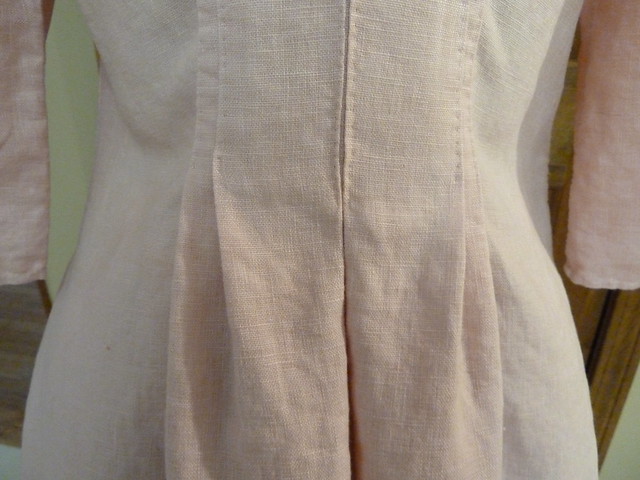
Now that the garment had some kind of shape, I put it on my dressform (which I don't like using for draping purposes because my stays won't fit on it, but Ashley wasn't around to be my body double!) and fiddled with the back pleats until I got a look I liked.  In the two examples in Fitting and Proper, the back pleats are more or less parallel to the center back; they run vertically from neckline to waistline.  I tried this pleating pattern, but wasn't quite happy with the boxy look it gave when I tried it on over my stays.  To give it the illusion that the waist is smaller, I angled the pleats slightly, in exactly the same way I would do an English back gown.  The pleats were then top-stitched down using a spaced backstitch.

Detail of the back with the tapered pleats.

Detail of the bottom of the pleats.  The center back pleat is the
deepest, in keeping with the pleating patterns of en fourreau gowns. 
Because the pleats end exactly at waist level, they release quite gracefully
into the "skirt" when an apron is tied around the waist.

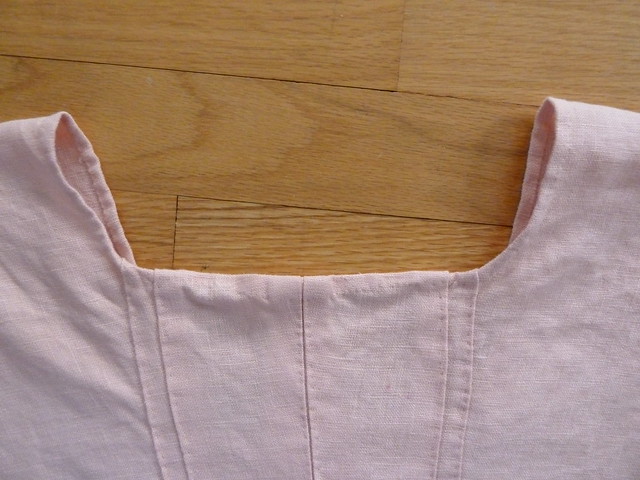
Lastly, I turned all of the edges under and whipped them down.  In the unlined short gown in Fitting and Proper, a facing strip is used to conceal the top of the pleats in the back; I opted not to use one because my fabric folded under quite easily, even with the pleats. 

Back neckline.

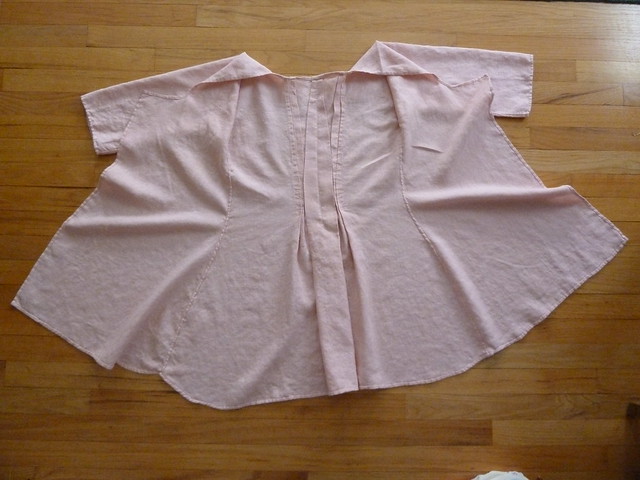
This means that the ENTIRE garment it made out of one length of fabric, uncut and unpieced.  Many extant examples are pieced to lengthen the sleeves (and sometimes to widen the "skirt"), but because my linen was 54", it provided plenty of room to make the shortgown in a single piece of fabric.

The unlined interior of the shortgown, with the back
pleating fully visible.  All seams are felled to finish them.

For additional photos, check out the flickr album for this project.

The Fabric: A dusty pinkish/coralish linen, dyed by me (that in itself was an adventure!).  Shortgowns in the eighteenth and early nineteenth century were made of linen, cotton, fustian, linsey, or wool.  Stripes and prints are seen on extant examples.

Finishing the Look: Though an informal and relatively unfitted garment, a shortgown should still be worn over stays (and, of course, a shift!) and petticoat, and its neckline can be filled in with a kerchief.  Some surviving examples are secured in front (neck and/or waistline) with ties, but the majority seem to have been closed with pins and were then further secured with an apron.

The shortgown "in action," properly accessorized with a kerchief and
apron.  No, I'm not wearing stays, but that's because this was obviously
 an exceptional situation (i.e. the stays workshop!). 
Photo by Angela Burnley, linked from the Burnley and Trowbridge facebook page.

PS - I'm thinking of doing a detailed step-by-step tutorial (with lots of step-by-step photos again, of course!) on making a shortgown without a pattern, but want to be sure there is sufficient interest before I take the time to do another example and write it all up.  If this is something you would be interested in reading, please leave a comment or drop us an email to let us know!

Tuesday, April 19, 2011

"Napoleon and the Empire of Fashion"


Beginning with it's official opening in Milan last year, there has been some considerable blogger buzz regarding the exhibition "Napoleon and the Empire of Fashion."  The English-language version of the exhibit catalogue has just been released, and I received my copy over the weekend.  As the official website indicates, there is currently a poll in progress to help determine where the exhibit might travel next, and in an effort to encourage you all to vote to bring it here to the US, I strongly entreat you, gentle readers, to pay a visit to the poll page and vote your hearts out!  What I wouldn't give to see these extraordinary gowns in person!


For those of you unfamiliar with the project, "Napoleon and the Empire of Fashion" brings together hundreds of original garments, shoes, and accessories to represent a total of fifty-one fashionable ensembles from 1795-1815.  What is most fascinating and revolutionary about this particular collection is that its owners and curators, Cristina Barreto and Martin Lancaster, have assembled it around a set of key French fashion plates of the period, most of which appeared in Les Journal des Dames et des Modes (the first successful fashion magazine, according to the exhibit catalogue).  Over the years, Barreto and Lancaster made their purchases based not only on the conditions of items, but more importantly on how well they would coordinate to a gown or ensemble in color, style, provenance, and date.  After hearing Linda Baumgarten describe the difficulties of mounting delicate textiles and fragile accessories in a way that mimics drape and use on the human body (during her tour during the recent conference), I find it even more spectacular that these fifty-one figures have been fully outfitted and accessorized in (almost) all antique items, so that they appear as if they've stepped right out of the fashion pages next to them.

In both the exhibit and the catalogue, the inspiration prints are juxtaposed with their material realizations as gowns, shawls, bonnets, fans, veils, bags, and shoes almost literally come to life.  Part of the project also involved the meticulous cleaning and restoration of each item; as the curators explain in the catalogue, they wanted every piece to look as it appeared when it was first made and worn.  Back to be being "light, bright, and sparkling" (as Jane Austen would put it!), the fifty-one ensembles represent for the curators the revolution and evolution of fashion during the Napoleonic era, reflecting Napoleon's strategic manipulation of the textile and fashion industries to imagine and project a very specific and unique "Frenchness" for the people of France and the world.  As the catalogue introduction describes, mannequins approximating the body shape of an early 19th century woman in period undergarments were specially designed, though each has an identical head so that the fashionable ensemble each wears speaks for itself, creating a character and a specific social situation all its own.


Natalie Garbett, who helped coordinate and literally "dressed" the exhibition, keeps a blog, and several of her posts detail her experiences with staging the exhibition.  Her entries offer a fascinating and unique glimpse behind the scenes, showing not only the type and degree of work that goes into putting something like this together, but also the very personal and touching stories that emerge when one works so closely with garments and accessories from the past.  Her own reproduction sewing work is gorgeous, too, so be sure to check it out!

Besides the photographs on the exhibit site, additional official images of a number of the pieces (including some breathtaking detail shots) taken by Thomason Photography can be found here.  Video footage of the Milan exhibit, with commentary by the curators, can be viewed on YouTube by clicking here and here.

Sunday, April 17, 2011

Drancy Fess Ball

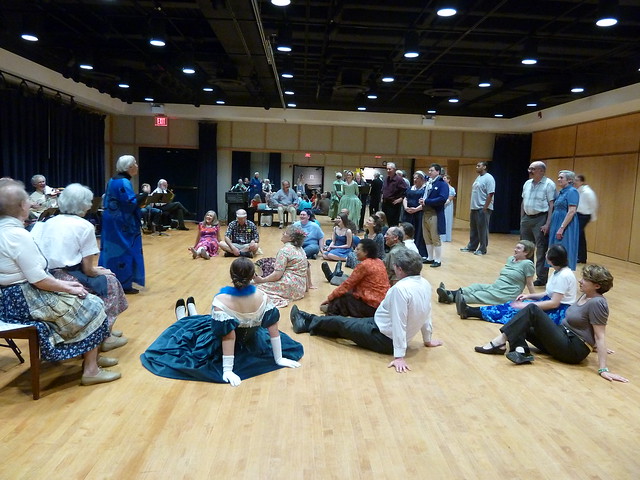
On Friday evening, we attended the annual Drancy Fess Ball held by our English country dance group.  For those of you unfamiliar with the origins of "drancy fess," I present for your reading pleasure the spooneristic tale of "Prinderella and the Cince"!  Enjoy!

Listening to Marshall recounting the tale of "Prinderella and the Cince." 
She's amazing and can do it flawlessly!

Every year, the Drancy Fess Ball is given a theme meant to inspire our choice of dress (err, drancy fess!).  This year, however, we somehow were all so busy that we forgot to settle on a collective theme, so we all came dressed in whatever made us each feel drancy and fessed up, which produced a very fun conglomeration of outfits!  Some (like us) came in period attire, while others came dressed as their favorite dances; The Female Sailor, The Comical Fellow, Sun Assembly, and The Merry Milkmaids were the cleverest of the group for their inspired and creative ensembles!  Next year's theme is "mythical beasts," so this ought to be a challenge!

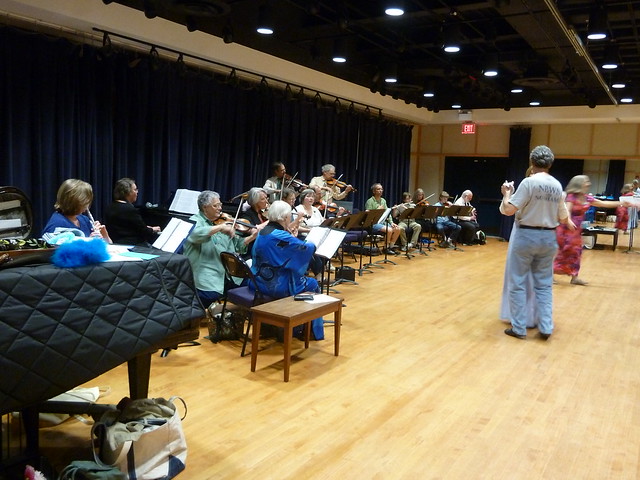
We're very, very lucky to be able to dance with a splendid English country dance band, led by the incomparable Marshall Barron, with Grace Feldman and Margaret Ann Martin.  The band typically numbers between 10 and 15 members, and they play from Marshall's own lovely arrangements of traditional and modern dance tunes.  It's such a delight and a privilege to be able to dance to live period music each week.  Our instructor, Peggy Vermilya, is impressively well-versed in ECD past and present, and her great sense of fun keeps our evenings lighthearted as we learn and dance together.

Our dance band, during the traditional closing waltz of the evening.

I'm sorry I didn't get any pictures of actual country dancing in action, but we were too busy frolicking all night!  We had a blast enjoying our last meeting of the season, and can't wait to rejoin our dancing friends again in the fall.  Thankfully, there are a couple of upcoming local ECD balls hosted by other organizations that will fill some of the gap and help to satisfy the dancing itch for a couple of months, so we don't feel too deprived until September!  Stay tuned for lots updates on those balls, coming soon!

Thursday, April 14, 2011

Connecticut Needlework, 1740-1840 Exhibit at the CT Historical Society

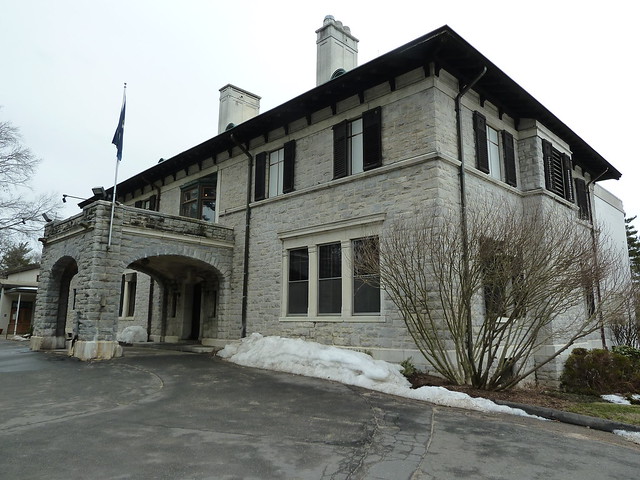
The Connecticut Historical Society in Hartford, CT.

On 5 March, the weekend before we headed down to Williamsburg for the symposium and conference, we made the short trip to the Connecticut Historical Society in Hartford to visit their exhibit, "Connecticut Needlework: Women, Art, and Family, 1740-1840."  The exhibit had been on our "to see" list ever since it opened last year, and we had to be sure to see it before it closed the weekend we'd be in VA.  We're very glad we did because it was fantastic and included a superb variety of rare New England-made objects, many unique and all quite beautiful.  I apologize for the lack of pictures in this post, but I promise it's worth reading!  All images taken in the exhibit were strictly for private research use according to the museum's policies, so we're unfortunately unable to share them here, but many of the items are available for viewing on the CHS eMuseum.  Here are a few of our favorites:

- Two panels of a crewel-embroidered linen petticoat dating between 1750 and 1755 (acquisition number 1950.518.0).  The documentation and family history provided with the fragments asserted that this was originally two-thirds of a petticoat created specifically to be worn for a wedding.  I suspect instead that this might have functioned as a underpetticoat, which would account for the very narrow circumference if the fragment does indeed represent two-thirds of the original garment, though that's just a personal speculation; on the other hand, though, the panels are fully embroidered from waist to hem, while many underpetticoats (like this one, which was also featured in the exhibit) were embellished mostly around the bottom third, so my speculation could easily be wrong.  Anyone else have any ideas about that?  At any rate, the embroidery is beautifully done in a stunning floral and vines patterns very representative of the period, and I wish they'd make a pattern off of it because I'd love to recreate it.

- An absolutely amazing linen bedcover, decorated with crewel embroidery, dating to 1760-1770 (acquisition number 1964.35.0).  Be sure to check out the close-up photos to get a better view of the incredible detail in this piece.  The center features an eighteenth-century-clad representation of Adam and Eve.  As I refer back to my photos as I write this, I'm amazed at how fully accessorized these figures are.  That may seem like a random and irrelevant comment, but returning to this bedcover after the accessories symposium, I'm struck by the detail here.  The woman wears an apron and a blue-beaded necklace tied with a yellow-gold ribbon; this same colored ribbon also appears at the peak of her cap (which you can't see) and is used as a breastknot pinned to the front of her gown.  She also holds a fan and sports a pair of buckled red shoes.  Her dashing be-wigged gentleman carries a walking stick and a felt hat.  This just goes to support one of the primary arguments made during the symposium: one simply cannot gain an accurate concept of 18th century dress without looking at it in the context in which it was worn.

- This red satin-weave worsted (calamanco) petticoat (acquisition number 1959.54.2) is a fascinating and unique example of regional needlework.  Its design, which integrates its year of execution - 1758 - is full of whimsy and an eye towards the fantastical.  It includes a mermaid (the symbol of vanity), a lion, a leopard, fish, stags, rabbits, birds, a butterfly, and various flowers and vines.  A sketch of the complete hem design, drawn by Linda Baumgarten and John Watson (of Costume Close-up fame), is included in the catalogue for the exhibit (see below for more on that).

- Faith Trumbull's silk-embroidered overmantel (acquisition number 1925.1.3), dated to approximately 1761.  It is one of a set of three intricately embroidered pastoral pieces, the size of which alone is jaw-dropping.  The scene measures 18.25" by 51.25" (yes, you read that correctly!).  The foundation fabric is a black silk, which means that every last inch of it has been embroidered - aside from the man's breeches, hat, and shoes.  Faith Trumbull, you may recall, is the eldest daughter of CT governor Johnathan Trumbull, whose hometown of Lebanon we recently visited.

- This charmingly adorable and stunning cotton muslin dress (acquisition number 1959.11.2) features white-on-white embroidery and was worn by a teenage Charlotte Perkins in Hartford between 1805 and 1810.  The exhibit's curators speculate that the embroidery was done by Charlotte herself, rather than by a professional, because of its relatively uneven qualities.  The muslin is extremely sheer, which means the gown would have been worn over an underdress (the display features one in pink).

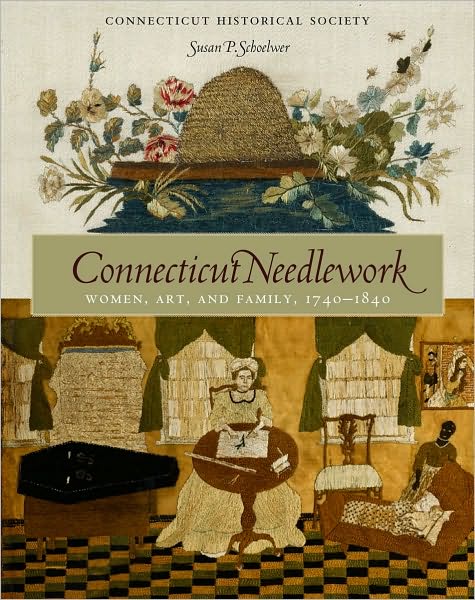
The exhibit catalogue, available directly through the
CT Historical Society.

Although the needlework exhibit is now closed, all of these item are owned by the CT Historical Society and can be viewed by making an appointment with the collection's curator.  A gorgeous full-color 220-page catalogue is also available from CHS and is well worth the price.  The photography is beautifully done and it's chock full of fantastic details about the exhibit items and the history of needlework in eighteenth- and early-nineteenth-century New England.  I highly recommend it!

I have also traced a couple of video links of the exhibit on YouTube, which offer further glimpses at some of the treasures on display: video one and video two.  Please note that neither of the videos were produced by us.  More images can be seen with this review of the exhibit from Antiques and the Arts Online.

The CT Historical Society frequently offers lectures, book talks, workshops, youth programs, and special events, so if you're in the area, be sure to check out their events calendar.  Their newest permanent exhibit, "Making Connecticut," provides an interactive historical timeline view of the life in and the culture of the area, from native and colonial settlement up through the 21st century.  We were able to browse through much of the exhibit in its preview form and were struck by the museum's innovative initiatives to engage the "modern" museum-goer in history.  Our father's family arrived in the greater NYC area in the late seventeenth century and we can trace their settlement in southwestern CT back almost that far, so seeing this exhibit, arranged in its timeline form, was particularly relevant and interesting to our personal history as well.  The exhibit formally opens on 25 May and we're looking forward to returning to see it in its finished form.

Wednesday, April 13, 2011

Happy Birthday, Tom!

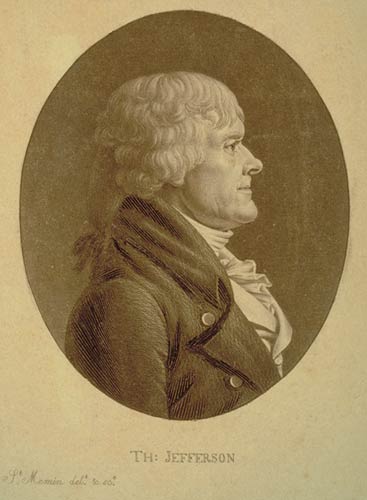
Today marks the 268th anniversary of Mr. Jefferson's birth!  For those of you who do not know, I have a rather ardent fondness for Mr. Jefferson (okay, that might be an understatement...) and so I wanted to be sure to give him a small tribute here today.  Although there is no evidence that he celebrated his own birthday, I hope he doesn't mind.  To commemorate today, the Thomas Jefferson Foundation will be hosting some special events at Monticello in conjunction with the University of Virginia's Founder's Day celebration.  Also at UVa today is the first annual JEFFERSING! ON THE LAWN, which will feature a cappella groups, birthday decorations, and free cupcakes!  Mr. Jefferson will be in attendance (in the personage of Bill Barker) to join in the festivities.  Poplar Forest will also be distributing birthday cupcakes to all of its visitors today.


I could go on and on about what makes Mr. Jefferson such an inspiring man, why he's so relevant today, and about how awesome and dreamy he is... but I will spare you all that.  Instead, I'll share a few facts that many of you might know already, but hopefully will be new information for others.

Fun Fact #1: April 2, 1743 O.S. is the date engraved on Jefferson's grave (see photo below), but we celebrate the day on April 13.  In 1582, Pope Gregory XIII began the calendar system we use today, known as the Gregorian calendar.  This replaced the previous Julian calendar (named for Julius Caesar) which had fallen several years behind the solar calendar.  The British empire did not conform to this system for several hundred years.  In 1752, when Britain finally adopted this calendar system, Mr. Jefferson added the additional 11 days to his birth date.  (You can read more about the switch from the old style calendar on this page.)

The obelisk marking Jefferson's grave at Monticello

Fun Fact #2: Many people attribute the invention of the swivel chair (which he often referred to as his "whirligig" chair) to Mr. Jefferson, but there is no definite proof that he was indeed the first to add some spin to his seat.  In 1775, he purchased a revolving Windsor armchair in Philadelphia.  The chair was built with two seats on top of each other, revolving around a center spindle.  During his stay in New York as Secretary of State, Mr. Jefferson purchased several pieces of furniture from Thomas Burling.  Among this collection was another revolving chair, which has a design attributed to the French.  Knowing that Mr. Jefferson already had a similar chair at home and considering his recent residence in France, it is often suggested that he may have had a hand in designing these Burling chairs (Burling also made one of these chairs for George Washington).

Fun Fact #3: Speaking of inventions, how about the myth that he was the first to bring mac & cheese (which, by the way, is one of my all-time favorites!) to America?  The NY Times recently published an article about Mr. Jefferson's appreciation for macaroni, a dish he first encountered in northern Italy during a 1781 visit.  He had a macaroni machine imported to America and macaroni became a frequent dish on his table.  While he definitely introduced many Americans to macaroni, he was most likely not the first to serve it in this country.  A pasta factory in Trenton, NJ, owned by Giovanni Battista Sartori, was already in existence in the early 18th century and frequently provided supplies for President Jefferson at the White House.  Mary Randolph's The Virginia Housewife of 1824 mentions dressing the macaroni with cheese, but again, it is unlikely that Mr. Jefferson was the first to eat it this particular way.  (Click here to read more about TJ's macaroni.)

That's all I have time to share with you all today.  But don't worry, I'm sure more TJ Fun Facts will find their way to our blog soon.  So, once again, wishing Mr. Jefferson a very delightful 268th birthday!

Sunday, April 10, 2011

Burnley & Trowbridge Stays Workshop Weekend

Our weekend in Williamsburg has flown by and we will be back in the car tomorrow for another 9 1/2 hour (hopefully no longer!) drive back home.  The purpose for this trip was Burnley & Trowbridge's stays workshop with CW tailor Mark Hutter.  We have been waiting anxiously for this particular workshop to be offered again and are so excited to upgrade our stays!

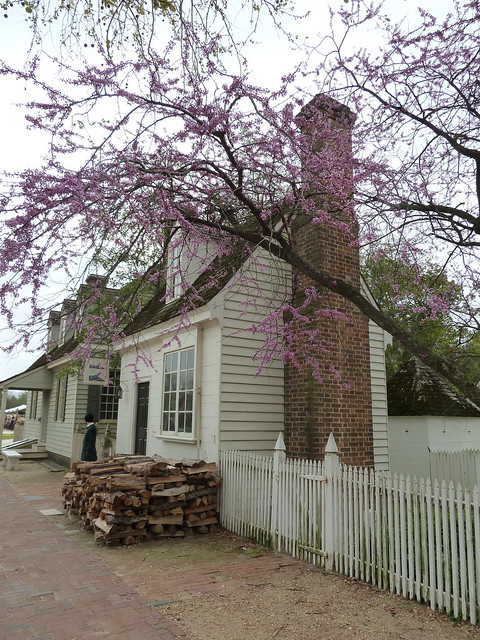
Flowers are starting to bloom next to the CW shoemakers' shop

Friday morning was spent running a few errands in CW and stopping by a few of our favorite places.  We even had some time to see Mr. Jefferson and "scalawag" (TJ's term for his "impersonator") Mr. Barker at the St. George Tucker House prior to lunch.  At one point, Mr. Jefferson asked the audience to name the five members of the Declaration committee and to list their home colonies.  To my surprise, this was a difficult task for the group (don't they know the song form 1776?!).  One of the guests was bringing his two young grandchildren to experience the magic of CW.  Thirteen years earlier, he had introduced another grandson to CW and the young boy was inspired by meeting Mr. Barker's Jefferson.  It was so touching to hear this gentleman express his appreciation for the efforts of CW and its talented interpreters.

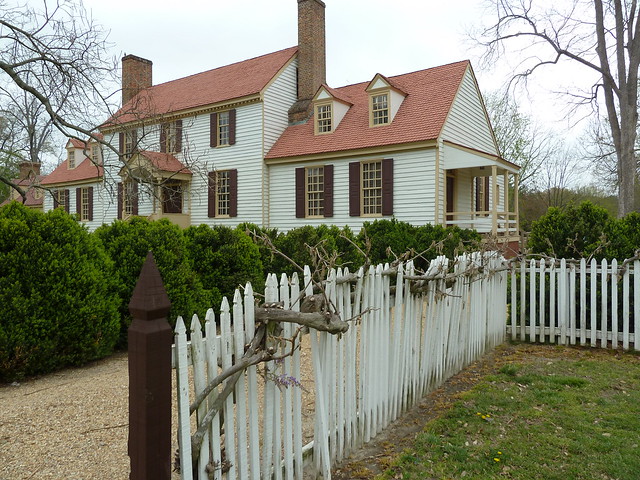
St. George Tucker House, CW

The Burnley & Trowbridge workshop was packed full of new information and techniques for creating an accurate, hand-sewn pair of eighteenth-century stays.  Our fellow workshop participants (aka "bosom buddies"!) were wonderful to work with and we had a lot of fun learning together.  Mr. Hutter was a very patient teacher and helped us all to create the foundation for our individual stays using period measuring and patterning methods.  We still have a lot of work to do before our stays are completed, but we can confidently continue thanks to Mr. Hutter's excellent instructions.  I know that many of you already know about the wonderful offerings of B&T, but be sure to keep an eye out for their upcoming workshops.  Angela will also be posting some pictures from the workshop on the B&T facebook page soon.  We promise to keep you all updated as work on our stays progress.  Thank you to Angela and Jim for hosting such comprehensive opportunities for us to learn and create our 18th century wardrobes.  And thank you again to Mr. Hutter for your excellent instruction and patience!

At the Margaret Hunter Millinery Shop

Today was a gorgeous sunny day in Williamsburg!  After spending a weekend of cold, rainy days inside sewing, we were glad to have the chance to enjoy a warm stroll in CW this evening.  We were hoping to make it into town in time to wish one of our Rev City friends a happy belated birthday (sorry we missed seeing you, Mr. M!) but we ended up running into another friend along the way.  As you can see from of our pictures, some of the flowers and trees are finally starting to bloom.  We're sad to be leaving Williamsburg just as spring is arriving, but are looking forward to UTR in just a few months!

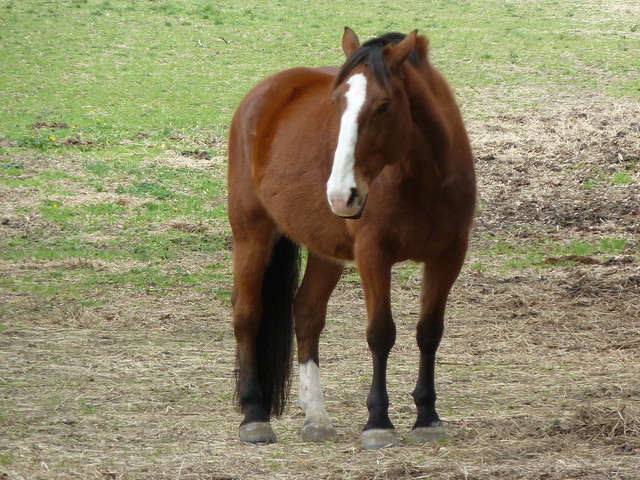
A CW pony.

Monday, April 4, 2011

My Personal "Eyre Affair": The Newest "Jane" Film

Yesterday, we (finally!) went to see the new Jane Eyre film, which stars Mia Wasikowska (Jane), Michael Fassbender (Rochester), Jamie Bell (St John Rivers), and Judi Dench (Mrs Fairfax).  We went with a family friend, our second grade teacher who we've kept in close touch with all these many years.  The summer before I entered high school, she handed me her two favorite books, said I was finally old enough to read them, and told me she looked forward to the endless discussions she knew we'd have as soon as I finished them.  The novels were Pride and Prejudice and Jane Eyre, and I hold that one summer's experience responsible for my lifelong love affair with eighteenth- and nineteenth-century literature (aka my career!) and history, and my fascination with the history of fashion.  So of course I couldn't go to see a new adaptation of the novel without her!

Rochester and Jane.  Photo from the official Focus Features website.

I should preface my review with the disclaimer that I am prodigiously difficult to please when it comes to adaptations of novels.  I should also say that when it comes to Jane Eyre in particular, my perspective is necessarily an academically skewed one tainted by years of close study, so I hope the review that follows won't unduly offend anyone; it certainly isn't intended to do so, and I completely understand how someone coming to the film without such excess "baggage" would view it with a much milder eye.  But I'll begin with the positive - the good stuff - the costumes!

Visually the film is very, very strong.  The cinematography is stunning and the location shots and color palates are gorgeous works of art.  The costumes, designed by Oscar-winning Michael O'Connor (of The Duchess fame), are fantastic and one of the greatest assets of the film.  Apparently, both O'Connor and the director, Cary Joji Fukunaga, elected to set their adaptation in the 1840s because they both dislike the excesses of 1830s fashion.  The only costume in the film styled to date from the latter period appears on Aunt Reed at the beginning of the movie.  With the director as invested in the details of dress as the costumer designer, it's no wonder the costumes here achieve such a high standard of superior excellence and accuracy which makes all the difference to the film as a whole. 

Jane's beautifully understated wedding gown. 
I wish I could find a close-up of the sheer bonnet because
I'd love to try to make something like it.
Photo from Vanity Fair.

From leather to hair accessories to shoes, O'Connor describes how the details of the period correct drove his design decisions.  He used antique textiles from the period wherever possible, though due to their rarity, he explains, they were most often able to be integrated only in small amounts as trims and laces.  All of his fabric choices and designs are based on meticulous research, and his mantra throughout this film rings sweetly in the ears of historical sewers.  "The lining, the buttons, the stitching, everything was totally researched. I always say, ‘Is there a reference for that, is that something they did?’ And if people say [they] don’t know, then I say we can’t do it—there’s so much information from that time that there’s no excuse not to have it."  For the full Vanity Fair interview from which this quote and much of this information is drawn, click here.   For a closer, very sigh-worthy look at some of the costumes and accessories, accompanied by comments from O'Connor and Fukunaga, see this movie "Style Gallery" from THR.

The straw bonnet at right was made with antique hat braid gifted to the filmmakers. 
I wish I could find a picture of the back because it's an amazing piece.  I want it!

Some of the film's costumes were recently on display to promote the film, and can be seen on the Hollywood Movie Costumes and Props blog.  Be sure to check out the wedding gown, Jane's plain grey dress, and the cloak and plaid gown Jane wears when she flees Thornfield.

The stunning ensemble worn in the final scenes of the film. 
The dress fabric is a reproduction cotton and the hat made from antique hat braid.

All that said, I was quite disappointed with this movie when it came down to the interpretation of the story by both the screenwriter and the actors, especially after all of the hype surrounding the film.  One reviewer praises "the freewheeling adaptation [which] drops needless scenes and spurs the story ahead with galloping momentum,"  but I read these characteristics very differently.  I appreciated the intriguing re-organization of the timeline of the story; the Moor House scenes are privileged at the beginning of the movie, which was a productive move on the whole because film adaptations in general conveniently forget or downplay that rather difficult-to-reconcile (yet so crucial) portion of the book.  On the other hand, though, there were just too many other scenes vital to the complex and multi-layered overall meanings of the novel that were completely left out: Bertha Mason was relegated to less-than-a-subplot (a strange move, considering the fantastically gothic feel of the film overall), there was little dialogue at all provided for the fleeting Gateshead opening (though these famous opening chapters establish the basis for who Jane becomes and what ultimately motivates her throughout her life), and Blanche Ingram, that essential figure of contrast, self-doubt, and ultimate self-definition for Jane, remained one-dimensional and almost unintegrated into the plotline.  I was also a little surprised by the abrupt ending and the lack of any real show of remorse by Rochester during the "confession" scene (which has some of the finest dialogue in all of English literature).  The re-writing of so much of the original dialogue in general across the whole of the film seemed a little unnecessary.  Also, the incredibly understated nature of Mia Wasikowska's Jane was a little too quiet and subdued for the Jane that Bronte seems to imagine.  But in the end, I'm left wondering how many of these faults are the result of some unfortunate editing, necessitated by the all-too-brief two-hour feature film requirements.

Blanche Ingram's fabulous riding habit. 
The hat is trimmed with an antique veil. 

As I'm certain many of you know, there are numerous film and television adaptations of Jane Eyre.  My personal favorite is the 1983 BBC miniseries starring Zelah Clarke and Timothy Dalton; not only does it preserve almost all of the original plot and its structure, but also much of the dialogue is drawn verbatim from the pages of the novel.  For those used to big-budget, bright-and-shiny Hollywood adaptations (or even BBC productions of the last 15 years), the starkness of the sets and the simplicity of the cinematography will be a shock, but you quickly get used to it and I almost prefer that style because it privileges the story, rather than the medium used to represent it.  The 2006 Masterpiece Theatre version is also good and worth watching (Toby Stevens makes a very fine Rochester!).  The other adaptations I don't much fancy and wouldn't recommend, either for reasons of mis-cast lead roles or because they ignore or re-write massive chunks of the original novel.

Marla Schaffel and James Barbour in the 2000
Broadway production of Jane Eyre: The Musical. 
Photo from Playbill.com.

But by far and away the finest adaptation of Jane Eyre ever made is - believe it or not - the musical version, written by Paul Gordon and John Caird, which played on Broadway from 2000-2001.  If you aren't familiar with it, this review from Playbill.com gives a fantastic overview (except when it comes to that last paragraph, which is wildly inaccurate, in my opinion).  Luckily, I've located some amateur video of the production on YouTube (follow the links to the "Jane Eyre: The Musical" in parts at the side), and although the quality isn't the best, it gives a fine idea of how the musical achieved what (to date) no film or television adaptation has: representing the passion and the soul that motivate the story in the first place.  It's just a shame that something necessarily as ephemeral as a theatrical production is the dramatization that has come closest to "getting it right."

Friday, April 1, 2011

A "Threaded Bliss" Tutorial

The Standard 18th-Century Petticoat

We've had a request from one of our loyal readers for a detailed tutorial on how to make an 18th-century petticoat.  Confused by the directions on a commercial period pattern (and I don't blame her, they are quite horrid) and frustrated by the conflicting information she's found online, she asked if we could offer a straight-forward, easy-access guide to cutting and assembling an accurate petticoat.  So here goes!

The pattern: No pattern or complicated draping is necessary to make a standard "straight petticoat" (i.e. one intended to be worn without skirt supports).  Of the extant petticoats in this "straight petticoat" category that I've encountered that date from approximately 1750-1785 (including quilted ones), almost all have a skirt width of between 100"-120".  When making one, I wouldn't go much under or over that.  Under 100" looks too skimpy on one extreme, and at the other extreme, greater volume can be (and was) achieved through multiple petticoats, a quilted petticoat, and/or the way you choose to lay your pleats at the waistband.  The general rule of thumb I've heard repeated by re-enactors is a skirt width of 3 to 4 times your waist measurement, which works out to within the 100"-120" range for the average individual.

Other than that, the only "pattern" you need comes from two key measurements: your waist measurement (with stays on) and your waist to floor measurement (with appropriate shoes).  Keep in mind that these instructions are only for a petticoat that will *not* be worn over skirt supports.  If you plan to wear side hoops or a bum or hip roll, you'll need to accommodate that with shaping at the waistline.  It's not complicated, but in the interest of keeping things simple and easily accessible here, we'll save the "shaped petticoat" for another tutorial!

Construction Details: Below is a step-by-step guide to cutting and assembling a "straight petticoat".
1) Before you cut your petticoat panels to the appropriate length, you need to make a decision about how historically accurate you need/want to be. 
     - If you want to recreate a petticoat that mirrors an original as closely as possible, you should try to replicate the width of period fabrics, which differed from the width of fabrics available today.  Silk, for instance, which we typically find woven in 54" or 60" (and occasionally in 45") today, was very narrowly woven in the 18th century.  Period gowns and petticoats retaining the original selvages have panels that are (on average) between 17" and 23" (for satins and taffetas).  Linen, as Linda Baumgarten explains in Costume Close-up (pg. 58), was available in a slightly wider variety of widths, most commonly 27", 31 1/2", 36", or 45".  Between 30" and 36" seems to be the typical range for cottons, while wool was woven in such a wide range of widths that basically anything goes (even 60" - after all, that's why one type was called "broadcloth"!).  So after selecting your fabric, and if you choose to take the route of strictest historical accuracy, you must first adjust its width accordingly before preceding to the next step.
OR....
     - Your other option, while not strictly period-accurate, is also perfectly acceptable: work with the width of your fabric as it is, regardless of the content.  Unless I'm doing an exact reproduction of an extant gown and/or petticoat, this is the route I choose, with the justification that 18th century seamstresses would *never* have wasted fabric or time by separating panels and re-stitching them; they would have taken full advantage of wider widths had they been available.  This is a personal choice and up to your own individual accuracy ideals.  Just so you know that in choosing to retain your modern fabric width, you're making a conscious, educated choice.

2) Now that you've settled on your fabric and decided on the width you need/want to use, decide on the appropriate length for your petticoat.  If you're working on a formal gown, a longer toe-length gown (about 2" off the floor) is ideal (though you'll probably want shorter if you intend to dance in it!).  If you want a working-class impression, just at the top of the ankle bone is best because it helps the petticoat stay clear of fires and mud.  A walking-length petticoat (about 3-4" off the floor, about mid-high ankle) is the fashionable ideal for 1770s and early 1780s daywear.  Period paintings and fashion plates are a great place to get a comprehensive sense of what styles look best worn at what length. 

Once you've decided on your preferred petticoat length, measure from your waist to that length and add 1 1/2" (this allows for the waistband and a 1/2" hem; if you want a larger hem (don't go over 1"), account for that here).  Cut the appropriate number of fabric panels (to equal the 100" to 120" width) to that length.

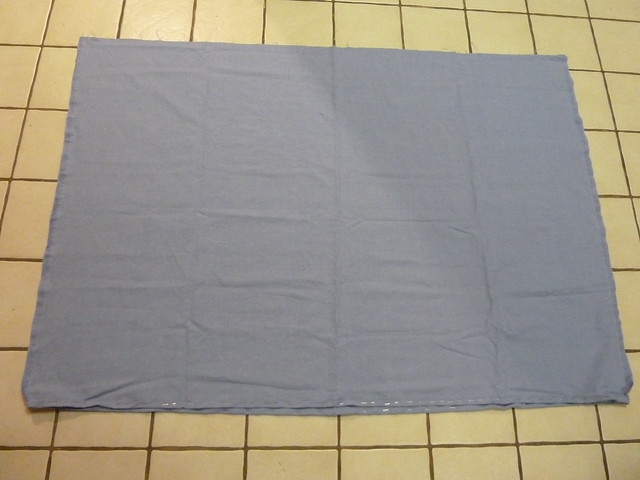
Two panels of 54" linen, cut to the appropriate length and
laid on top of each other.

3) Stitch together your fabric panels using either a combination stitch or a mantua maker's stitch.  If you have only two panels, leave the top 9 to 10" open on each side for pocket slits.  If you have more than two panels, sew the entire length because you'll need to cut slits into the center of two of the panels in a later step.

The two panels seamed together with a combination stitch. 
I usually don't make my seam allowances so large (18th century
ones were typically tiny), but the selvage on this fabric was very wide
and so had to be accommodated.

4) Finish your hem by folding it up 1/2" and then rolling it 1/2" again to encase the raw edge.  Secure it using a slip stitch or hem stitch.  Hems during the second and third quarters of the 18th century were typically small (why waste fabric?), averaging about 1/4" to 1/2", but if you have the fabric and prefer a deeper hem, you can go up to 1" (but not over). 

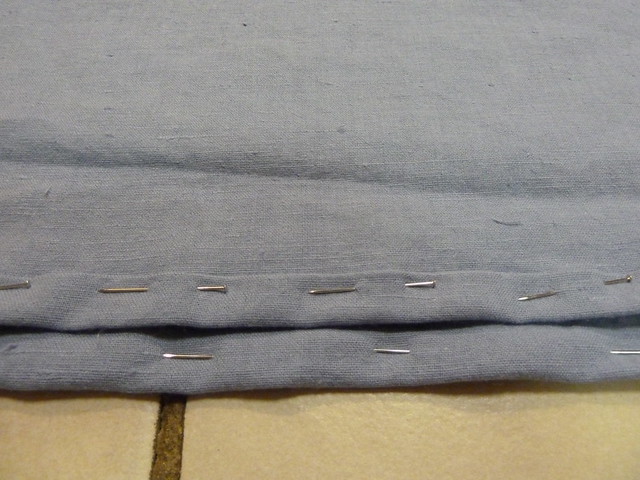
The 1/2" hem rolled and pinned...

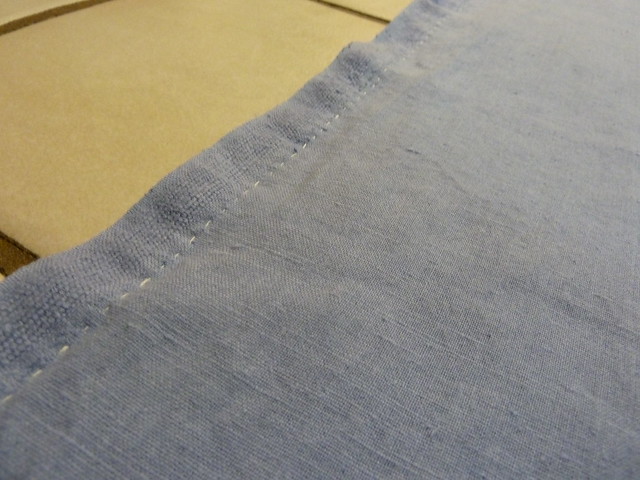
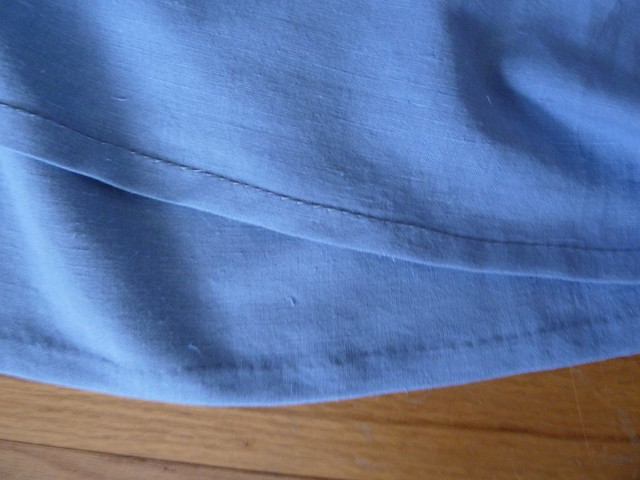
...and stitched down (outside view is on the bottom, inside view
on the top in the photo).

Rolling the hem twice is the most common (and easiest) way to finish it, but if you're working with thicker fabric (wool or a quilted or marseilles fabric), or if you need to eek out as much length as you can, you could also bind the raw edges of the hem.  This was called ferreting in the period, and is achieved by taking tape (wool, linen, or silk works, the fiber matched to your petticoat fabric), stitching it to the bottom of the petticoat, and then flipping it to the inside and securing it so that about 1/4"-1/2" of the tape remains visible on the right side.  Your third period option is to face the hem, typically with a light-weight silk; this treatment is almost always reserved for silk petticoats and silk gown skirts, though it is seen on expensive cotton gowns as well.  Your facing strips can be anywhere from a narrow 1" all the way up to 9" (sometimes even more is seen).

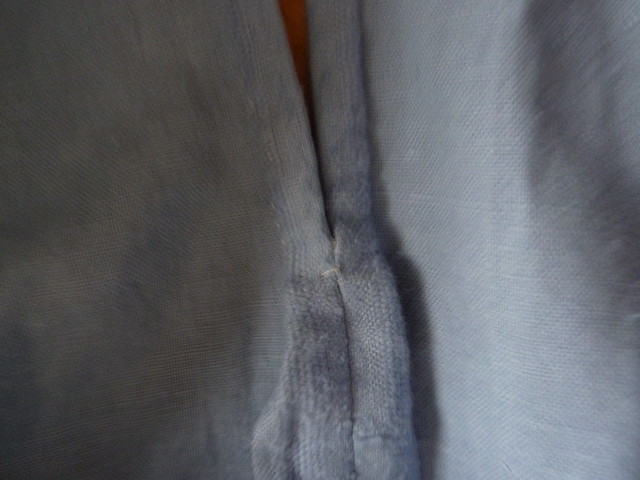
5) Now it's time to finish the pocket slits.  If your petticoat uses 2 or 4 panels, all you have to do is roll the selvage edges of the side slits and hemstitch/whipstitch them down.  It also helps to stitch a couple stitches, forming a bar, across the very bottom of the slit to prevent it from tearing. 

The thread bar, formed from a series of overlapping stitches, 
that secures the bottom edge of the pocket slit.

If you're working with a thicker material (quilted/marseilles, for instance) that is difficult to roll, you could also bind the pocket slits.

If your petticoat uses three panels, fold your petticoat "tube" in half on one of the seams (that seam will be your center-back, and its opposite point your center-front), and then in half again, so that you've divided it into quarters.  Cut 9 to 10" down on the fold (and on the grain of the fabric), forming your two pocket slits.  Narrowly roll in the edges, as above, and whipstitch them down.  To finish the bottom edge of each slit, make buttonhole stitches to strengthen the curve and stitch a thread bar just above.  As this method is already expertly detailed in The Lady's Guide to Plain Sewing, Book One and by Nicole of Diary of a Mantua Maker, and because I didn't use this technique in my example, I'll refer you to those resources if you'd like extra guidance here.

6) Next, measure your waist in stays and divide that figure in half.  Add 2" to that number and that is the length into which you need to pleat each half of your petticoat.  Adding the 2" allows for a little overlap at the sides when the petticoat is tied on, so that the pocket slits don't hang open, and it allows for greater adjustability in your waist size without using the dreaded drawstring waist (horrors!).  If you'd prefer your petticoat to meet and tie exactly at the sides with no overlap, don't add the extra 2" and just use half your total waist measurement instead.

7) Pleat the front half of your petticoat to the figure just calculated above.  Begin by dividing the front panel in half to find the middle.  Make a 3" to 5" box pleat at the center.  This creates a smooth, flat front which helps contribute to the illusion of the narrow waist and full hips that was so fashionable.  It also reduces bulk and allows the front of your gown or jacket to lay as flat as possible across your stomach (who would object to that?!). 

A 4" box pleat at the center front.

Then make knife pleats (1/2" to 1" wide up to about 1775ish, and then you can go narrower if you'd like to) facing towards the pocket slits so that the panel equals your measurement calculated in step #6.  In this example, I did a 4" center box pleat with a series of 1" knife pleats.  Don't stress the pleats too much; as long as they look more or less even on the outside, it doesn't matter what they're like on the inside.  If you look at extant gowns, more often than not, the skirt pleats look perfect from the outside, but are shockingly uneven and even messy on the inside.  What no one sees, no one knows!

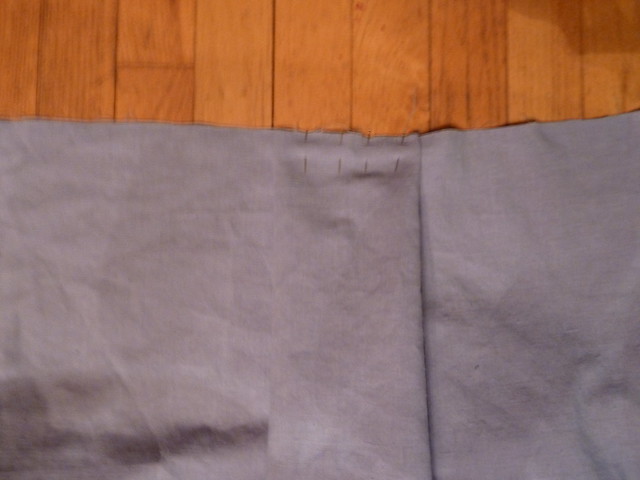
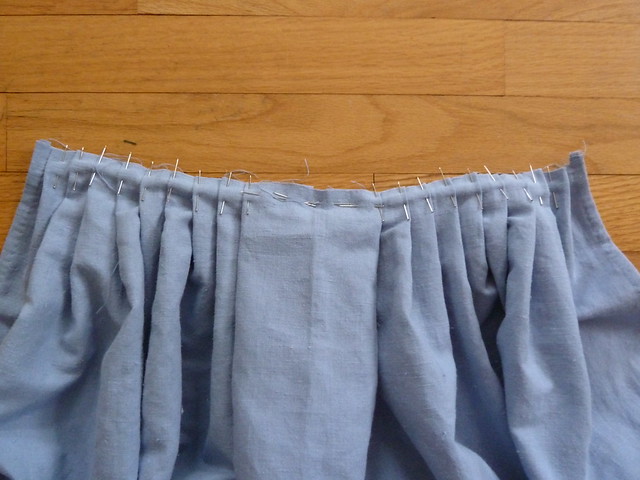
The front panel of the petticoat, showing the center 4" box pleat
and the 1" knife pleats angled towards the pocket slits.  The
total measurement for this completed panel is half my waist
measurement plus 2".

8) Pleat the back panel of the petticoat by making an inverse box pleat, 3" to 5", at the center.  Then make knife pleats facing towards the center-back inverted pleat, about the same size as the ones you did for the front, until you reach your required measurement from step #6.

The 4" inverted box pleat at center-back, which mirrors the one you
just made for the front.  The 18th century was all about symmetry!

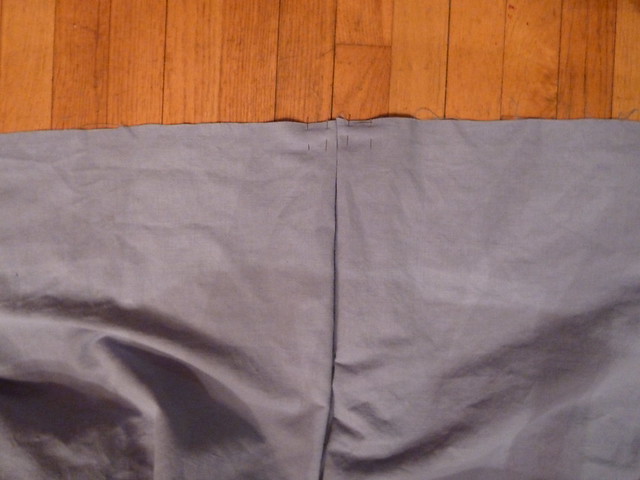
The completed back panel, showing the inverted box pleat and
the 1" knife pleated angled towards center-back.

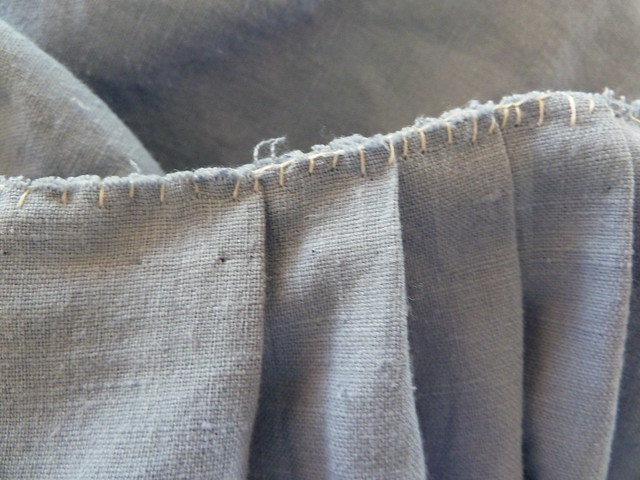
9) You can skip this step, but I find it makes the next part easier.  Do a running stitch or blanket stitch across the top of the pleats on each panel to secure them in place, about 1/4" from the top.  It can be as messy as you like because the stitches will be fully concealed beneath the waistband.  I prefer a blanket stitch when using thicker fabric (like marseilles) or fabric that tends to unravel easily (like the linen in this example), but a running stitch serves very well when you're working with something like a firmly woven cotton or taffeta silk.

Blanket stitches secure the pleats in place and prevent the fabric from unraveling.

10) The last step is to finish the waistband.  Again, you have options here that are commonly used and generally approved by reenactors and historical clothing experts.  Truly documented waistband treatments are almost nonexistent because waistband treatments happen to be one of those things that rarely survived the passage of time on extant petticoats.  These two methods, however, are both firmly and confidently within the realm of historical probability, however, so use them with confidence!
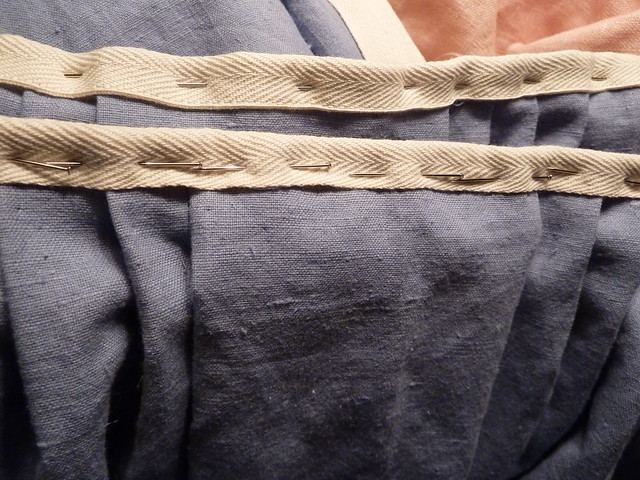
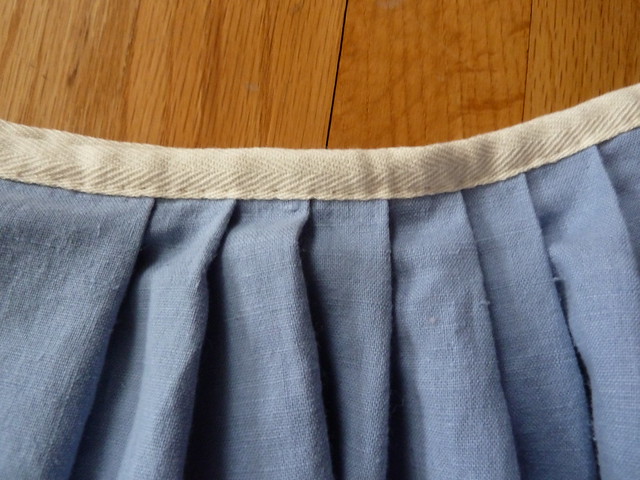
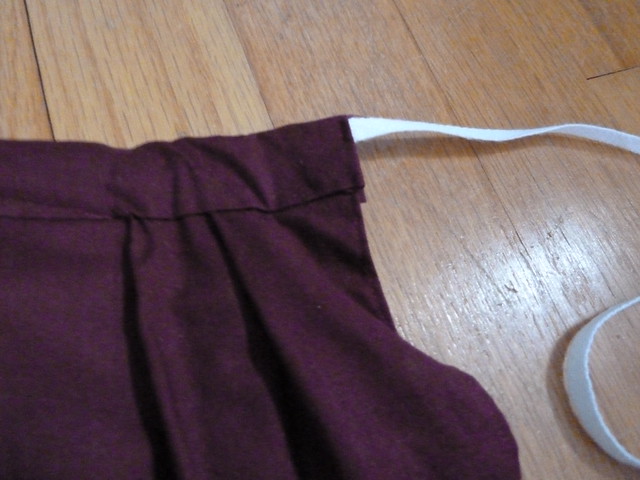
     - One option is to cut two lengths of cotton or linen tape (1/2" to 1" wide), long enough to wrap around your waist and tie in a generous bow.  Stitch the tape to the top of each panel to form the petticoat waistband and ties.  You can either sew it right-sides together, then flip it over and whipstitch it down to the inside, or fold it in half and secure it in one step with a spaced backstitch, catching all layers at once.  The latter is my favorite, mostly because by the time I get to this step, I just want to be done with the petticoat already!

1" cotton twill tape, folded in half and pinned across the top of the petticoat pleats.

One option is to use spaced backstitches to attach the tape waistband.

     - Your second option is to make a waistband of self-fabric.  Cut two rectangles 1 1/2" wide and the length of one panel plus 1".  Fold under the short edges 1/2".  Place one of the long sides even with the top edge of the petticoat panel, right sides together, and backstitch them together about 1/4" to 1/2" from the top.  Flip it over, fold under the edge, and whipstitich it down on the inside.  Cut two lengths of narrow tape (that is, two lengths per side, or four total), about 30" long, insert the ends (maybe about 1/2") into each side of the waistband, and tack them on.

A self-fabric waistband is also an option...

...with narrow tape ties tacked at the sides of each panel to wrap around the waist.

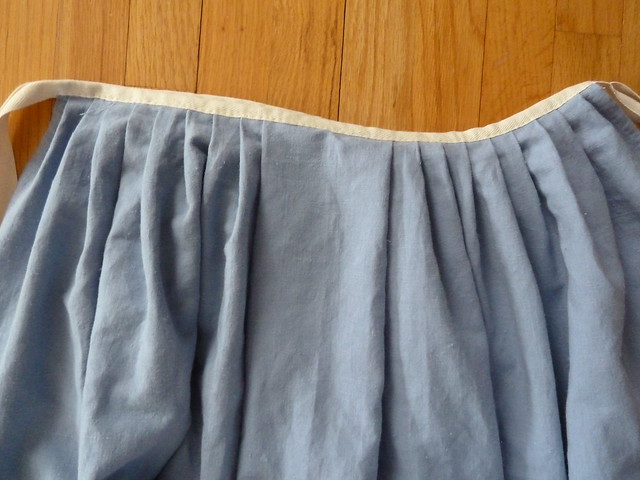
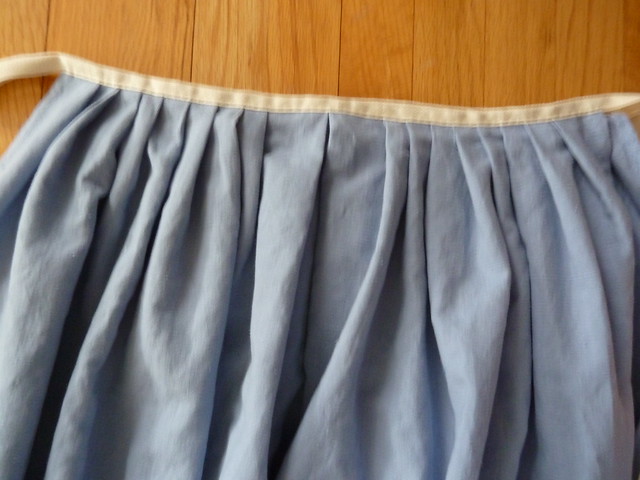
Congratulations, you've finished your petticoat!

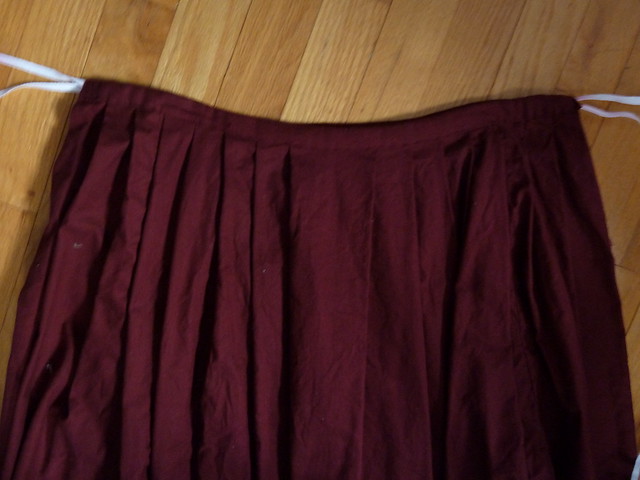
The completed front panel...

...and the completed back panel.

The fabric: Petticoats can be made of any period-appropriate fabric.  When choosing your petticoat material, keep in mind that printed petticoats were only worn when they were made of fabric matching your gown; never was a printed petticoat worn with a solid color outer garment.  The reverse, however, is perfectly acceptable (that is, it was common to see a printed outer garment with a solid color petticoat).  Be careful with plaids, as they tended to have regional or ethnic associations.  Checks appeared only on aprons, men's shifts, and as lining material, so it's best to avoid those as well for this particular project.  Use only woven stripes with a balanced design.  If you're unsure, it's best to stick with solid colors that could feasibly be achieved with natural dyes.  Keep in mind that wool takes dyes more easily than linen, so you would be more likely to find brighter colors in wool and more muted shades in linen.

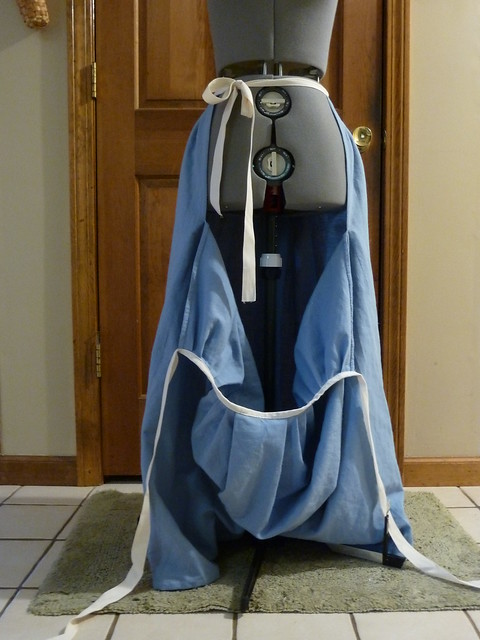
Finishing the look: Always wear at least two petticoats.  To don your new petticoat, pull the strings from the back panel around your waist to the front and secure them slightly off to one side (this helps to keep your center front as smooth as possible). 


Then wrap the ties from the front panel around your waist and tie them in the back.  Tuck in the ends so that they're less likely to pull or come undone. 

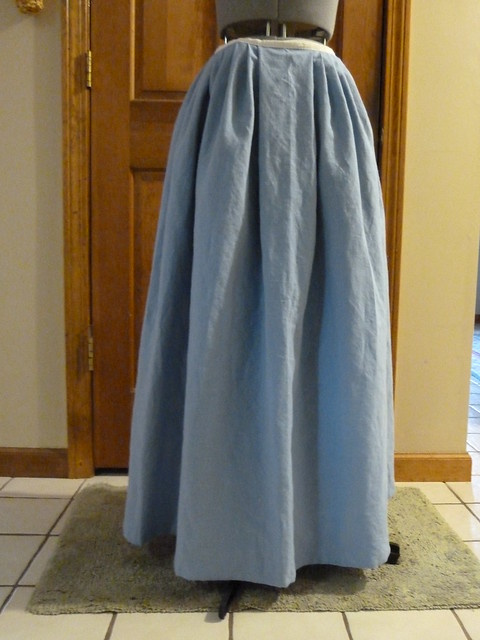
The completed petticoat (which actually sits about
2" further off the ground on me than on the dressform)

And finally, if you create a petticoat using this tutorial, we welcome your feedback and we'd love to see photos of your finished project!