A Pink Silk Triangular Reticule
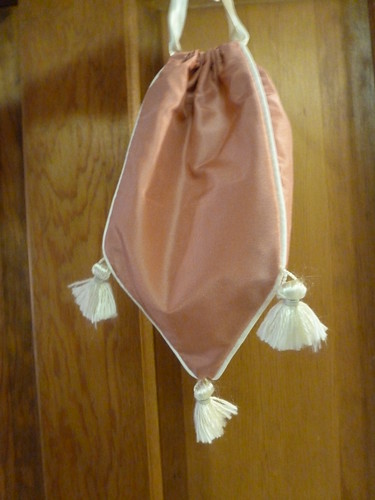
To accompany some new in-progress outfits (which shall remain unidentified for the present!), I've been collecting all sorts of cute reticule patterns and inspirational images. One of my favorites was this "Three-Sided Reticule" pattern shared by World Turn'd Upside Down. It was originally published in 1831 in The American Girl's Book; Or, Occupation for Play Hours, by Miss Eliza Leslie. When I looked through the book (which is available in full on googlebooks), I found a wealth of not only additional reticule patterns, but all sorts of nifty period tidbits and treasures, from pincushion and needle book patterns, to games and riddles. It's great fun to skim through, and you'll be surprised at the neat little things you'll find in there!
Anyway, I was itching to try the triangular reticule, and when I found myself in need of a thank you gift for our friend S, who very generously gifted us with our very own Jane Austen cookie cutter after we so adamantly admired hers, I decided to test out the pattern. She's an Austen devotee, and even though the pattern is from an 1831 source, it is unquestionably a shape and style seen twenty years earlier during the Regency as well.
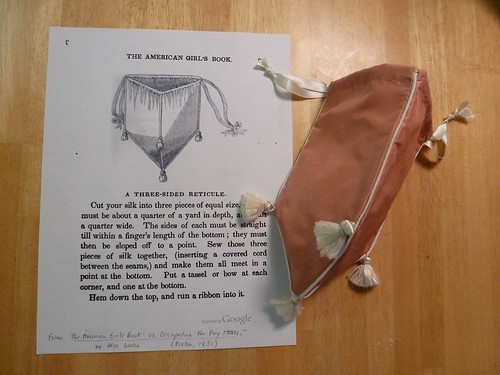
The completed reticule next to the original pattern.
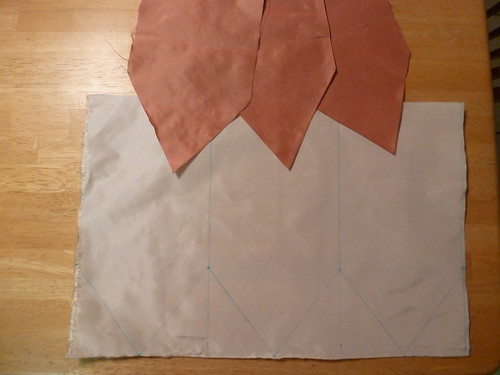
The pattern: The pattern from The American Girl's Book is given verbally, rather than as a sketch or scaled drawing, but it was incredibly simple to draft. I did it directly onto my fabric using a fabric pen, since it's nothing more than straight lines.
The pink silk pieces cut out, with the cutting lines of the ivory lining
drawn directly onto the fabric.
Construction details: The construction process was very easy, the only fidgety part being accommodating the tassels into the piped seams. The first step was to sew together the three silk lining pieces. Then I cut strips of bias and inserted the cording and sewed one piece of piping to each of the three pink outer pieces.
Attaching the piping and stitching the pieces together.
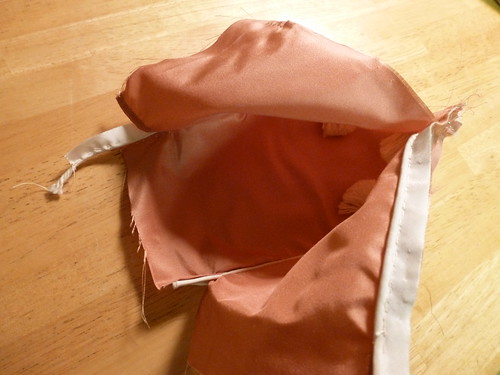
Each of the outer pieces was then sewn to the others, taking care to insert the cording holding the tassels so that they would fall right at the corners and at the center bottom tip. Finally, the lining was inserted and the top finished by folding over the outer pink fabric to the inside to create a channel through which to run the two ribbon ties.
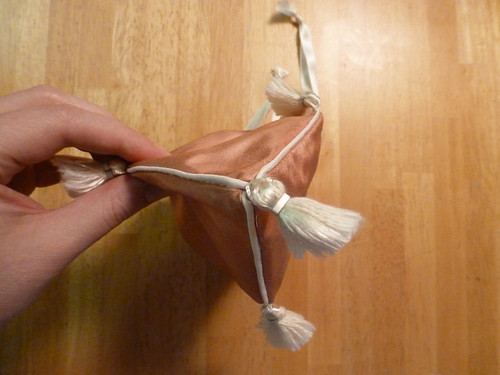
A shot of the bottom, which shows the triangular construction better than a side view.
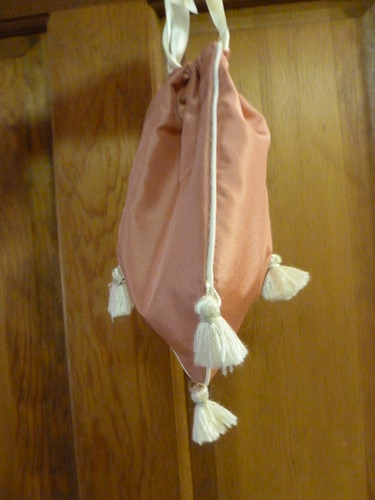
The fabric: Because S has a gorgeous pink painted fan that she often uses with her Regency wardrobe, I decided to make up the reticule in a pink silk taffeta. It is piped and lined in the ivory silk taffeta I used on my ivory silk petticoat. The tassels were a necessary compromise, as it's nearly impossible to find real silk ones; I got these at Joann in the home decorator's department and snipped them off the be-tasseled braided trim! The reticule ties with two ivory silk satin ribbons.
Additional photos of this project can be found in its flickr set. If you're interested in a full-blown tutorial of this reticule, just say the word and I'll be sure to take more in-progress pictures the next time I make one (which will be in the next couple of weeks) and put up a more detailed post then!

F you have the time, I'm in live and would live a tutorial!
ReplyDeleteBoth of those "live"s should be "love"! My iPhone thinks I live, but do not love! :-)
ReplyDeleteWord! :> I would love to make one of these and a detailed tutorial would be great - thanks! :>
ReplyDeleteNoelle - Haahaa! Oh, the impersonal nature of all of these newfangled "personal" devices! :-)
ReplyDeleteAlrighty ladies, I'll make another one next week and try to have the tutorial up by next weekend!
Very pretty!
ReplyDeleteThanks, Emily! I'm so glad you "found" us, and I'm loving your new blog! :-) Here's hoping we get to see each other soon for a shoe reunion!
ReplyDeleteAwww, how sweet for you to do that to gift her! Love the pink! You did a lovely job with that!
ReplyDeleteLaurie
7 years later I am using your ideas to make one -- thanks
ReplyDelete