Blue and White Striped Linen English Gown, 1770-1780
Colonial Williamsburg, June 2011.
This post is about a year late. I began this gown about this time last year and finished it in June 2011 and wore it to several events last summer, including Under the Redcoat and at our shoemaking workshop. It wasn't until I dug it out of the closet on Friday to wear to our annual ECD Drancy Fess Ball that I realized I'd never given it the proper "Threaded Bliss" treatment. So here it is, better late than never!
Colonial Williamsburg, June 2011.
The pattern: Draped by me.
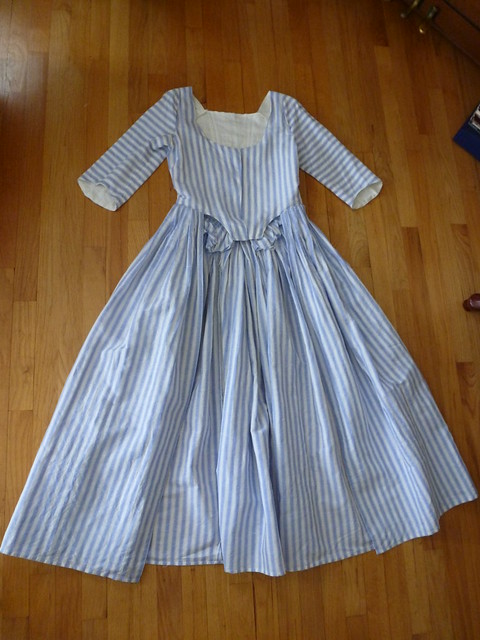
Construction details: The construction details of this gown are identical to those of my red floral print English gown and Ashley's lavender linen and "DAR" gowns, but since it's been so long since we're done a gown post here, I'll just give a brief overview with some detail pictures.
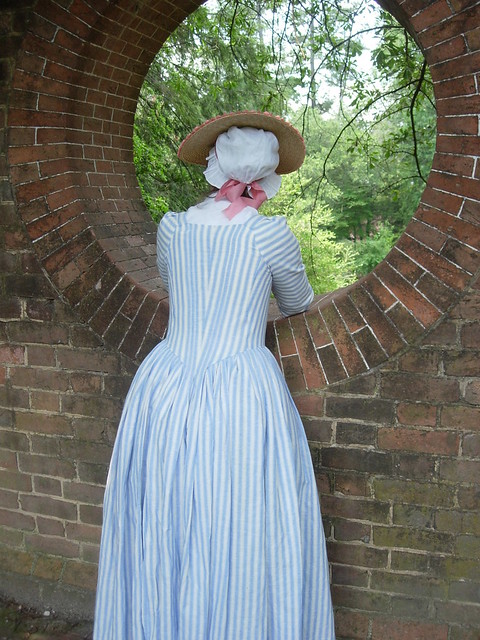
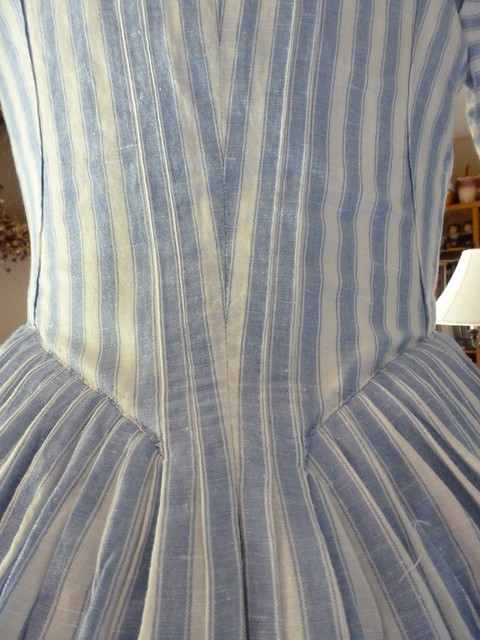
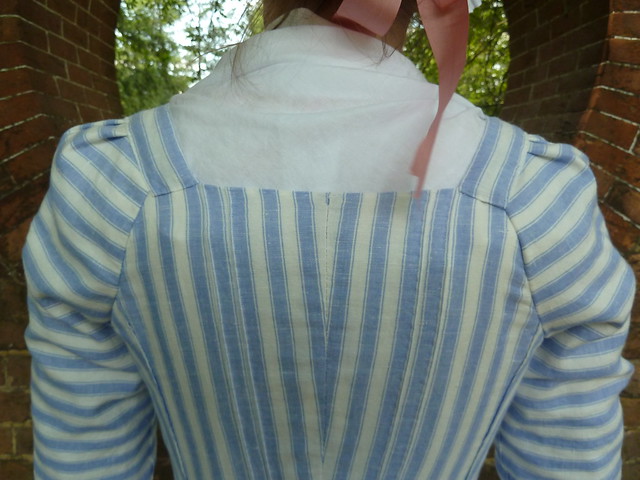
Because of the stripes in the fabric, I did the back panel first, creating a chevron pattern down the center back and forming the two back pleats alongside it. This back piece was then mounted to the linen lining and pleats secured using a spaced backstitch.
Detail of center back chevron.
Next, I draped the front of the bodice in the linen lining, as always using the neckline of my stays as my guide for the shape of the "scoop." Because of the stripes (and because I had plenty of fabric), I decided to cut the shoulder straps as part of the bodice fronts. After examining pictures of extant striped gowns, I decided on the angle I wanted for the chevron pattern at center front and then cut out the bodice front pieces in the striped linen.
These outer pieces were then fitted to the back panel, the edges folded under and then topstitched with more spaced backstitching. Chevron angles at the side/back seams were not common at all with striped fabrics and I honestly didn't cut the bodice pieces with any thought of creating them. When it came to pinning the fronts to the back, though, I found that they just so happened to fall like that because of the angle at which I had chosen to cut them to achieve the center-front chevron. What are the chances?!
The next step was to finish the inside by adding the interior lining and attaching it around the neckline and at the center fronts. The sleeves went in next, cut in the period-appropriate manner with stripes encircling the arms horizontally. Ashley pleated the sleeve caps with the dress on me and basted them to the lining of the shoulder strap. The shoulder piece of the striped linen was then overlaid and topstitched down to cover the raw edges of the sleeve.
The interior of the gown, with unfinished armscyes and the extra fabric
of the skirt folded down.
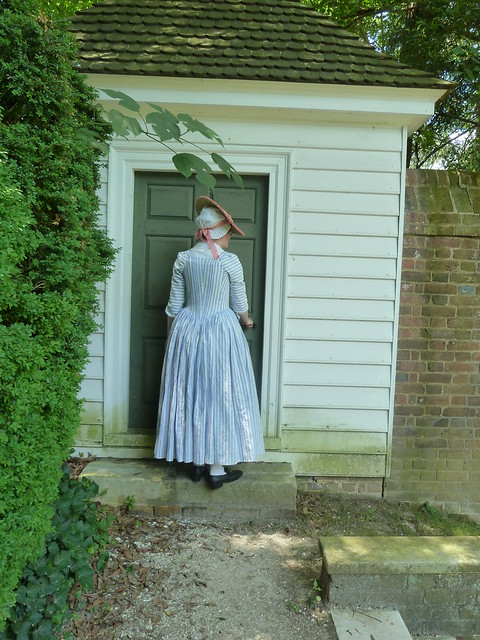
The back of the gown, with stripes converging everywhere!
Finally, the skirt panels were pleated to the bodice and secured to it using a backstitch. After wearing the gown a couple of times, however, I decided I didn't like the way the pleats were falling (this fabric has a nice crisp feel), so I took those stitches out and replaced them with whipstitches, which help the pleats hang and move more freely. While both techniques are documented methods for securing skirts to bodices, with this particular fabric, the latter is definitely preferable for the look I wanted to achieve.
The fabric: A delightful blue and white striped linen from Wm Booth. I bought it a couple of years ago and they sold out of it soon after, but it seems they've recently gotten it back in stock again. I wish there were more stripes like this out there these days to help spice up campfollowing wardrobes a bit more! My only caveat with this particular fabric is that, like most linen, it's a nightmare to iron, but the stripes just make it so much worse! My lovely pleats took hours (seriously, hours) to get back into place with the iron after I washed the gown. Of course, "back then" I'm sure they wouldn't have bothered as much as I did, but I have a horror of wrinkles, so I couldn't help myself. Otherwise, though, the fabric is lovely, with an ideal weight and a very nice crease.
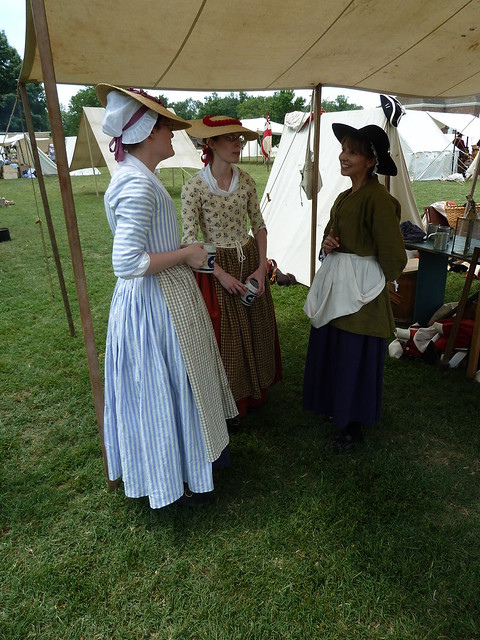
Finishing the look: The nice thing about this shade of blue is that it basically goes with anything, which adds to the fun of mixing and matching petticoats to create different looks. During UTR (which seems to be the only event we actually have pictures for!), I paired the gown with a navy blue linen petticoat, a checked apron, and a very minimally decorated straw hat.
Under the Redcoat, Colonial Williamsburg, June 2011.
For a wander about town later that week, I swapped the simple hat for one a little more elaborately trimmed (though still within the means of a woman who would have worn this type of gown), abandoned the apron, and added a silver watch suspended from a silk ribbon.
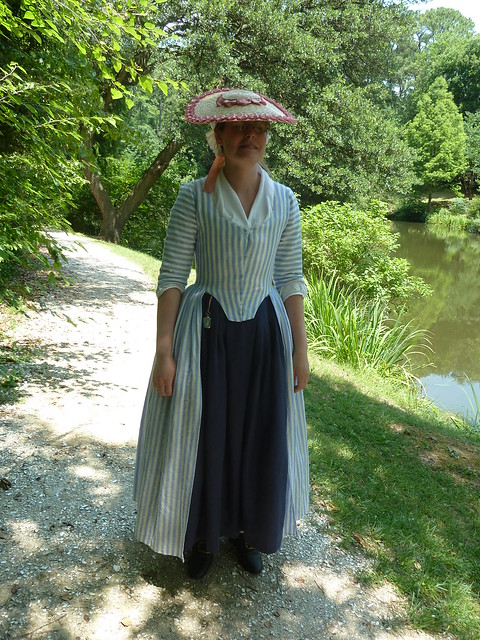
Colonial Williamsburg, June 2011.
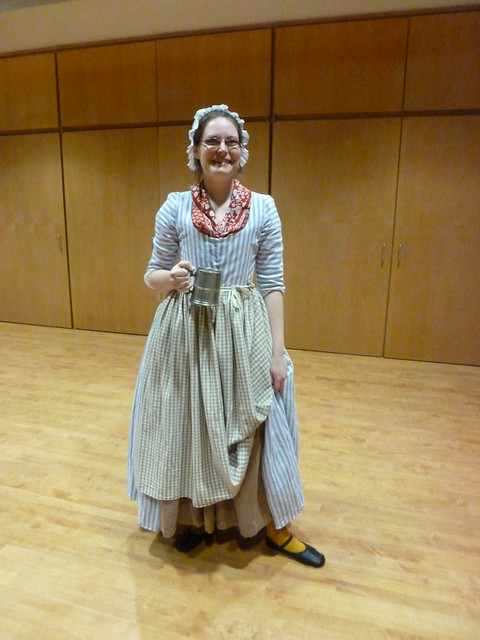
For our ECD Drancy Fess Ball this weekend, our theme was "Mythical Beasts." Ashley went as the Loch Ness Monster in what we foundly call her "Nessie Dressie" (so dubbed because of the serpentine trim, aka the blue/yellow changeable sacque), and I went as "Nottingham Ale" (a very "mythical" beast indeed, wouldn't you say?). ;-) To achieve this character, I paired the gown with a clay-colored linen petticoat and further aided the lower-class impression with a linen checked apron, yellow stockings, and a printed cotton kerchief (and, of course, the obligatory pewter mug!). Pray forgive the wrinkles in the photo - this was after a non-stop 2 1/2 hours of dancing and lifting of arms, so the bodice was badly in need of a repinning!
As "Nottingham Ale" for our ECD Drancy Fess Ball, April 2012.
Additional photos of this project can be found in its flickr photo set.


Fabulous! I love it when people really know how to work a stripe!
ReplyDeleteLovely! I especially love the back!
ReplyDeleteAww, thank you!! I love stripes, too, and we never seem to see enough of them in the 18th century reenacting world! Ashley and I both recently purchased some striped linens, so more stripes are in the near future. Huzzah!
ReplyDelete