Silk Accessories in Black and Blue, 1770s
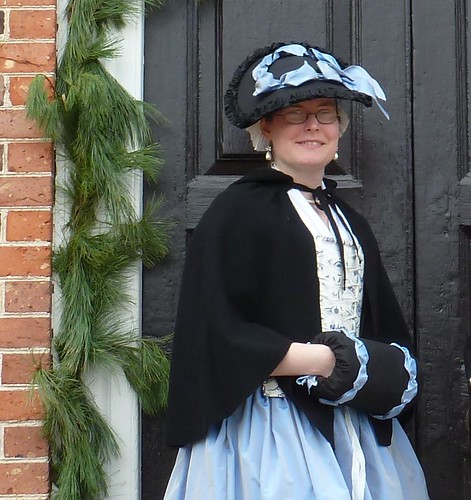
Photo taken at Colonial Williamsburg, December 2011.
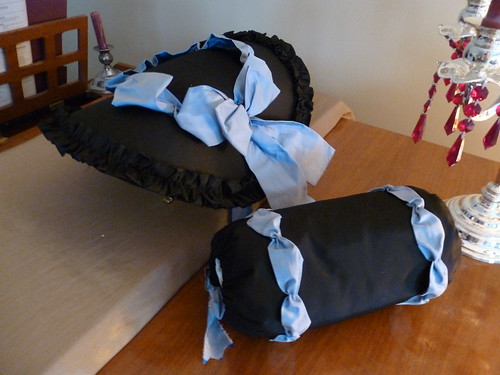
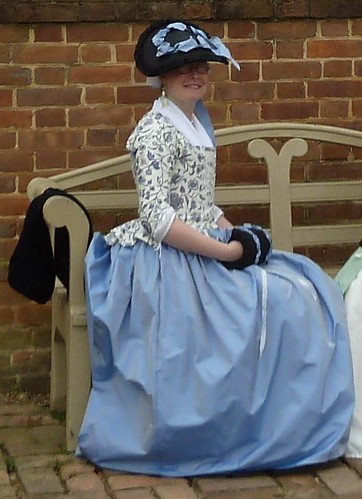
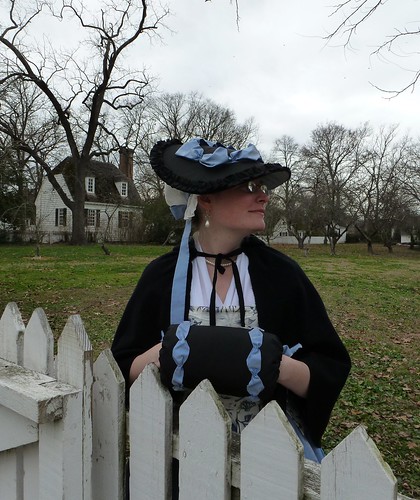
Inspired by March's accessories symposium, and finding myself with a bit of fabric left over from my blue and ivory changeable silk taffeta petticoat, I decided I wanted to make some accessories to coordinate with the petticoat and the chintz jacket I'd be wearing with it. Since the jacket was completed in time to wear to Williamsburg for our Grand Illumination visit, I decided on a new muff cover and a matching covered hat. Here they are!
The pattern: The pattern of the muff cover is taken off of the one I made at the silk muff workshop at CW in March. It's a very simple rectangular design with channels to gather up the ends to secure the seperate pillow inside. The straw hat I used logically became the pattern for its own cover, as I just traced the brim to cut the top and underside coverings. Very easy!
Inspirations: I began with an inspiration for the hat, which I found months ago and have been wanting to make ever since. I had some left over ivory silk taffeta from one of the petticoats I'd just made to go with my blue chintz jacket, and thought I'd do an exact copy of this hat from a 1756 Reynolds portrait of Lady Chambers. The features that particularly drew me to this design were the contrast between the base color and the trim, and the way that it is highlighted by lining the underside of the hat in the accent color.
Catherine, Lady Chambers, by Sir Joshua Reynolds (1756).
Image linked from http://www.hoocher.com/Joshua_Reynolds/Joshua_Reynolds.htm.
But as I set about cutting out my fabric, I saw the remainder of the black silk taffeta left from my bonnet sticking out of my scrap pile next to me, and I pulled it out and tried how the blue looked next to the black. Although I did love the ivory with the blue - especially because the blue is shot with ivory - the black just seemed so much more striking. Then, too, black covered hats seem to have been very popular in the 1770s and very early 1780s, so selecting the black taffeta instead of the ivory also made sense fashion-wise since I was planning to wear the hat with my new 1775-1785 jacket. So I rummaged through my picture files again and found this image of a black covered hat from 1778:
"The Studious Beauty" (1778).
Image linked from the Lewis Walpole Library.
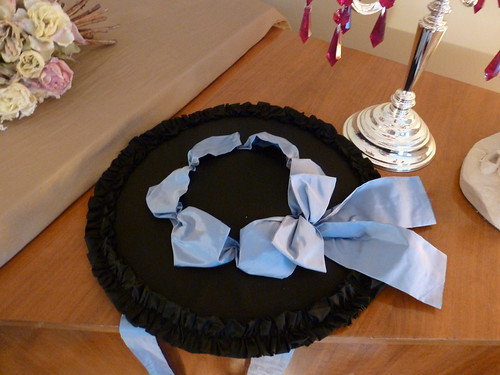
In the end, as you can see, I used the first image as the primary source for my hat's design, with its contrasting lining and trim colors, just adding the ruched black trim around the edge of the brim that is featured in this second image to help "update" the Reynolds hat to the late 1770s.
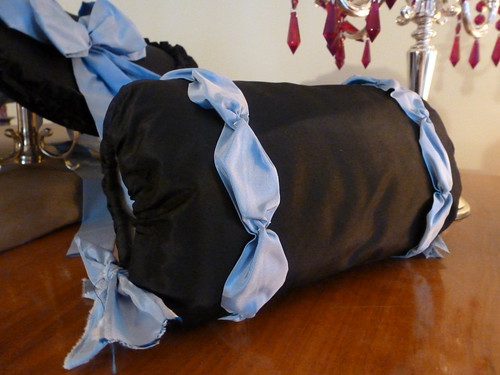
I don't really have a single inspiration source for the muff design; its poofs are simply intended to echo those found around the crown of the hat. Considering that such fabric and ribbon poofs were fashionable not only on hats during this decade, but also as trim on caps, gowns, and even mantles, I figured I was pretty safe putting them on a muff as well. :-)
Construction details: For details on the construction of the muff cover, see my previous post about the green/ivory silk muff from the workshop. The blue poofs are quite simply a length of silk gathered at regular intervals. The same fabric forms the "ribbon" ties that gather the ends of the muff.
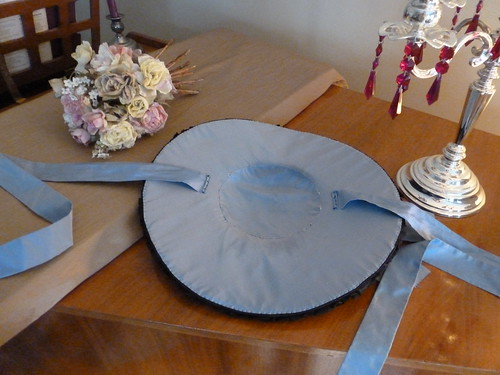
The covering of the hat was also quite easy. I used the straw hat blank to trace a pattern to cover the top; this was sewn down first. I then made a hole at the center top of the crown and snipped down a bit on all sides to accomodate the rise of the crown. Then I took a circle of black taffeta to cover the crown and stitched that down. The blue trim came next. As with the muff, this is just a strip of fabric gathered at intervals to form the poofs, and finished at the end into a big bow that hangs down to one side, like in the Reynolds portrait (though it's a little tough to see!). The black taffeta self-trim around the edge of the brim is made in a similar way, being nothing more than a strip of fabric ruched to create texture and stitched down through both the taffeta and the straw to hold it securely in place.
The lining was applied next, its pattern taken in the same way as the top cover. It is stitched down around the edge of the crown and again around the edge of brim, where the stitches are concealed by the ruched black trim. The lining in turn conceals all of the stitching from the trim from the top. The final steps were to cut a circle for the crown lining and slipstich it into place, and then to tack on the blue "ribbon" ties.
The fabric: The top of the hat and the hat's brim trimming, as well as the muff cover, are done in an Italian black silk taffeta (the same that I used on my bonnet). The underside lining of the hat, as well as the trim on both the hat and muff, comes from the blue and ivory silk taffeta I used on the petticoat that coordinates with my blue chintz jacket.
Photo taken at Colonial Williamsburg, December 2011.
Photo taken at Colonial Williamsburg, December 2011.



Your whole outfit is gorgeous!! I love the combination of the chintz and silk. :)
ReplyDeleteOh, the whole things is so fantastic! I love that you now have pieces that mix & match with each other.
ReplyDeleteThe hat and muff are beautiful! You do such lovely work! I love your outfit - you look great!
ReplyDeleteAwww! Thank you! :-)
ReplyDelete