Showing posts with label Threaded Bliss. Show all posts

Friday, January 30, 2015

Threaded Bliss

A Reproduction Red Wool Broadcloth Cloak
with details taken from two extant examples
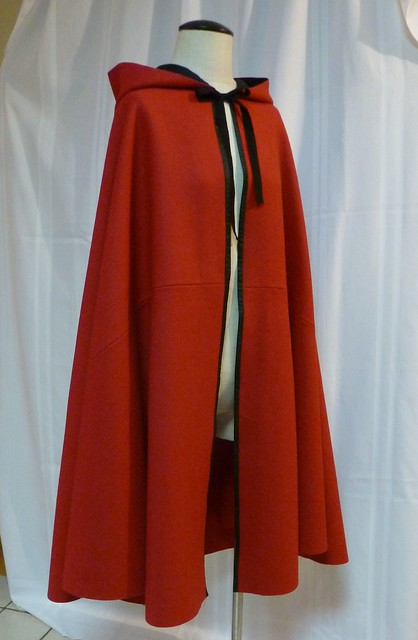
1770-1800 reproduction cloak

One of our friends recently joined our Rev War unit and is looking to update to her wardrobe to reflect our CT-based interpretation.  She was in need of a cloak to help weather the sometimes below-freezing CT winter temperatures and knew she wanted a red one copied directly from the one featured in Costume Close-up, since that was one of the pieces that made her first start to fall in love with 18th century fashion.  So we added a couple of extra details copied from a similar extant cloak with a CT provenance and this is the end result!  I'm in love and want one for myself now!  :-)  So here are all the nitty-gritty details:

The pattern: The pattern for this cloak is taken directly from an extant original in the collections of Colonial Williamsburg (CW acc. no. 1953-968), patterned to scale in Linda Baumgarten's indispensable Costume Close-up, pgs. 54-56.  Every detail of the construction, right down to the piecing on the hood and the body, has been reproduced, with the exception of the slits for the arms, which we left out simply because our friend didn't think she'd use them, which would render them rather counter-productive by letting the cold air in!

The cloak's source pattern and primary inspiration, a red wool broadcloth example 
from the collections of Colonial Williamsburg (CW acc. no. 1953-968).

Inspirations: The hood lining and front facing details were inspired by the Williamsburg cloak.  Costume Close-up indicates that "originally, the hood was lined with with soft thin silk and the cloak front was faced with taffeta; there was not a full lining."  What isn't specified, however, is the color of the original hood lining and front facings, so I turned for further inspiration to another cloak source which I had the opportunity to examine in person last year, this one with the requisite CT provenance!  Similar in cut and construction to the CW example, this second inspiration cloak owned by the CT Historical Society features the same hood lining and front facing details that Baumgarten cites - and in a very striking black!

The second inspiration cloak, this one from the
CT Historical Society (CHS acc. no. 1972.3.1).
Photo from the CHS eMuseum listing.

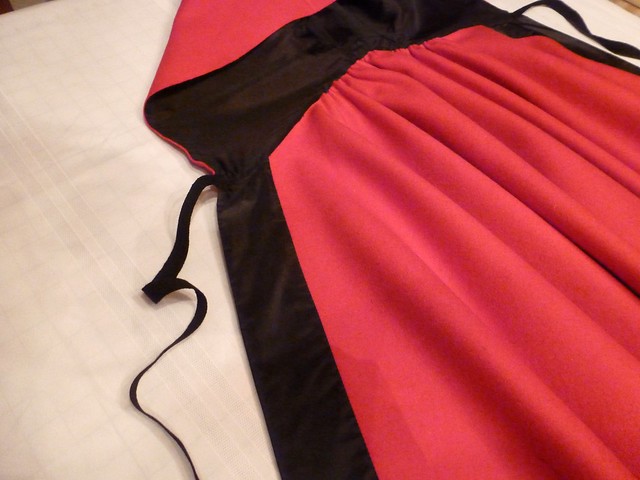
The hood of the CHS cloak is half-lined in a thin black silk.  The front opening edges of the cloak's body are bound and faced with strips of black silk which are sewn on in such a way that only a narrow band of black is visible from the outside, and a much wider band of 2 5/8" on the inside.  These details were translated onto my reproduction.

Construction details: The cloak is entirely hand-sewn in a golden-brown silk thread, which reproduces the thread choice on the extant CW piece.

What I find so fun and exciting about cloaks - which otherwise might appear pretty boring to make! - is how ingenious they are when it comes to piecing in order to make the most out of the least amount of fabric.  Baumgarten estimates that the CW cloak was cut from 2 3/4 yds of 55", which is pretty spot-on; mine ended up taking almost exactly that same length out of 58" width broadcloth.

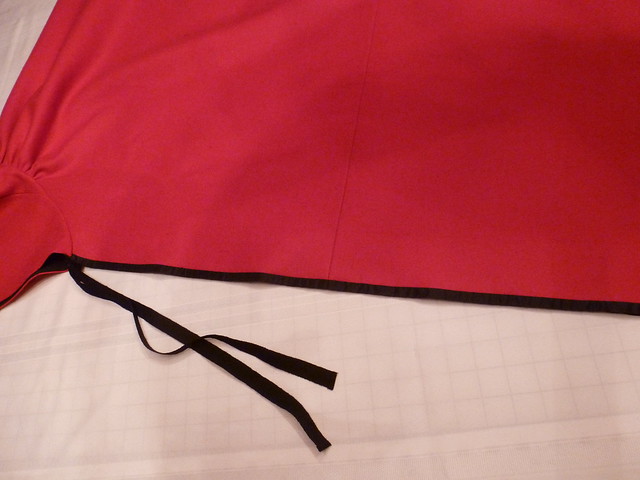
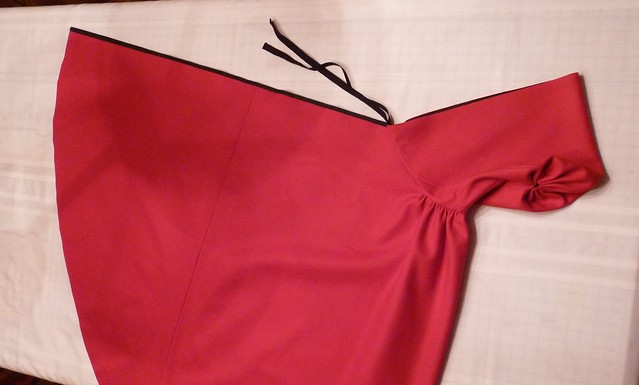
The cloak's body was cut to make use of the full width of the original 55" fabric.  Because my fabric was a touch wider, I of course had to trim off the leftover width on both sides to maintain the measurements and proportions of the original.  To complete the full half-circle sweep, the sides are then pieced onto the central body in long, backstitched seams.
1770-1800 reproduction cloak
The piecing of the cloak's wide body falls at about half-way down the center front.
1770-1800 reproduction cloak
The cloak's body piecing helps it achieve a generously full half-circle sweep.

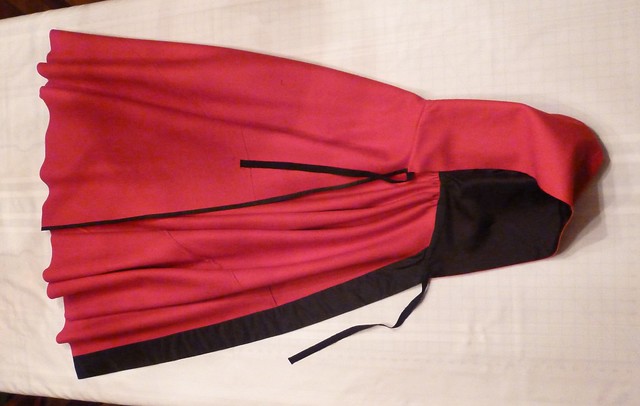
Once the body seams were sewn, I then applied the black silk taffeta bindings/facings to the front edges.  These serve to encase the front edges to protect them from wear and also add a bit of interest to the front of the cloak with the sharp, eye-catching contrast of color.  Only about 3/8" of black is exposed on the outside, with 2 5/8" strips visible on the inside.  The remainder of the cloak's edges (including the hood) are left unfinished, as per both original sources.  The broadcloth is well-fulled, more than sufficient for maintaining the smooth cut edges.
1770-1800 reproduction cloak
The cloak half-closed (on the top) and half open (on the bottom)to show the
contrasting widths of the black silk taffeta strips that form the center-front bindings/facings.
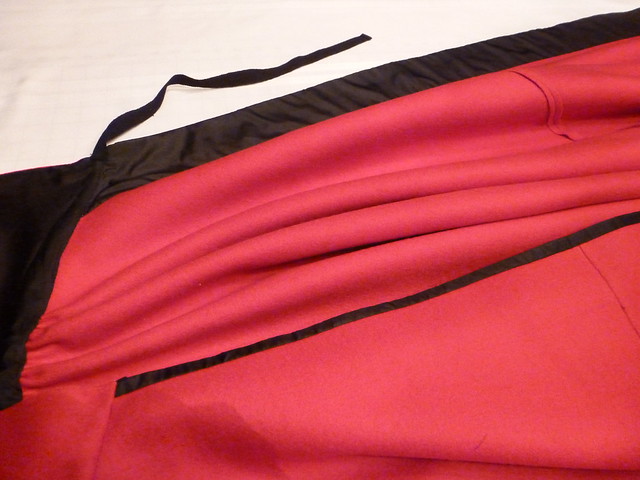
1770-1800 reproduction cloak

The hood is assembled from six different pieces which were all backstitched together with narrow seam allowances to eek out as much fabric as possible.  Each of the pieces was cut with the grainline going in a different direction, a feature I was also careful to reproduce as I cut them out.  I wish I'd taken a picture of the hood pieces all laid out together before I stitched them because the piecing is a little tough to see on the finished hood.
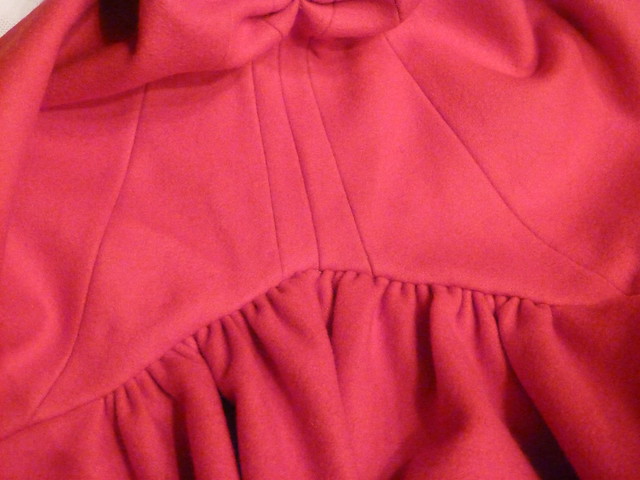
1770-1800 reproduction cloak
Detail of the hood piecing.

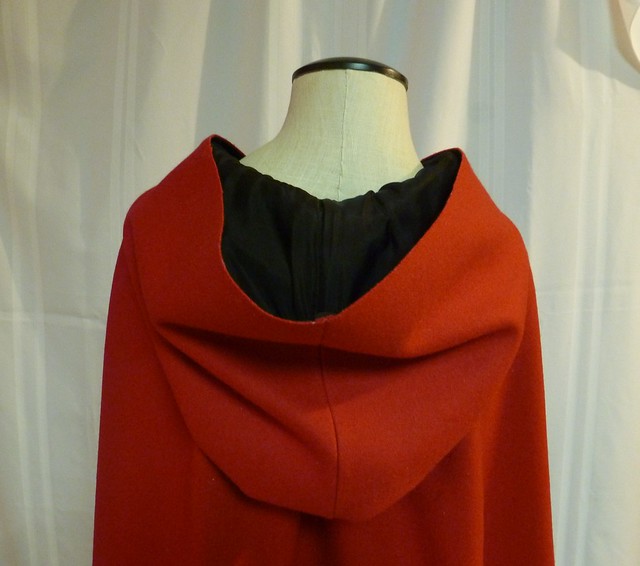
The hood is then lined in a very lightweight black silk before its back seam is sewn and arranged into the characteristic "fan" pleating detail that appears on the majority of extant cloaks from this period.
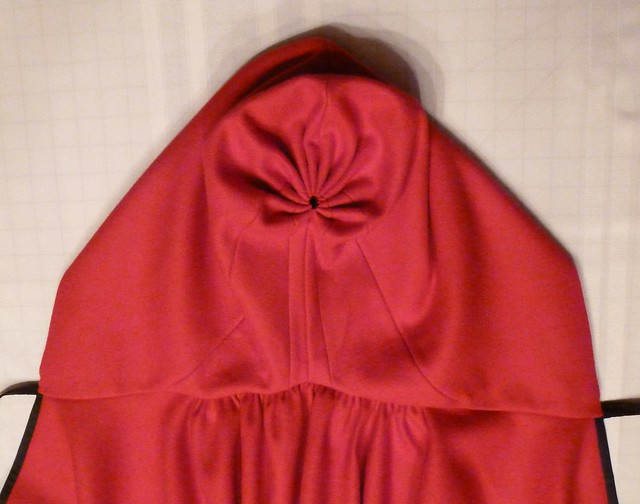
1770-1800 reproduction cloak
The back of the hood, with the signature "fan" pleating.
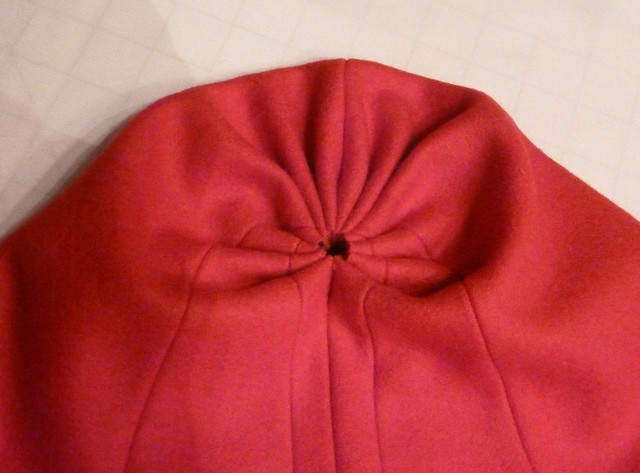
1770-1800 reproduction cloak

Finally, the hood is sewn to the body of the cloak.  The gathering of the cloak's wide body is concentrated at the center back to allow the cloak to drape gracefully over the shoulders.

1770-1800 reproduction cloak
The cloak folded in half to show the concentration of pleats at the back of the cloak,
with the front half of the hood joined smoothly to the body.

1770-1800 reproduction cloak
The cloak spread flat, shown from the outside/back.

The hood lining is used to cover the neckline seam, black wool tapes are added for ties, and then the cloak is finished!

1770-1800 reproduction cloak
Interior of the cloak.

1770-1800 reproduction cloak

1770-1800 reproduction cloak
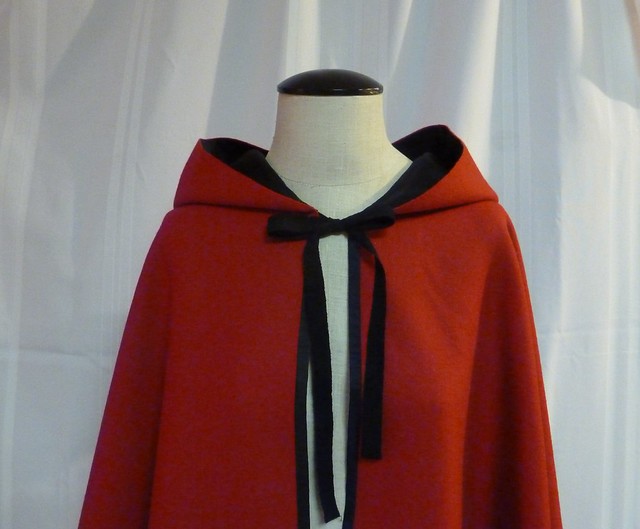
The hood view from the back when worn, with the black lining providing a 
strikingly eye-catching contrast to the red.
1770-1800 reproduction cloak
Black wool tape is used for the ties, which help support the weight of the cloak when worn.

The fabric: The red wool is a superfine broadcloth of a heavily fulled weight from Burnley and Trowbridge.  It's some of the nicest quality broadcloth I've ever worked with (so yes, of course I had to buy some to make a cloak for myself, too!).  The color is absolutely spot-on in terms of a match for the inspiration sources.

The black silk used in the hood lining and the front body facings is of two different weights to accurately reflect those used on the original CW example.  The hood is lined in a very light-weight silk persian and the front openings are faced with a mid-weight silk taffeta.

Finishing the look: I guess we'll just have to wait for the cloak's first official airing before we finish this section!  Stay tuned!  :-)

Wednesday, May 21, 2014

Threaded Bliss

Reproduction Cotton Print Shortgown
from the collection of the Chester County Historical Society,
1780-1790

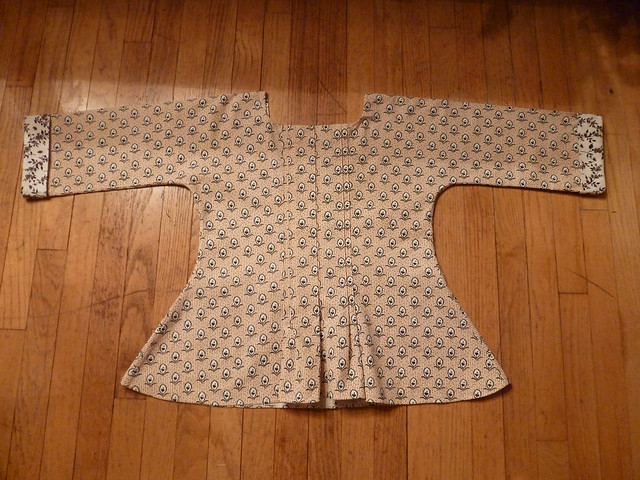
reproduction printed short gown, 1780-1790

The pattern: This shorgown is reproduced almost exactly from an extant garment in the collection of the Chester County Historical Society.  A scaled pattern and several photos are included on pages 23-25 of Sharon Burnston's Fitting and Proper.  Another photo can be seen on page 142 in Cloth and Costume 1750-1800.  Unfortunately, I can't find any pictures of it online, so you'll have to refer to these printed sources to compare mine to the original!

I made only two changes when reproducing the original.  The body of the original shortgown is fully lined in an off-white linen, with the ends of the sleeves lined in a linen printed with brown flowers.  I elected not to fully line the body of mine because the fabric is a little bit heavier than usual, and I plan to use this primarily for summer camp wear, when the least amount of fabric layers one has on, the better!  I did line/face the ends of the sleeves in a reproduction printed cotton, however.

The only other change I made was to eliminate the two sets of pleats on either side of the front of the shortgown, which were used to help tailor the shape a bit in front.  This is a feature that you don't normally see on shortgowns, so I felt completely justified in omitting it.  Because of the weight of the fabric, I found that these pleats just added some awkward-looking, unnecessary bulk to my stomach area just below the waistline where they flared out.  This being hardly desirable, and since such pleats aren't at all necessary to shaping the garment, and especially considering that it will always be worn under an apron to hold it in place, I instead simply followed the curve of the neckline of the original and the fit worked out beautifully.

reproduction printed short gown, 1780-1790

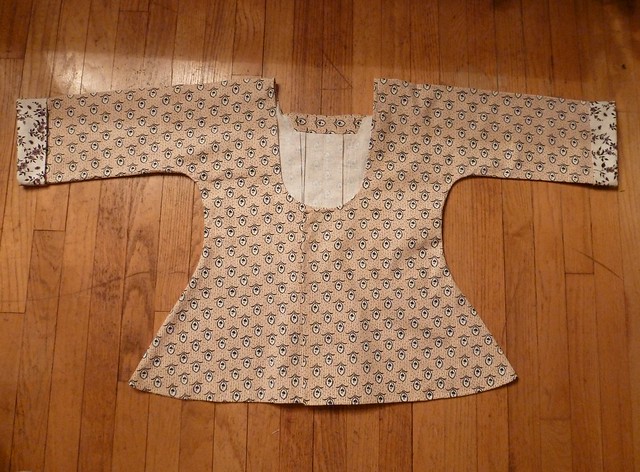
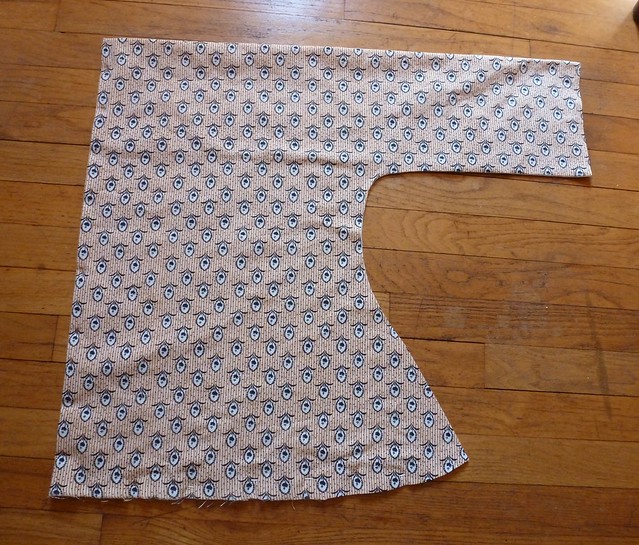
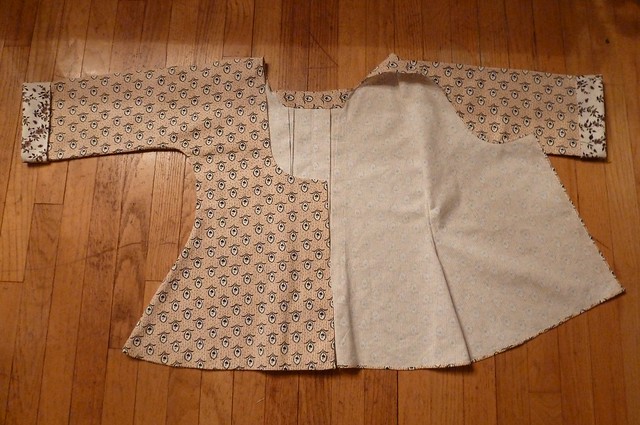
Construction details: I started out by scaling up the pattern of the original and cutting out the basic outline.  Because the shortgown is cut from a single piece of fabric, and because the pattern of this fabric has a defined direction, I followed the original in choosing to have the design "upside down" in the front and "rightside up" in the back.

reproduction printed short gown, 1780-1790
Cutting out the basic outline from a single piece of fabric folded into quarters.

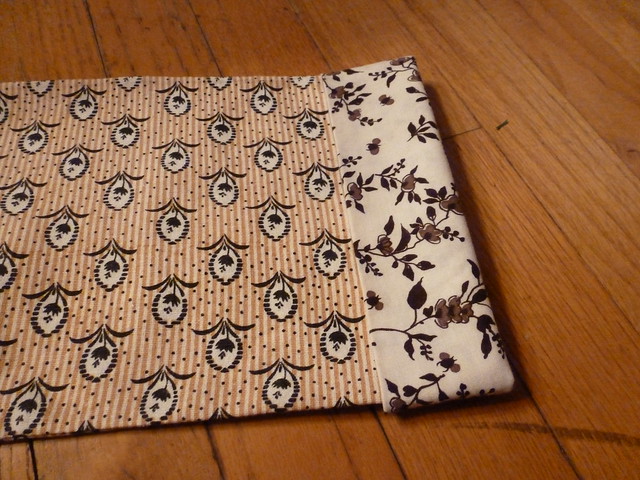
I then double-checked that the original neckline shape would work on my body and, once concluding that it would, I carefully cut it out in both the front and back.  The sleeve facings were then pieced on, as per the original.

reproduction printed short gown, 1780-1790
The turned-back sleeve facings in a contrasting fabric,
a feature copied directly from the original.

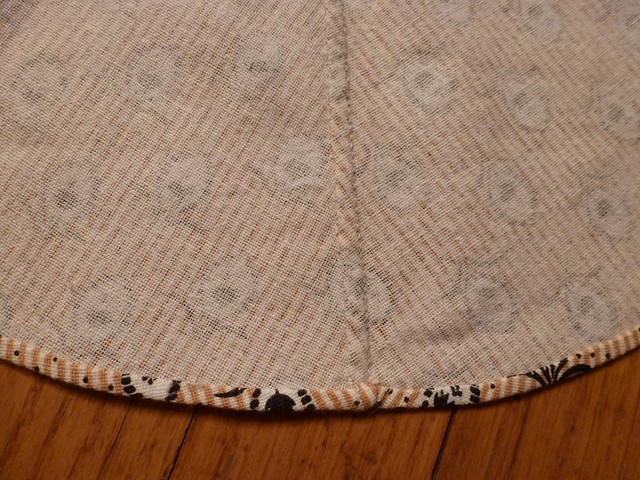
Because I elected not to line my shortgown, the two side seams are finished with tiny flat-felled seams, a feature I copied from an unlined extant shortgown from the same collection, found on pages 20-22 in Fitting and Proper.

reproduction printed short gown, 1780-1790
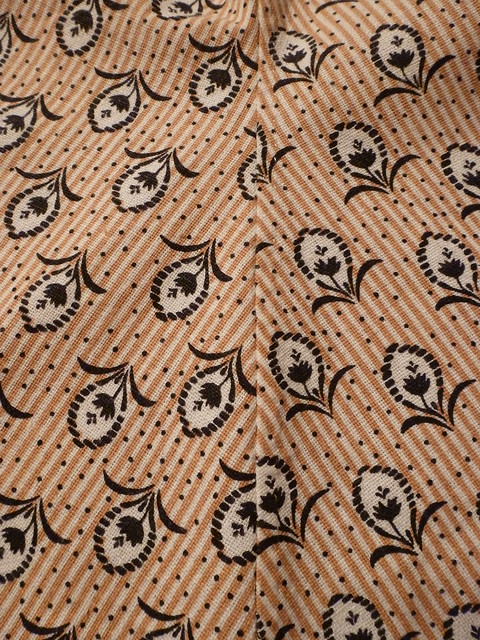
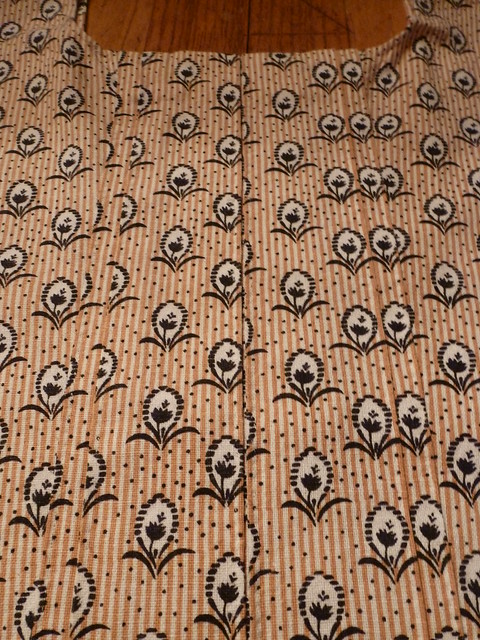
Matched stripes in the side seams!

reproduction printed short gown, 1780-1790
The interior side seam, flat-felled to protect it from wear.

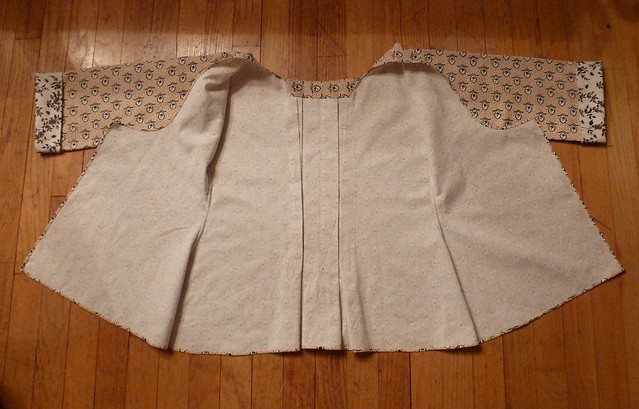
Next, the back pleats were set in and top-stitched, just as in the original, and the sleeve facings folded under and slipstitched down into place inside.

reproduction printed short gown, 1780-1790
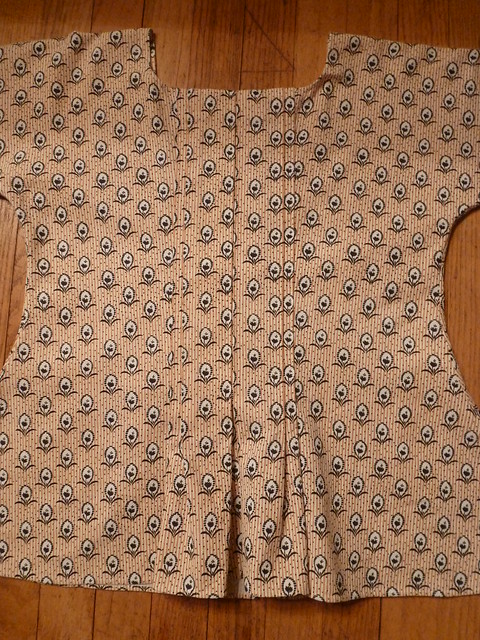
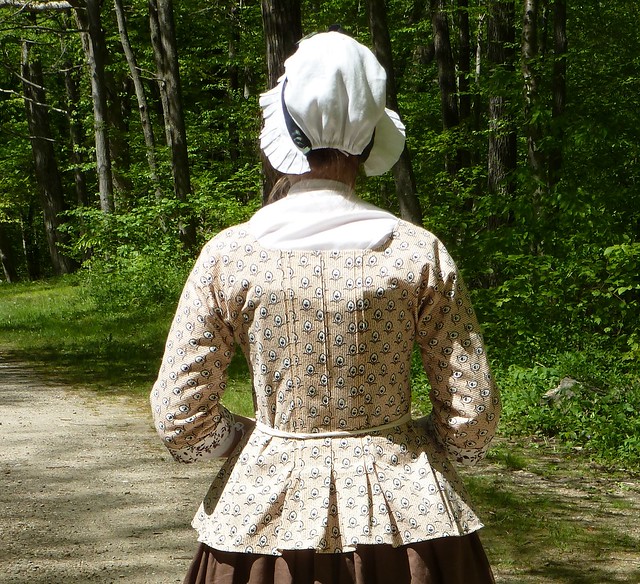
Back of the shortgown...

reproduction printed short gown, 1780-1790
...with two sets of pleats top-stitched into place.

reproduction printed short gown, 1780-1790
Back pleating detail.

Finally, the neckline, center front, and hem edges were finished with a narrow hem.  A facing strip covers the raw edge of the center-back where the pleats are turned in, another detail copied from the unlined shortgown.

reproduction printed short gown, 1780-1790
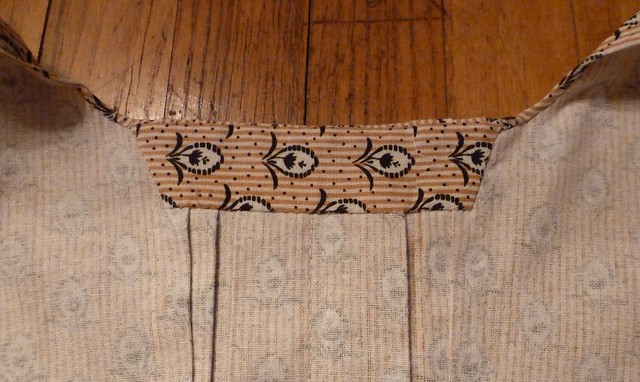
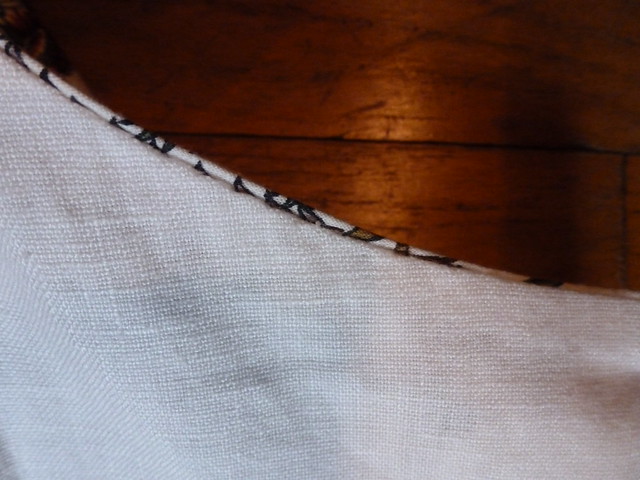
A facing strip covers the interior back neckline and helps secure the back pleats.

reproduction printed short gown, 1780-1790

reproduction printed short gown, 1780-1790
The interior of the unlined shortgown.

Further construction details on this shortgown can be found in Claudia Kidwell's article, "Short Gowns," which appeared in Dress: The Journal of the Costume Society of America, volume 4 (1978), pp. 30-65.

reproduction printed short gown, 1780-1790

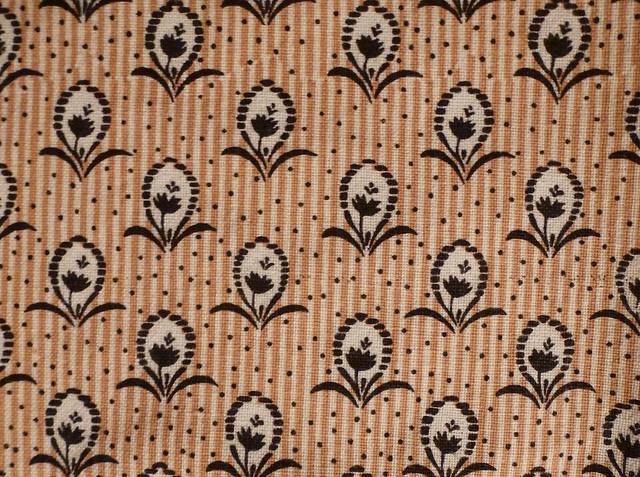
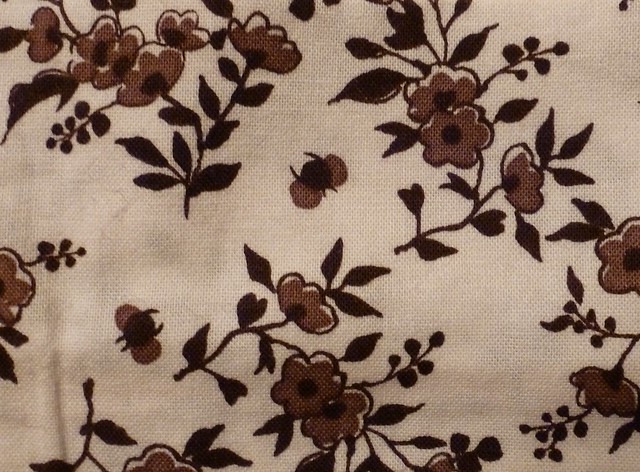
The fabric: Duran Textiles reproduced the original textile in the document size and colorway (they call it "Daisy"), and when I discovered that Wm Booth, Draper was adding it to their stock, of course I just had to take advantage of the opportunity and use it to do a true reproduction piece.  The print itself is lovely and I always appreciate access to true reproduction textiles.  It is a little pricey, but since I only needed a 1.25 yards, it ended up being quite reasonable.

reproduction printed short gown, 1780-1790

The sleeves of the original shortgown were lined in linen printed with a simple, stylized pattern of brown flowers.  Luckily, I had a small piece of a reproduction brown print (on cotton) done by Windham several years ago, which was a perfect approximation for this project.  I love the way it looks against the stripes of the primary textile.

reproduction printed short gown, 1780-1790

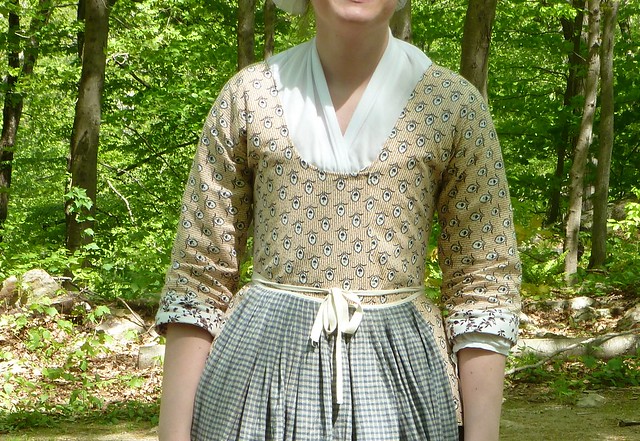
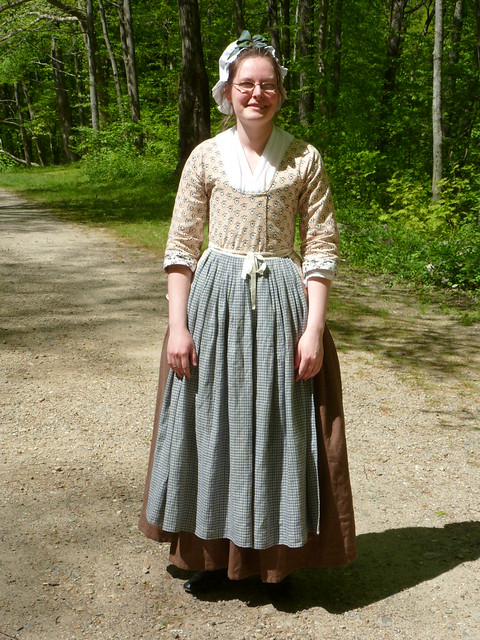
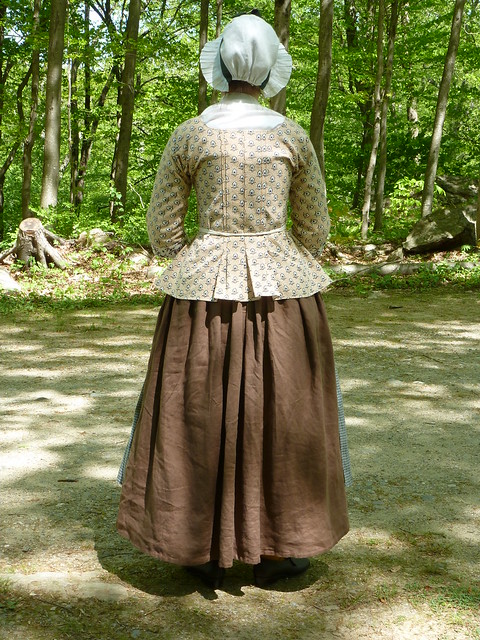
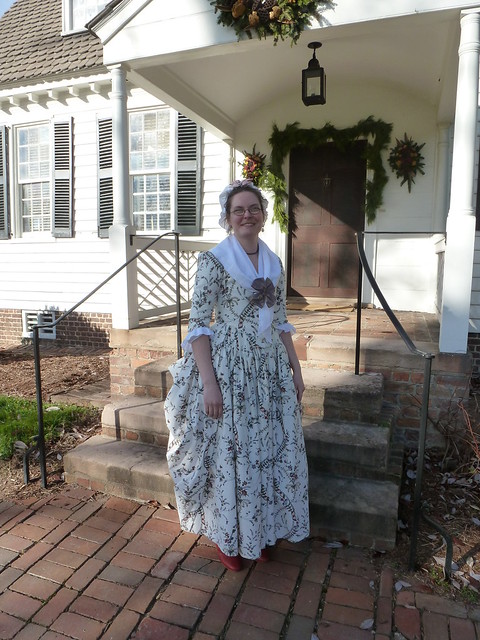
Finishing the look: I apologize that the "model" pictures for this project aren't very interesting!  I wore this for the first time a couple of days ago when doing a cooking demonstration at a local state park, and we were so busy talking and working all day long that I didn't have a chance to get any pictures taken until the very end of the day.  As soon as I get some more exciting "pretty" shots, I'll be sure to add them!

reproduction printed short gown, 1780-1790

For the school program, I paired the shortgown with a brown linen petticoat and a blue/yellow/natural cross-barred linen apron - the perfect outfit to wear while working around fire, soot, grease, and dirt all day long in the heat of a sunny late-spring day!  It's worn, as always, over my fully-boned stays, a shift, and a linen underpetticoat.  Forgive all the wrinkles - that's what happens after 6 hours of hard work bending and lifting and working over a fire!  :-)
reproduction printed short gown, 1780-1790
 
If you'd like to see larger versions of any of the pictures, just click on them to access the full size.  Additional photos can be found in this project's flickr set.

Wednesday, January 15, 2014

Threaded Bliss

A Fitted Back Gown
in a Reproduction 1780 Cotton Print

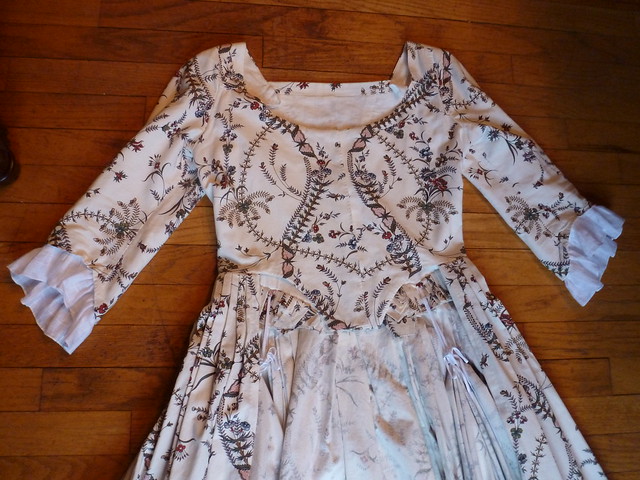
"Williamsburg" WCR 1780 reproduction cotton print gown

Oh my.  Was September really the last Threaded Bliss we did?  That's minorly embarrassing.  It certainly isn't a case of not having anything new to share, but between creating items for the Shop, finishing up some commission projects, and doing some "real work" in between, we've been so prodigiously busy that the blog has slipped silently by the wayside.  I had to laugh this morning when I saw that Samantha sent up a similar cry, and all I could think was, "Oh, I'm *so* glad we're not alone in this blogging backlog!"

So...here's the beginning of what I hope to be a quick succession of make-up-for-lost-time posts!  This gown was finished back in January of 2013 and I wore it a number of times over the past year.  Unfortunately, as these wearings included a couple of school programs, a dance, and our town's 225th anniversary parade, I didn't manage to get any pictures of it at all.  During the Christmas trip to Williamsburg, then, I made it my mission to finally get some quality proof that yes, indeed, I have finished this gown, and yes, indeed, I have actually worn it!

"Williamsburg" WCR 1780 reproduction cotton print gown

The pattern: Draped by Ashley at a Burnley and Trowbridge workshop in November 2012.


Inspirations: The inspiration for this gown was the fabric, which, as I will detail below, is reproduction exactly from a cotton gown in the collections of Colonial Williamsburg (acc. no. 1991-450).  The gown was featured in Linda Baumgarten's What Clothes Reveal (pp. 48-9).

http://emuseum.history.org/view/objects/asitem/search@/0?t:state:flow=0ad9746e-8778-4643-80d1-fa1d31214fc9
1780 cotton print gown (acc. no. 1991-450).


Construction details: Since the construction process of the gown was partially described in the original workshop post, and as it is exactly the same as all of our previous fitted-back gowns, I won't spend any time reiterating those details here.

The most challenging part of making this gown (and the reason I saved this fabric specifically for the workshop!) was matching all the viney curves on both the front and the back.  I had forgotten to bring a picture of the original gown with me to the workshop, but of course Janea had the benefit of experience of having already made a gown out of this fabric and she worked her magic figuring out how to make the printed design balance and flow as it ideally should.  I'm so chuffed at how perfectly it came out, thanks to her expertise!

"Williamsburg" WCR 1780 reproduction cotton print gown
The front of the gown...

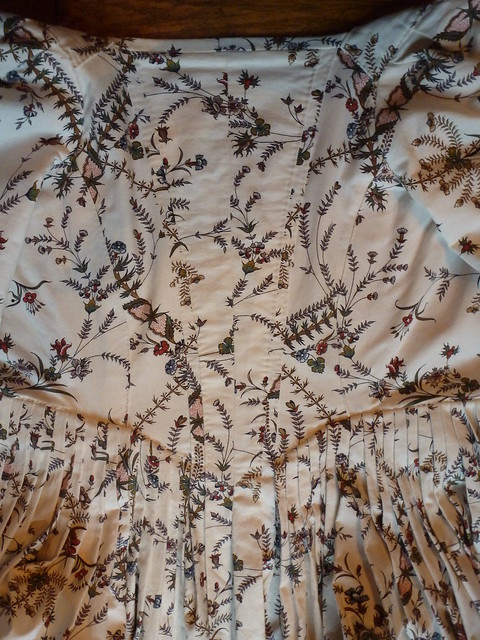
"Williamsburg" WCR 1780 reproduction cotton print gown
...and the back pleats.

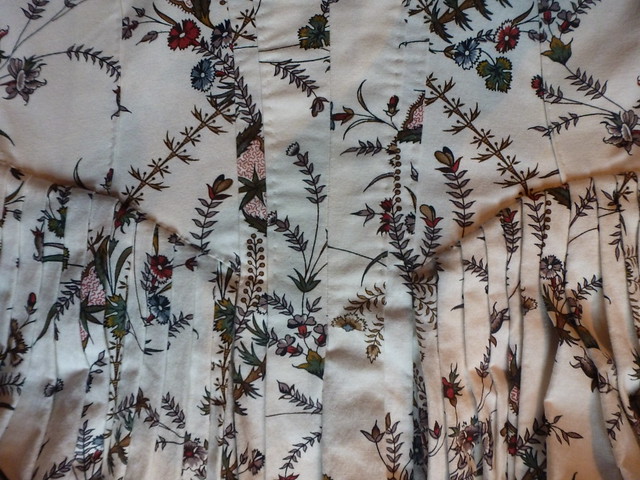
Here are a couple detail shots, including the back waistline,

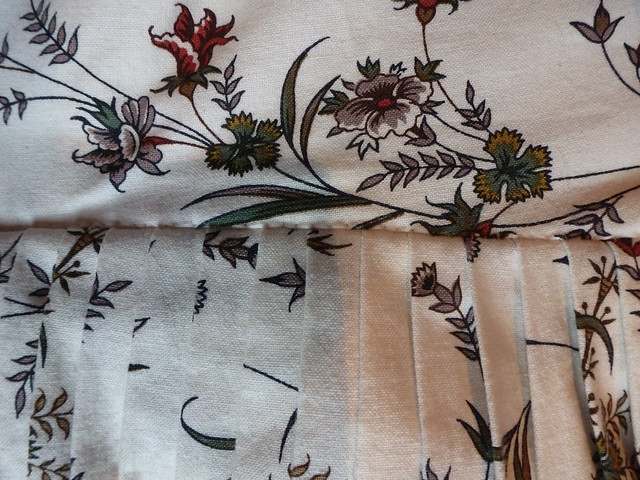
"Williamsburg" WCR 1780 reproduction cotton print gown
 
the pleating of the skirts,

"Williamsburg" WCR 1780 reproduction cotton print gown
 
the top-stitched back pleating that helps to fit the gown closely to the back of the body,

"Williamsburg" WCR 1780 reproduction cotton print gown
 
and a detail of the shoulder and sleeve from the back.

"Williamsburg" WCR 1780 reproduction cotton print gown

The interior of the bodice reveals the construction process of the gown, with the stitching of the back pleats visible, along with the overlapped front linings,

"Williamsburg" WCR 1780 reproduction cotton print gown

as well as the unfinished armscyes, common in 18th-century gown construction.

"Williamsburg" WCR 1780 reproduction cotton print gown

The edge of the bodice neckline and center fronts are finished by turning the edges in towards each other.

"Williamsburg" WCR 1780 reproduction cotton print gown


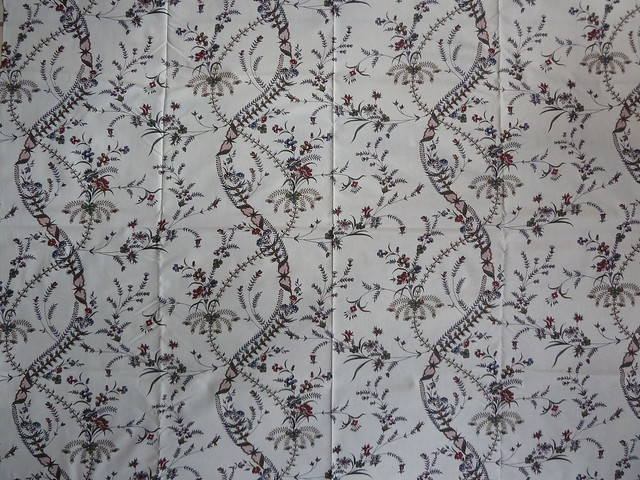
The fabric: As I mentioned above, the fabric is part of Colonial Williamsburg's exclusive line of fabrics that are reproduced from pieces in their collection.  This particular one is taken from the block printed and penciled English cotton used on a fitted-back gown dating to 1780 (CW acc. no. 1991-450).


"Williamsburg" WCR 1780 reproduction cotton print gown

An eerily similar English chintz textile appears in Barbara Johnson's album (V&A acc. no. T.219-1973), and her dating reaffirms the 1780 date of the CW piece.  Johnson records that she purchased her fabric in June of 1781 and paid thirteen shillings a yard for it.  I still can't get over how very similar the motifs are.


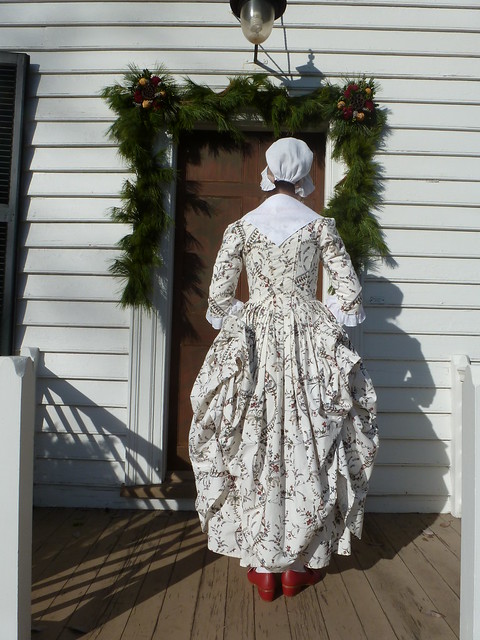
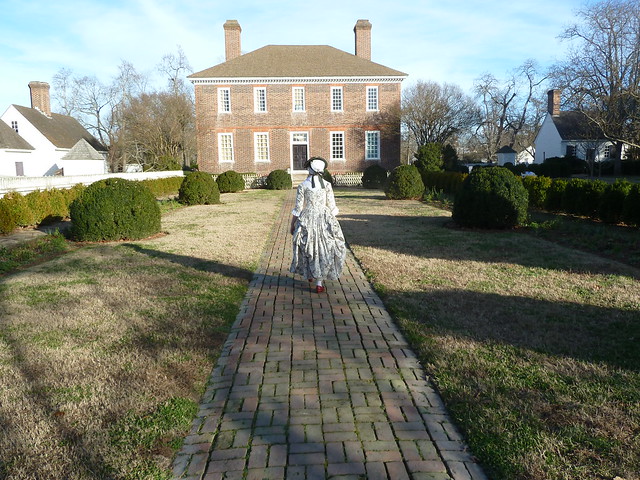
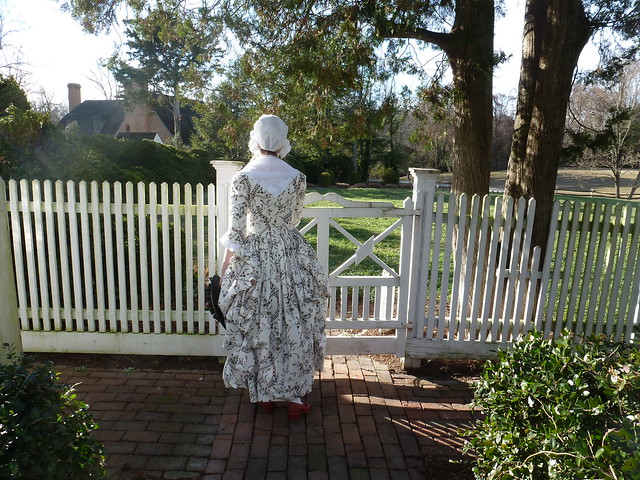
Finishing the look: The trouble with only having a single set of photos to share with an outfit is that they don't give any sense of the sheer variety of ways that I've worn this gown.  For one, it's got several other petticoats that look splendid with it (you can see one in the workshop photos), and for another, I regret that I decided to leave my neckerchief out when I wore this for the pictures because it obscures the front of the gown.  The front is visible in the dance video, but not to any real satisfying degree because it's so far away (and moving!).  I suppose this just means that a "Threaded Bliss Postscript" post is necessary in the near future!  :-)
"Williamsburg" WCR 1780 reproduction cotton print gown

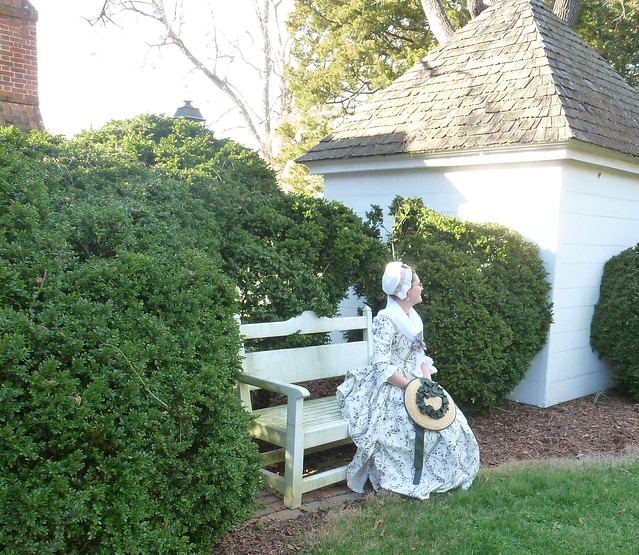
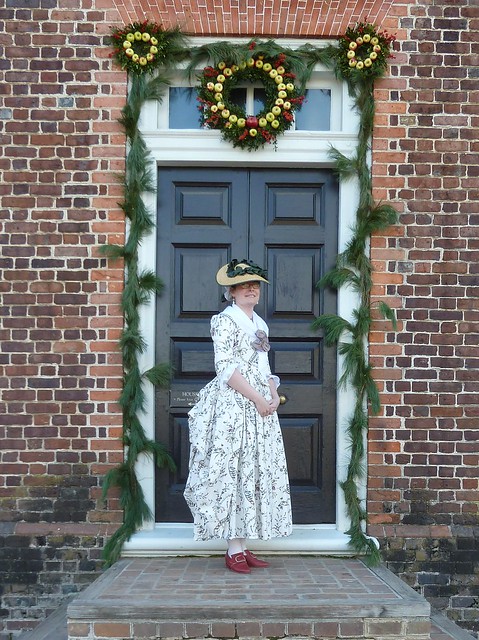
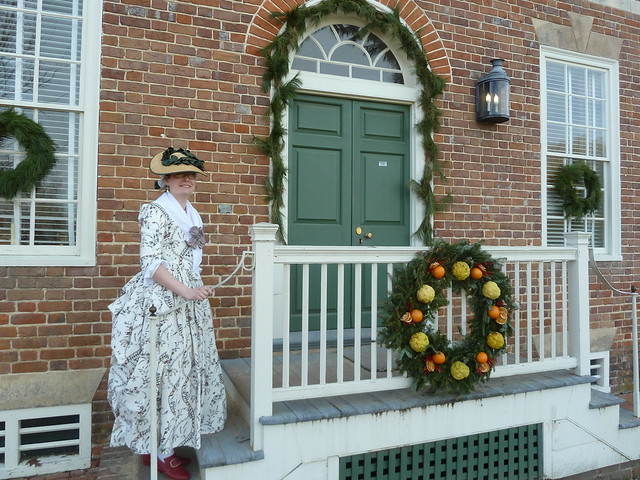
When I wore the gown at Christmas, I accessorized it with a windowpane checked linen neck handkerchief, left untucked and secured in front by a breastknot of purple/yellow changeable silk taffeta.  A string of deep purple glass beads further underscored the "best" middling impression suggested by the gown's textile.

"Williamsburg" WCR 1780 reproduction cotton print gown

I also added my favorite hat, which is trimmed, edged, lined, and tied in a blue/green changeable silk taffeta, and my B and T red shoes.  Somehow, both accessories just seem to coordinate so perfectly with every outfit.  I especially love wearing them together!

"Williamsburg" WCR 1780 reproduction cotton print gown

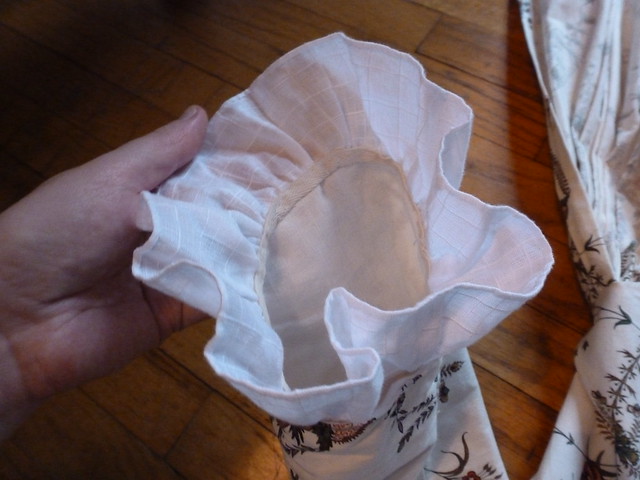
A set of removable windowpane checked white linen ruffles - part of the suit of kerchief, apron, and ruffles - are basted into the sleeves.

"Williamsburg" WCR 1780 reproduction cotton print gown

In the pictures, I have the gown drawn up through two sets of interior loops and ties to create a double draped look, giving a bit of extra body to the skirts.  This feature it copied from the original inspiration gown.

"Williamsburg" WCR 1780 reproduction cotton print gown
 
These ties can be easily let down to allow the skirt to hang free.  Next time I wear the gown, I'll be sure to get a view of the back left undraped.

"Williamsburg" WCR 1780 reproduction cotton print gown

Many more photos can be found in this project's flickr set.  Stay tuned for a Threaded Bliss Postscript for more variations on this outfit soon!

"Williamsburg" WCR 1780 reproduction cotton print gown