Showing posts with label workshops. Show all posts

Sunday, April 20, 2014

"Millinery Through Time" Conference: Day Four: The Wokshop Day

The fourth and final day of the "Millinery Through Time" conference was an option day consisting of a selection of workshops on various millinery items or accessories.  With eight to pick from and each being offered at the same time, you can imagine what a difficult time we had making our final choices!

In the end, we both opted to take Jay Howlett's workshop in felt hat basics.  We were thrilled to have the opportunity to make hats for our in-progress riding habits, and with appropriate, accurate felt hats for ladies being nearly impossible to come by, we simply couldn't pass up this chance to learn how to make our own.

CW Millinery Through Time conference - felt hat workshop
Our felt hat blanks at the start of the workshop.

To save some time on the workshop day itself, we had each forwarded our individual head measurements to Mr Howlett so that he could prepare custom-sized hat blanks for us before we arrived.  Though our basic hat shape was already done, he began the workshop by demonstrating the techniques he used to block our blanks, sharing some tricks of the trade and explaining some thrifty methods we could use to achieve the same process for ourselves.  We talked about period felt hats - materials, descriptions, terms for the parts of the hat itself - and then proceeded to learn how to line our hats to help protect the felt from hair oils, powders, and sweat (hey, they're for riding, after all!).

CW Millinery Through Time conference - felt hat workshop
Demonstrating how to re-size the crown of the hat.

Once we'd all finished stitching in our linen linings, we examined a large collection of period images and discussed the differences in styles in hats that were seen across the last half of the eighteenth century.  Once we'd each selected our personal favorite style, Mr Howlett set to work helping us to capture it on our own hat, showing us how to trim and finish the brim, and how to steam and shape it to match our respective sources.  Finally, we talked briefly about trim options and various techniques for attaching that trim.  Let's just say it involves lots and lots and lots of feathers!  :-)

CW Millinery Through Time conference - felt hat workshop
Adjusting the size of the brim to match the style of a period image.

CW Millinery Through Time conference - felt hat workshop
My hat beginning to take shape!

CW Millinery Through Time conference - felt hat workshop
Ashley's hat beginning to look like it's inspiration image.

We both left so excited to have our hats so close to being finished, and newly-motivated to get back to work on our riding habits.  We're very much looking forward to seeing how our looks pull together from head to toe.  So now...back to those waistcoats and jackets!

Wednesday, January 15, 2014

Threaded Bliss

A Fitted Back Gown
in a Reproduction 1780 Cotton Print

"Williamsburg" WCR 1780 reproduction cotton print gown

Oh my.  Was September really the last Threaded Bliss we did?  That's minorly embarrassing.  It certainly isn't a case of not having anything new to share, but between creating items for the Shop, finishing up some commission projects, and doing some "real work" in between, we've been so prodigiously busy that the blog has slipped silently by the wayside.  I had to laugh this morning when I saw that Samantha sent up a similar cry, and all I could think was, "Oh, I'm *so* glad we're not alone in this blogging backlog!"

So...here's the beginning of what I hope to be a quick succession of make-up-for-lost-time posts!  This gown was finished back in January of 2013 and I wore it a number of times over the past year.  Unfortunately, as these wearings included a couple of school programs, a dance, and our town's 225th anniversary parade, I didn't manage to get any pictures of it at all.  During the Christmas trip to Williamsburg, then, I made it my mission to finally get some quality proof that yes, indeed, I have finished this gown, and yes, indeed, I have actually worn it!

"Williamsburg" WCR 1780 reproduction cotton print gown

The pattern: Draped by Ashley at a Burnley and Trowbridge workshop in November 2012.


Inspirations: The inspiration for this gown was the fabric, which, as I will detail below, is reproduction exactly from a cotton gown in the collections of Colonial Williamsburg (acc. no. 1991-450).  The gown was featured in Linda Baumgarten's What Clothes Reveal (pp. 48-9).

http://emuseum.history.org/view/objects/asitem/search@/0?t:state:flow=0ad9746e-8778-4643-80d1-fa1d31214fc9
1780 cotton print gown (acc. no. 1991-450).


Construction details: Since the construction process of the gown was partially described in the original workshop post, and as it is exactly the same as all of our previous fitted-back gowns, I won't spend any time reiterating those details here.

The most challenging part of making this gown (and the reason I saved this fabric specifically for the workshop!) was matching all the viney curves on both the front and the back.  I had forgotten to bring a picture of the original gown with me to the workshop, but of course Janea had the benefit of experience of having already made a gown out of this fabric and she worked her magic figuring out how to make the printed design balance and flow as it ideally should.  I'm so chuffed at how perfectly it came out, thanks to her expertise!

"Williamsburg" WCR 1780 reproduction cotton print gown
The front of the gown...

"Williamsburg" WCR 1780 reproduction cotton print gown
...and the back pleats.

Here are a couple detail shots, including the back waistline,

"Williamsburg" WCR 1780 reproduction cotton print gown
 
the pleating of the skirts,

"Williamsburg" WCR 1780 reproduction cotton print gown
 
the top-stitched back pleating that helps to fit the gown closely to the back of the body,

"Williamsburg" WCR 1780 reproduction cotton print gown
 
and a detail of the shoulder and sleeve from the back.

"Williamsburg" WCR 1780 reproduction cotton print gown

The interior of the bodice reveals the construction process of the gown, with the stitching of the back pleats visible, along with the overlapped front linings,

"Williamsburg" WCR 1780 reproduction cotton print gown

as well as the unfinished armscyes, common in 18th-century gown construction.

"Williamsburg" WCR 1780 reproduction cotton print gown

The edge of the bodice neckline and center fronts are finished by turning the edges in towards each other.

"Williamsburg" WCR 1780 reproduction cotton print gown


The fabric: As I mentioned above, the fabric is part of Colonial Williamsburg's exclusive line of fabrics that are reproduced from pieces in their collection.  This particular one is taken from the block printed and penciled English cotton used on a fitted-back gown dating to 1780 (CW acc. no. 1991-450).


"Williamsburg" WCR 1780 reproduction cotton print gown

An eerily similar English chintz textile appears in Barbara Johnson's album (V&A acc. no. T.219-1973), and her dating reaffirms the 1780 date of the CW piece.  Johnson records that she purchased her fabric in June of 1781 and paid thirteen shillings a yard for it.  I still can't get over how very similar the motifs are.


Finishing the look: The trouble with only having a single set of photos to share with an outfit is that they don't give any sense of the sheer variety of ways that I've worn this gown.  For one, it's got several other petticoats that look splendid with it (you can see one in the workshop photos), and for another, I regret that I decided to leave my neckerchief out when I wore this for the pictures because it obscures the front of the gown.  The front is visible in the dance video, but not to any real satisfying degree because it's so far away (and moving!).  I suppose this just means that a "Threaded Bliss Postscript" post is necessary in the near future!  :-)

"Williamsburg" WCR 1780 reproduction cotton print gown

When I wore the gown at Christmas, I accessorized it with a windowpane checked linen neck handkerchief, left untucked and secured in front by a breastknot of purple/yellow changeable silk taffeta.  A string of deep purple glass beads further underscored the "best" middling impression suggested by the gown's textile.

"Williamsburg" WCR 1780 reproduction cotton print gown

I also added my favorite hat, which is trimmed, edged, lined, and tied in a blue/green changeable silk taffeta, and my B and T red shoes.  Somehow, both accessories just seem to coordinate so perfectly with every outfit.  I especially love wearing them together!

"Williamsburg" WCR 1780 reproduction cotton print gown

A set of removable windowpane checked white linen ruffles - part of the suit of kerchief, apron, and ruffles - are basted into the sleeves.

"Williamsburg" WCR 1780 reproduction cotton print gown

In the pictures, I have the gown drawn up through two sets of interior loops and ties to create a double draped look, giving a bit of extra body to the skirts.  This feature it copied from the original inspiration gown.

"Williamsburg" WCR 1780 reproduction cotton print gown
 
These ties can be easily let down to allow the skirt to hang free.  Next time I wear the gown, I'll be sure to get a view of the back left undraped.

"Williamsburg" WCR 1780 reproduction cotton print gown

Many more photos can be found in this project's flickr set.  Stay tuned for a Threaded Bliss Postscript for more variations on this outfit soon!

"Williamsburg" WCR 1780 reproduction cotton print gown

Thursday, November 14, 2013

The B&T Workshop Marathon Concludes with a Weekend of Riding Habits!

Last weekend was the second and final workshop in the Burnley and Trowbridge fall workshop series.  Both Ashley and I have been very eagerly anticipating the chance to do a riding habit workshop for years now, so when the opportunity finally came up, of course we couldn't resist!

The decision to go was also motivated by the fact that we both already had pre-purchased fabric, so technically (ahem...) there wouldn't be the added expense of needing to purchase materials.  Back in 2010 at Brandywine, I found some green worsted wool at B&T and bought it specifically for the purpose of making a habit - the habit below, to be precise!  It's been maturing in The Stash ever since, awaiting the day when it could be brought to life, and I'm tickled to death at how close it's going to look once it's finished!

My riding habit inspiration image: Jane Maxwell Gordon, Duchess of Gordon,
painted by Daniel Gardner circa 1775.
Image linked from wikipedia.

Ashley also already had some wool gracefully aging in The Stash, set aside for this express purpose.  A couple of years ago, she found a rich chestnut brown worsted at B&T and snapped it up with a habit project in mind.  Not too long after, though, she stumbled across a small piece of a gorgeous red silk velvet and decided it would be perfect as cuff and collar accents on a black habit, so she got some black worsted as well.  Finally forced to make a choice as to which color would become her first riding habit, she ended up selecting the chestnut at the last minute, and I think she was most pleased with that choice in the end.

P1080381
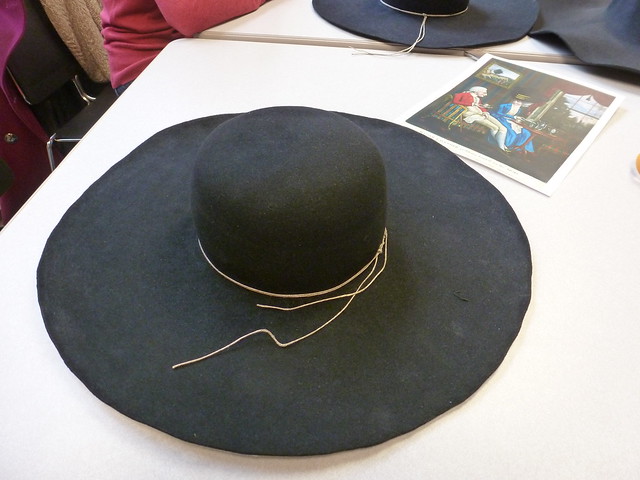
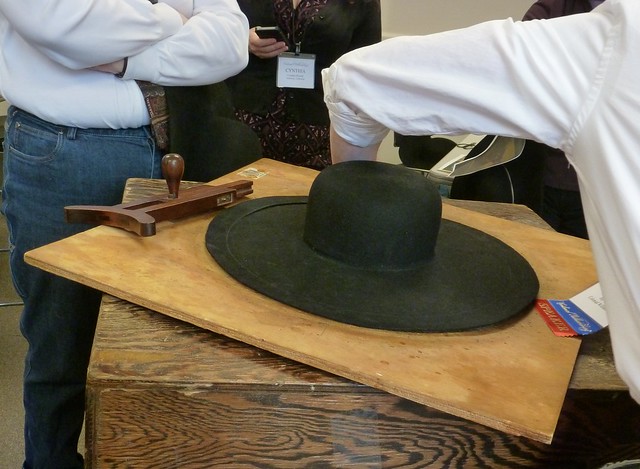
Some of the goodies created by the CW tailors, laid out at the workshop for our inspiration.

P1080383

P1080414

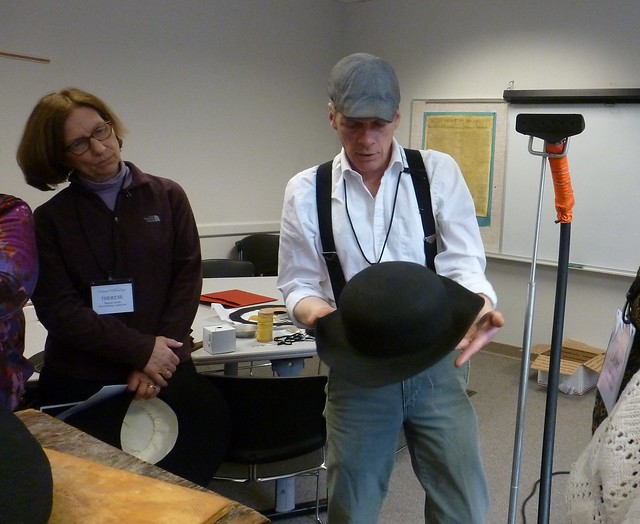
Our weekend of fun with riding habits began last Friday afternoon with a fantastic lecture by CW tailor Mark Hutter.  Mark used a rich and comprehensive collection of period images to lead us on a fascinating journey of the evolution of female riding attire from the seventeenth through the early nineteenth centuries.  Talking through changes in cut, fit, style, trim, and regional differences, we learned how to "read" and date habits by deciphering the clues found in these details.  We also discussed common habit textiles and colors and even addressed fashions in head wear and footwear.  Before the first session concluded, our instructor demonstrated the process we'd undertake the next morning: the draping of the habit waistcoat.  I even had the pleasure of playing model for this first demonstration!  :-)

B&T riding habit workshop, November 2013
Behind the scenes at a B&T workshop!  Here's Angela in
the process of uploading one of her "live" Facebook updates.

B&T riding habit workshop, November 2013
Beginning to look like a waistcoat, eh?  No, this wasn't my
waistcoat fabric, but I really liked it and wanted to keep it!!

B&T riding habit workshop, November 2013
The back of the waistcoat.

When we arrived on Saturday morning, we thus went straight to work pinning and smoothing and tucking waistcoats on each other.  Ashley and I and our friend Lily were grouped together as draping buddies, and we all agreed that having that third set of eyes was infinitely more productive and helpful than just being paired off in twos; when one of us forgot a step or needed an extra hand to help wrangle fabric, the other was there ready to help.

P1080388
Ashley and Lily helping out (and getting a bit more practice!)
by draping the back of another participant's waistcoat.

As we proceeded step by step with the process throughout the morning, Mark paused to review and re-demonstrate.  For those of us "raised" on the techniques of the mantua maker, forcing the brain and the hands to act instead like a tailor was a bit of a challenge, so the constant reminders as we went along were prodigiously helpful.

P1080391
Mid-morning waistcoat front draping reminder...

P1080407
...which was concluded around lunchtime with the re-demonstration of the final step.

It took us most of the day to perfect our waistcoats.  This was crucial because our waistcoats would also serve as the patterns for our habit coats, so achieving the perfect fit the first time around was essential before we could proceed.  Once Mark was satisfied that we were each meticulously fitted, our attention turned to the acquisition of yet another new skill as Mark instructed us in the art of transforming our three-dimensional draped waistcoats into flat patterns that would be used to cut our coats.  Homework that night was to cut and baste our waistcoats and coats for a further fitting the next morning.

P1080439
Learning how to transform our three-dimensional draped waistcoats into flat patterns.

P1080449
These flat patterns will be used to cut both our waistcoats and our coats.

With all the pieces (mostly!) together, Sunday morning was spent trying on and tweaking the fit of everyone's waistcoats and coats.  This got a little complicated because it involved remembering we needed to adjust seam allowances to be sure there was sufficient overlap for buttons - something we mantua-making ladies have never needed to consider before!

P1080473
Checking and tweaking the fit of the basted coat.

P1080521
Lily and Ashley checking the fit of Ashley's coat over her waistcoat.

Then we moved on to patterning our sleeves, which introduced yet another new set of skills to learn because, like good tailors, we were working off patterns and using measurements, rather than draping directly to the shape of the body.  We learned how to take a tailor's measure of our key arm measurements (snipping that strip of paper brought back fond memories of the stays workshop oh so long ago!) and how to apply those measurements to adjust a sleeve pattern in the flat patterning stage.

P1080492
Learning the tailor's techniques for measuring for a sleeve.

P1080501
Applying our measurements to a sleeve pattern.

P1080523
Measuring Ashley for her sleeves.

After basting our sleeves together, our final bit of instruction was in how to fit the sleeve to the coat body.  We each got at least one sleeve attached by the end of the day and strategically posed for our traditional end-of-workshop picture being careful to reveal only that one be-sleeved arm!  ;-)

P1080555
Ashley being prodigiously diligent working on her sleeve pattern.

P1080560
Fitting the first sleeve onto the coat body!

If you couldn't tell from the pictures we posted on Facebook, we had a splendid time and thoroughly enjoyed every bit of the weekend!  The group dynamics between all of the participants was the best we've ever experienced, and we all indulged in lots (and lots) of laughter as we learned and sewed together.  To Mark goes an immense amount of thanks for tolerating all our giggles and general hilarity, and an even greater appreciation for showing such dedication in teaching us, even to the point of taking hours of extra "over-time" to be sure we left with all the information we needed to complete our projects.  And thanks go, too, as always, to the lovely folks at Burnley and Trowbridge for yet another most excellent workshop experience!  You guys are the best and we're already eagerly anticipating the spring series announcement!

P1080563
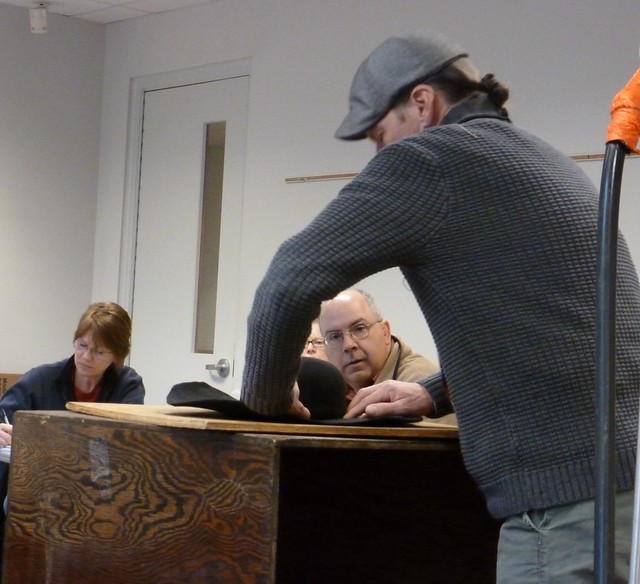
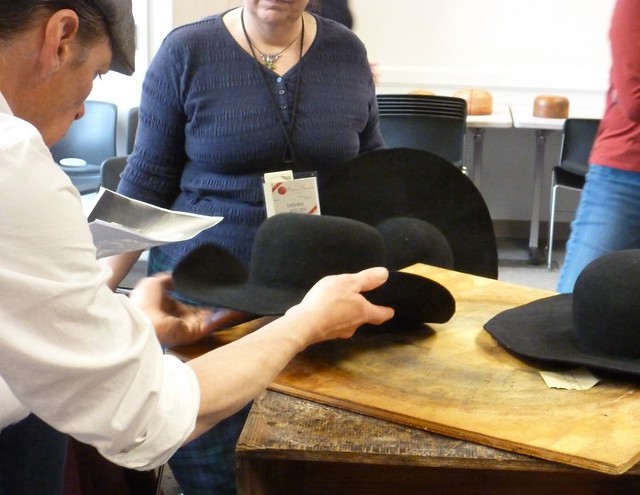
Historical accuracy is a hallmark of all B&T workshops and is strictly
observed at all times.  Well, just about... ;-)

Additional photos from the workshop can be found on Burnley and Trowbridge's Facebook page and in our habit workshop set on flickr.  If you're interested in participating in a spring workshop, keep checking back on B&T's website for updates!

Monday, November 4, 2013

B&T Sacque Jacket Workshop

When Burnley and Trowbridge posted their fall workshop schedule several months ago, I was ecstatic to find that both workshop weekends were going to be held back-to-back.  Not that any kind of persuasion would have been required to convince me to do both, but since I already had the fabric for both projects, that just made it so much easier to excuse the indulgence somehow...;-)

The first workshop, which concluded yesterday afternoon, focused on sacque jackets.  Ashley opted not to do this one because she'd just attended the Threads of Feeling conference the week before (her post about that is coming soon!), so this was the first time I went into a workshop without my trusty fitting buddy.  I missed her and it just wasn't the same without her, but I promised her that I'd console her for having to miss out by making her her own sacque jacket for Christmas.  She's in the process of choosing fabric now, so stay tuned for that!

B&T sacque jacket workshop November 2013
Our end goal for the workshop: a sacque jacket.  This is the back of one recently
constructed by the ladies of CW's Margaret Hunter Shop.  That fabric is to die for.

Our workshop was led by the incomparable Janea Whitacre, mistress of the Margaret Hunter Shop at CW, and one of her apprentices, Sarah.  The ladies began on Friday afternoon with a brief lecture about the sacque jacket and its evolution through the second half of the 18th century.  Like the full-length sacque gown and the fitted-back English "nightgown," the sacque jacket enjoyed a surprisingly long period of fashionability across almost four decades.  Using images of extant originals and period prints and paintings, Janea and Sarah explained the stylistic differences between earlier sacque jackets and later ones; all of these would be options for us throughout the weekend as we worked on fitting and customizing our own projects.

B&T sacque jacket workshop November 2013
Sarah using a demonstration piece (modeled by Abby!) to outline
the steps of the construction process we'd be learning.

The remainder of Friday was spent cutting our back pieces and learning how to create the signature pleats that define the sacque style.  We also draped sleeves (I'll take all the practice I can get when it comes to those!).  Our homework that night was to finish up our back pleating and have our sleeves completed in preparation for continuing on to the next steps the following morning.

B&T sacque jacket workshop November 2013
Beginning the backs with the lining...

B&T sacque jacket workshop November 2013
...which is then used to cut the back piece.

B&T sacque jacket workshop November 2013
Demonstrating how to lay the back pleats.

B&T sacque jacket workshop November 2013
My back piece all pleated and pinned and ready to be sewn.

Saturday was a very busy day.  We began by choosing our individual front closure details.  Both I and my fitting partner elected to do ours in the later polonaise style with the fronts of the jacket falling away to reveal a stomacher beneath. 

B&T sacque jacket workshop November 2013
Fun with stomachers!

After patterning our stomachers, we moved on to draping the front of the jacket and then learning how to fit the outer fabric onto that draped lining to create the cute little flared shaping of the jacket's skirts.  Our final step on Saturday was to fit the fronts to the backs, and it was so exciting to see everyone's jackets beginning to take shape.  We all had jacket envy for each other as we walked around the room admiring all of the different fabrics and personalized styles.

B&T sacque jacket workshop November 2013
Draping the front lining...

B&T sacque jacket workshop November 2013
...and cutting it out...

B&T sacque jacket workshop November 2013
...and conforming it to the shape of the body.

B&T sacque jacket workshop November 2013
One side of my jacket's front waiting to be attached.

B&T sacque jacket workshop November 2013
Fitting backs to fronts.

B&T sacque jacket workshop November 2013

By Sunday morning, everyone arrived with fronts secured to backs, all ready to finish the shoulder straps and then begin to set the sleeves. 

B&T sacque jacket workshop November 2013
My jacket as of Sunday morning, finally looking like a jacket!

This is always the spot where my confidence begins to drop; sleeves and I have never been bosom buddies, and it always takes me forever to get to a point where I'm satisfied (but never completely happy) with them.  This experience proved no different, though I'm always glad to have the additional practice and the chance to ask lots and lots of questions and have expert eyes to guide mine as I go along.

B&T sacque jacket workshop November 2013
Setting sleeves.

B&T sacque jacket workshop November 2013
The back of Sarah's jacket.  Ooooo, so pretty!

What made this workshop even better than the others we've done in the past was that Janea and Sarah decided to sew along with us and make Sarah a jacket in "real time."  This meant that with each step, their own piece was in the same place as ours, so we could see how everything went together and what little trouble spots we might encounter as we went along.  And I think Sarah was just as tickled about her new jacket as the rest of us were about our own!  The blue and white checked taffeta she and Janea used made the most adorable jacket, and I look forward to seeing it finished and trimmed!

I didn't get a picture of my jacket with the sleeves attached, but there is a group shot that includes it in its workshop-ending state on Burnley and Trowbridge's Facebook page.  If you're interested in seeing more step-by-step pictures, there are more on their page and also a bunch on the Margaret Hunter Shop page as well.

All that's left to be done on my jacket now are to finish sewing in the sleeves, to finish the hem, and to apply trim to the front and hem and to the sleeves.  I'm also about half-way done with the trim for the petticoat.  I think this jacket is well on its way to being my new favorite outfit.  It's just so pink and puffy and pretty and girly and the style is so stinkin' cute!  :-)  Many many thanks to the folks at B&T for putting together yet another brilliant weekend, and to the Margaret Hunter ladies for sharing their expertise and guidance.  I can't wait to see what they cook up for us for the next workshop season!

With three days now until the riding habit workshop, I'm going to challenge myself to see if can finish this before that next big project begins!  Wish me luck!!!