For those of you in need of a new wardrobe for the campaign season, we currently have listed on Ebay three of our earliest 18th century creations.
The first is Ashley's first "Costume Close-up jacket," the first completely hand-sewn jacket I ever made, and the first project I created using a scaled-up pattern from an original garment. For more on the jacket's fabric and construction details, check out its previous Threaded Bliss posts here and here. Clicking on the image below will bring you to the current Ebay listing, which includes condition and measurement details.
The second item on offer is Ashley's sea green fitted-back gown. Like the jacket, this garment, too, represents multiple firsts for us. This was the first gown I'd sewn completely by hand, and this was the first petticoat Ashley ever completed by hand. This is also the first gown I draped from start to finish. I'd purchased the fabric on sale, and Ashley fell in love with the color and wanted it, so I decided it was time for an experiment. I started pinning and folding and cutting and pleating and trimming, and taught myself to drape in the process, and she ended up with this gown, which remained her favorite for years. The original post on it can be found here, and the picture below will link you to the Ebay listing. Measurements and condition details can be found there.
The third item is another gown, the first I ever made completely by hand for myself. It's made of a beautiful medium-weight dark indigo wool that has a lovely heavy drape to it that helps give the gown an ideal period shape. I wore this gown only once (to what was probably the hottest reenactment we've ever been to) and realized only long after the fact that I never even got a picture of myself wearing it, which is why it never got its own Threaded Bliss treatment. Ah well, that makes it perfect to pass on to someone else, who will be able at long last to give it an identity. :-) The listing is linked through the picture below.
If you'd like any additional details or pictures of any of these items, please let us know and we'll be happy to share them. We very much hope these will go to good homes and be used and loved for many years to come!
Showing posts with label Costume Close-up jacket. Show all posts
Friday, April 25, 2014
Tuesday, July 16, 2013
Threaded Bliss
A Blue and Red Dutch Chintz Jacket,
1775-1785
Colonial Williamsburg, June 2013.
This jacket was a Christmas gift for Ashley (well, she bought the fabric and I supplied the sewing!) and she's worn it numerous times since then, but it was only a couple of weeks ago that we were able to get pictures of it. I have to say that I think it's one of my favorites of all our projects thus far.
The pattern: The style of this jacket should look quite familiar by now! This is the "swallowtail" jacket from Colonial Williamsburg's collection (CW acc. no. 1962-259) patterned by Linda Baumgarten in Costume Close-up, pages 39-42. I used the pattern a couple of years ago for Ashley's "Wetherburn" jacket and then again more recently on my own blue chintz jacket, but we both like it so much that when Ashley ended up needing some new clothes, we immediately went to this old standby to ensure a quick, appealing, and well-fitting piece.
The original jacket in a study drawer at the DeWitt Wallace Museum.
Colonial Williamsburg, June 2010.
Inspirations: The red and blue colorway of this Dutch chintz was chosen to reflect the red and blue floral cotton print on the original jacket. This chintz is of a much finer quality than the original textile and the printing design correspondingly much more detailed, but the overall effect is quite similar.
The jacket with a stomacher.
Construction details: The construction specifics for this particular jacket pattern have already been provided in significant (three-post-long!) detail in the blue chintz jacket tutorial, so I won't waste space repeating anything here. If you haven't already seen it, you can access the complete tutorial here: part one, part two, part three.
Colonial Williamsburg, June 2013.
The fabric: A gorgeous Dutch chintz from Den Haan and Wagenmakers called "Wilhelmina." The jacket, like the original, is fully lined with off-white linen. The lacing holes are finished with silk button-hole twist.
Finishing the look: The other reason Ashley selected this particular colorway for this jacket is because it coordinates so nicely with multiple different petticoats and accessories we already had. In both incarnations, the jacket is worn over a shift, fully-boned stays, and a linen underpetticoat. To emphasize the blue in the chintz, she pairs the jacket with my blue stuff wool/silk petticoat and a hat trimmed with blue satin ribbon poofs. A bum roll helps the tails of the jacket drape elegantly, and a white neckerchief fills in the neckline. A white silk taffeta ribbon laces the stomacher in across the front.
A bum roll gives the back of the jacket the cute shape so
fashionable in the late 1770s and early 1780s.
To emphasize the red and pink in the print, Ashley wears the jacket with a rosey pink cotton petticoat the same color as my pink worsted gown and a coordinating wide pink ribbon on her cap. To give the outfit a slightly less "formal" look, she adds an apron made from the same white checked linen as the neckerchief and substitutes white cotton cording for the silk ribbon to lace in the stomacher. We unfortunately didn't manage to get any decent pictures of the pink version this time (it was the 4th of July when she wore it and SO hot!), so you'll just have to imagine the look for now and wait for a "Threaded Bliss Postscript" post next time she wears that outfit!
Colonial Williamsburg, June 2013.
When we discovered that my new pink worsted gown is identical in color to the petticoat Ashley wears with this jacket, we decided to wear the two outfits together during UTR and had a fun time photographing them together. We look a little too coordinated for 18th-century tastes, but the colors just looked so perfectly pretty together, so we did it anyway! :-)
Colonial Williamsburg, June 2013.
Additional pictures of this jacket can be found in this project's flickr set.
Thursday, May 31, 2012
A "Threaded Bliss" postscript
Costume Close-up Jacket in Blue Chintz,
1775-1785
1775-1785
Colonial Williamsburg, May 2012
Reading in the Governor's Palace gardens.
Colonial Williamsburg, May 2012
Exploring the kitchen of the newly reconstructed armoury site.
Colonial Williamsburg, May 2012
And just for fun...LIZARD!!! EEEEWWWW!!!!
Colonial Williamsburg, May 2012
Wednesday, May 23, 2012
A "Threaded Bliss" postscript
As many of you know, our Threaded Bliss series shares the construction details and final products of our sewing projects. We typically end each installment with a "Finishing the Look" section, which summarizes the accessories used to complete each outfit according to the demands of its specific historic period and the station in life/persona we intend it to represent. We all know how fun - and satisfying! - it is to make an old outfit "new" again with different accessories, so we thought it would be only fitting to update previous Threaded Bliss posts with postscripts to their original "Finishing the Look" sections whenever we "discover" a totally new look out of an old garment. So here goes the first one...
Finishing the look...continued...: For its initial wearings, Ashley wore the Wetherburn jacket paired with a brick red linen petticoat, red coral beads, and a hat trimmed with red satin ribbon to match. On our most recent trip to Colonial Williamsburg, however, she completely changed the color palate. Here, a teal linen petticoat picks up the blueish hue in the print of the jacket. A teal silk satin-trimmed straw hat (originally paired with her DAR cotton print gown) is substituted for the original red-beribboned hat. Completing the ensemble is a white self-checked linen neck handkerchief, worn tucked in front and hanging down in the back. As in the earlier photos in the previous post, the ensemble is worn over a linen shift, fully-boned stays, a linen underpetticoat, and a bum roll.
The Costume Close-up Jacket, 1775-1785
(aka The Wetherburn Jacket)
Finishing the look...continued...: For its initial wearings, Ashley wore the Wetherburn jacket paired with a brick red linen petticoat, red coral beads, and a hat trimmed with red satin ribbon to match. On our most recent trip to Colonial Williamsburg, however, she completely changed the color palate. Here, a teal linen petticoat picks up the blueish hue in the print of the jacket. A teal silk satin-trimmed straw hat (originally paired with her DAR cotton print gown) is substituted for the original red-beribboned hat. Completing the ensemble is a white self-checked linen neck handkerchief, worn tucked in front and hanging down in the back. As in the earlier photos in the previous post, the ensemble is worn over a linen shift, fully-boned stays, a linen underpetticoat, and a bum roll.
We fondly call this the "Girl at Well" pose, after the name of one of our
mother's Spode late-18th-century reproduction plates.
Colonial Williamsburg, May 2012
Enjoying the springtime gardens of CW.
Colonial Williamsburg, May 2012
And just for fun...napping on Palace Green after a long, hot day!
Colonial Williamsburg, May 2012
Friday, December 23, 2011
A "Threaded Bliss" Tutorial
Reproducing the Costume Close-up Jacket, 1775-1785:
A Step-by-Step Guide
Part Three
In the first installment of this tutorial, we covered fabric selection, enlarging the book pattern, and completing the sleeves. The second installment looked at assembling the bodice pieces and finishing the front, back neckline, and bottom edges of the jacket. This final installment concludes by focusing on all of the details you need to complete your jacket project, as well as your outfit as a whole.
Construction details: ...continued...
The Bodice: ...continued...
6) To finish the two slits at the front of the jacket, prepare two pieces of self-fabric binding. Cut two strips of fabric 1" wide and 10" long. Fold the strips in half lengthwise and crease to mark that measurement. Then, holding the fabric wrong side up, fold the sides in to meet that center fold mark and then fold the whole thing in half again, re-creasing the center fold. The creates finished edges that will bind the slits.
Folding the strips to create the binding for the front "slits" that
shape the front the jacket.
Begin attaching your binding at one end of the bottom of the slit, leaving about 1/2" hanging over the bottom edge of the jacket. Work the binding around the slit, carefully fiddling it into the top corner and back down around the other side. With the jacket laying right side up, fold the ends of the binding under, so that they cover the hem, and tuck them under the binding on the other side. Use a slipstitch or a plain hem stitch to tack down the binding on both the outer side and the lining side of the jacket. (#53-57)
7) Next come the eyelets down the front. The original jacket has ten eyelets on each side, though the line drawing in Costume Close-up only shows nine per side. I opted for eight in this project, though I did nine in the pink/green/yellow Indian print, and none at all on my first version for Ashley because she perferred the cleaner look of pinned-in stomacher, rather than a laced-on one. The long and short of it is that there is no hard and fast rule about the number of eyelets on any garment: even stays varied considerably from widely spaced lacing holes to very closely placed ones, and with a jacket, you have the option (as with a gown) to simply pin the stomacher, too. Look through some period images of jackets to get a sense of how fashions were trending as far as lacing spacing, and of what look you prefer, and also consider how high or low your waist is and what looks best with your own proportions when calculating the number of lacing holes. I don't think I'd go less than maybe 7 on each side and probably no more than 10 or 11.
Mark your eyelets on the lining side of the jacket, making sure they will lace straight and not spiral (as you would for stays. I haven't found an image of a spiral-laced jacket, but if anyone else has, do please let me know so I can correct this!).
Mark the placement of the eyelets on the lining side, down
both sides of the center front of the jacket.
Using an awl, proceed eyelet by eyelet, making your hole and then finishing it before moving on to the next. Use an overcasting stitch, rather than a buttonhole stitch, to make your eyelets and work though both layers. As you move on to the next eyelet, do not cut your thread; carry it from one lacing hole to the next, as this will help keep the threads strong. This technique was used in the original jacket, and you can see an excellent picture of it in Costume Close-up, pg. 42. (#58-60)
Setting the Sleeves:
1) Before setting in the sleeves, attach the front of the shoulder pieces with lapped seams. Fold under the seam allowance of the front (straight) edge of the outer fabric shoulder pieces, place them over the seam allowance of the top edge of the jacket fronts, and stitch them down using a spaced backstitch or plain backstitch (again, whichever stitch you've been using thus far).
Attach the shoulder piece at the front using a lapped seam (here, the
shoulder piece is at the bottom of the photo, with the body of the jacket at the top).
Then turn the jacket lining side up and do the same for the lining pieces of the shoulder, folding their allowances under and slipstitching them down to cover the backstitching you just did. (#61-63)
Completing the lapped seam for the shoulder pieces, folding under the
lining and slipstitching it into place.
2) Pin the sleeve into the bottom half of the armscye, positionng the sleeve seam so that it falls about 1" below the shoulder seam you just completed (**Note: this is where the sleeve seam falls in the original, and where mine fell as well, but yours might need to be different based on your own body type. The position of the sleeve within the armscye should be something you worked out in the muslin/patterning stage, but if it isn't, be sure you do that now before proceeding). Begin pinning at the sleeve seam and continue around the underarm area until you are within 1" of the top edge of the armscye on the back pieces. Backstitch - and here you have to use a regular backstitch for strength - the sleeve in between these two points, leaving the top shoulder part free. Repeat for the other sleeve.
Shoulders and Finishing the Neckline:
1) Put the jacket on over your stays and lace it closed. Pull only the lining part of the shoulder piece back to meet the top part of the back and pin it so it fits snugly. Once you get the fit, fold over the seam allowance of this lining piece along the neckline only. Backstitch the seam, thus compeleting the armscye and preparing the way to finish setting in the sleeve. Repeat for the other side.
If you have someone who can help you, they can stitch these seams without you having to remove the jacket, but if you don't have the extra set of hands, unfortunately you'll have to unlace and shed the jacket momentarily to sew your shoulder straps down before proceding. (**Note: the photos show this step and the next one being done on a dressform, but I do not recommend doing it this way because chances are the shape and angle of your shoulders change when you wear your stays, so the shoulder and sleeve cap will not fit correctly unless you fit them directly to your own body. I fit mine to myself and then switched the jacket to the dressform only so that I could get a good view for these pictures) (#64)
Pull the lining of the shoulder piece over your shoulder to meet the
back piece and secure it into place with backstitches. Before you sew the
seam, be sure you have folded over the seam allowance of this lining piece
along the neckline edge.
2) Put the jacket on again and lace it closed. Pin the sleeve head onto the lining piece of the shoulder, adding small pleats as necessary to make it fit your shoulder. Stitch down the sleeve head to the lining as close as you can to the edge of the sleeve to ensure that these stitches will not show in the next step. (#65-66)
3) This step can be completed on a dressform without compromising the fit, since you've already secured all of the necessary measurements. Pull the outer fabric shoulder piece to cover the sleeve cap and lining. Fold under its seam allowances on its remaining three sides and pin it into place. Using a spaced backstitch (or plain backstitch), sew down the shoulder piece where it meets the back and along the edge that covers the top of the sleeve.
A spaced backstitch secures the outer fabric shoulder piece to the
back and to the top of the sleeve.
Fold in the seam allowances of the remainder of the neckline on the two front pieces. Then, using le point a rabattre sous la main, finish the neckline from the back of each shoulder to the top of the fronts. (#67-68)
Using le point a rabattre sous la main, finish the remainder of the neckline
along the shoulder piece and down the front pieces.
Congratulations, you've just completed your own reproduction of "the Costume Close-up jacket"! If you do use this tutorial to create something, please send us a link and/or photo - we'd love to see what you make! And, as always, if you'd like to offer suggestions or corrections to any of these steps, I'm always happy and grateful to receive your input and advice. :-)
Optional - Making a Stomacher:
1) Because of the gap that remains when the original jacket is laced, Baumgarten speculates that a matching stomacher could possibly have existed. Of course, it is perfectly acceptable to lace your jacket over your bare stays with only a neck handkerchief filling in behind the laces. But just in case you'd like to make a stomacher, we'll cover that process here. It's really quite easy: with your completed jacket laced closed over your stays, meausure the width of the gap at the top and at the waistline. Also, measure from about 1/4" to 1/2" above the topmost lace (depending on how high your want your stomacher neckline to be) down to wherever you like your stomacher to end below your waistline. Add 3" to the width measurements and 1/2" to the length measurement. Using these measurements, sketch a stomacher shape onto a piece of linen lining. You can choose to make your stomacher with a pointed or rounded bottom; either is accurate for this period.
2) Cut out your stomacher in both linen lining and outer fabric. As you did to finish the ends of the sleeves and the edges of the jacket, turn the edges of both lining and outer fabric in towards each other, again allowing the outer fabric to be turned ever-so-slightly less than the lining so that it remains visible all the way around when viewed from the lining side of the stomacher. Using le point a rabattre sous la main, finish the edges of the entire stomacher, and you're done! (#69-72)
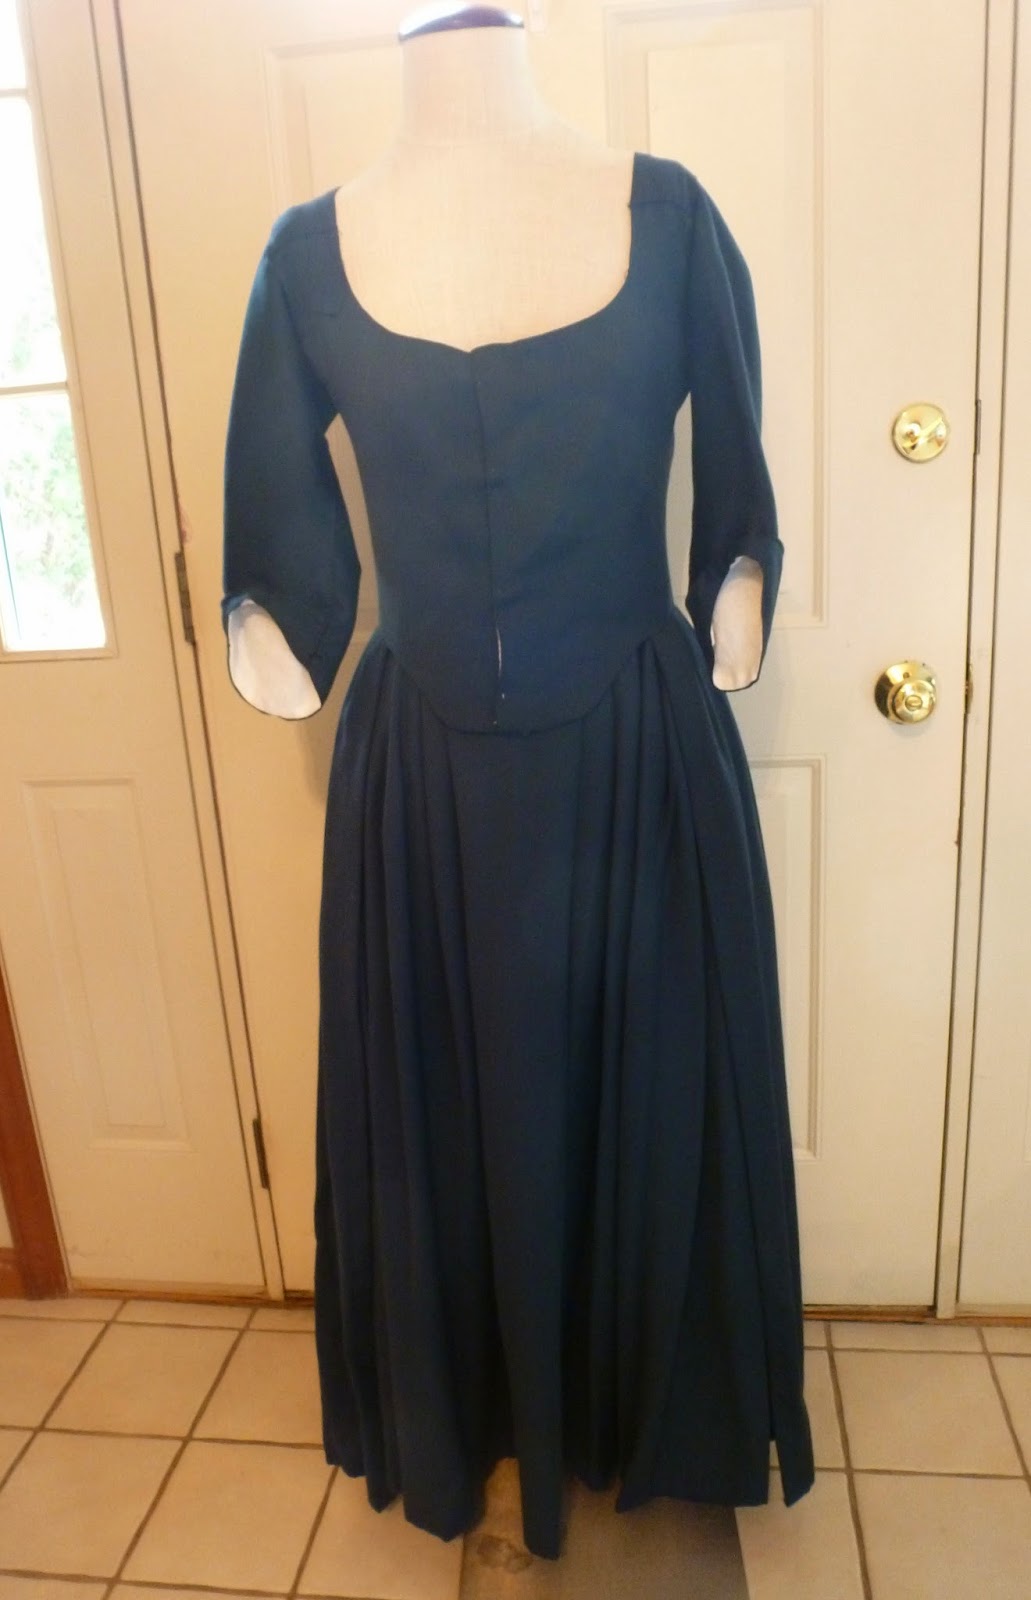
Finishing the look: As I mentioned in the first installment of this tutorial set, one of the things that makes a jacket like this so fun is how versatile it can be: an expensive cotton print can be dressed up with a silk petticoat for a middling- or upper-class "every day" impression, or dressed down with a linen petticoat for a "best" lower class look. My personal favorite choices with my jacket are the blue/ivory changeable silk taffeta pictured in several of the previous photos, and the ivory silk taffeta in the photo at right (sorry, I didn't get a more scenic one in that petticoat!). With both petticoats, I laced the jacket with ivory silk taffeta ribbon. I also have a blue stuff petticoat that coordinates with this jacket (which I haven't actually worn yet!); with something like a wool/silk blend, I could appropriately opt for either the silk ribbon or a "less formal" choice like a narrow cotton or wool tape or cording to lace the jacket.
In the pictures, I've added a cotton lawn neck handkerchief and a fine linen striped cap trimmed in ivory silk taffeta ribbon (the beautiful handwork of Mistress Nicole at Golden Hind Millinery, thank you again!), as well as pearl drop earrings (by Janice Erickson Smith) and a pearl necklace (by Ashley!) to complete the middling-class day wear look. As always, underneath are my 1780 Diderot stays and two linen petticoats.
The hat and muff featured in the "header" pictures of each of the installments were made to coordinate with this outfit, as I used the leftover bits of blue/ivory silk from my petticoat as trimmings. If you're curious about these accessories, check back for the next Threaded Bliss post!
Monday, December 19, 2011
A "Threaded Bliss" Tutorial
Reproducing the Costume Close-up Jacket, 1775-1785:
A Step-by-Step Guide
Part Two
The back of the jacket.
Photo taken at Colonial Williamsburg, December 2011.
In the previous installment of this tutorial, the background information of this project, as well as the steps detailing the construction of the sleeves, were outlined. Don't miss that post before reading this one! This second part of our Costume Close-up jacket tutorial will cover the construction of the jacket's bodice.
Construction details: ...continued...
The Bodice:
There are two possible ways to do the center-back seam of the jacket. One is as a lapped seam, which is consistent with the technique used in the side seams of the original. The other is as a plain, backstitched seam, pressed open, with the lining constructed separately and the two laid wrong sides together (more similar to a gown center-back seam, in other words). Costume Close-up does not specify which method was used for the center-back seam and my pictures of the extant jacket, alas, aren't conclusive, either. Either method would be acceptable, so choose which look you prefer. On my first jacket, I used a lapped seam; on the blue chintz pictured here, I opted for a plain seam. Below, I'll detail both methods so you can choose.
Option A: Lapped Seam:
1) For one side of the back pieces, baste the outer fabric and lining together. On only the outer fabric of the other back piece, fold under the center back seam allowance (and crease it, baste it, or pin it in place, whichever technique you feel most comfortable with).
Position both back pieces with the outer fabric right-side up. Place the single-layer outer-fabric-only piece over the center-back seam allowance of the basted piece. Use the seam allowance you've just folded to match up this center back seam. Then sew through all three (well, actually it's four if you count the fold as two) layers - the folded outer fabric, and the basted outer and lining piece - using a backstitch or spaced backstitch to complete this lapped seam. Use whichever stitch you used to sew the lapped seam of the elbow darts, so that all of the seams remain consistent throughout the jacket. Begin sewing about 1/2" down from the neckline.
Fold under the seam allowance of the remaining lining piece. Matching it up at all key points to its coordinating outer fabric piece, place it over the seam you just sewed and slipstitch it into place to cover and protect those stitches. Then baste the lining and outer fabric together along all of the other edges.
Option B:
1) On the wrong side of one of your back pieces (outer fabric only), mark the seam allowance at the center back. Then place the two back pieces - outer fabric only for each - right sides together and backstitch the two back pieces together along the allowance line you just marked. Press the seam open.
Repeat for the two back lining pieces, so that you now have two backs: one in the outer fabric and one in the lining.
Outer back pieces pinned together at center back, and lining pieces
pinned together at center back. The seam allowances are marked
on each to guide the backstitched seams.
Lay the outer fabric back over the lining back, wrong sides together, and pin them along the center back seam so that they do not shift and remain perfectly in line with each other. Using a tiny running or combination stitch, sew down the center of that seam to join the two backs together. Your stitches will disappear into the seam line. The pieces should be joined from about 1/2" down from the neckline to 1/2" above where the waistline notch mark is (be sure this mark is transferred from the original pattern!). Once this is finished, baste together the outer fabric and lining around the edges to fully join them together so they won't shift in the next step. (#26-29)
Joining the outer fabric back to the lining back along the center back seam.
The completed back seam!
That's it for the options. Now on to what we can confidently determine from the original jacket!
2) Baste together the outer fabric and lining pieces for each of the front/side pieces (wrong sides together). Along the side seams, make your basting stitches a couple of inches away from the edge. This will help with the next step: mark the side seam allowance on the wrong wide of the outer fabric and turn it under, clipping the corner slightly so that it lays flat. Be sure to turn under only the outer fabric! (#30-33)
Mark the seam allowance for the side seam and turn it under, clipping the corner.
Turn under the seam allowance of the outer fabric only.
3) If you chose Option A for Step 1, this part will sound familiar! Position one of the front pieces and the back piece right sides up. Lay the seam allowance of the front piece over the side seam allowance of the back piece, using the turned under seam allowance of the former to match up your edges. Pin it into place, being careful not to catch the lining of the front piece in this seam. Using a spaced backstitch or a regular backstitich (whichever you've been using), sew this seam from the very top down to about 1/2" from the edge of the bottom hem line. The seam should be sewn through three (or four, if you're being technical about it!) layers: the front piece's outer fabric (and the bit of it that's folded under in the seam allowance), and the back piece's outer fabric and lining.
Fold under the seam allowance of the front piece (outer fabric only)
and place it over the side-seam allowance of the back piece.
As you proceed around corners at the waistline, carefully work the fabric so that it lays flat as you sew. (#34-42)
Carefully maneuver the fabric around the corner, so that it lays flat.
Backstitch through the three (or four!) layers of the seam,
being carefully not to catch the lining of the front piece in this seam.
Repeat for the other side.
4) Flip the jacket so the lining side is up. Fold under the seam allowances of the front pieces' linings to cover the two seams you just sewed (again, clipping the corner slightly as necessary) and slipstitch them down. (#43-47)
Fold under the seam allowance of the front lining to cover
the seam you just sewed (clipping at the corner as necessary).
Using a slipstitch, secure down the front lining to the back lining,
being careful not to go through the outer fabric.
Again, sew from the top to 1/2" from the bottom - don't go all the way down!
The bottom 1/2" of this lapped seam remains unsewn for all layers.
This enables you to fold under each piece in the next step to finish the edges.
5) This step replicates what you did to finish the ends of the sleeves in Part One, Step 4. Fold under the seam allowances of both the outer fabric and the lining (i.e. fold them in towards each other, so the raw edges of each will be concealed) about 1/8"-1/4" down the straight fronts of the jacket (don't do the neckline curves yet) and all the way around the bottom skirt hem, over the points of the tails as well. Fold the lining in ever-so-slightly more so that the edge of the outer fabric peeks above it when viewed from the lining side of the sleeve.
Fold the lining and the outer fabric under (i.e. in towards each other).
The lining should be folded in ever so slightly more than the outer fabric,
so that the outer fabric is visible when viewed from the lining side.
Folding in the corners of the tails. The lining is treated the same way
and then laid down on top and finished in the same way as below.
Using le point a rabattre sous la main, the stitch illustrated by Baumgarten on page 8 and identified as having been used on the original jacket, finish all of these edges. When you get to the vent/slit marking at the bottom of the front pieces (make sure you've transferred these marks from the original!), stop sewing about 1/4" away from it. Tie off your thread completely; otherwise, when you cut the slits, you'll break the seam you're working on. Begin sewing again on the other side of the slit, again about 1/4" away from the marked line.
Do not sew over the mark of the front slits. Leave about 1/4" on either side of each
unsewn so that you won't snip your thread when you cut the slits later.
Then do the back neckline edge the same way. You only have to finish the top, curved edge of the joined back pieces - don't do the straight edges where the shoulder pieces will be joined. (#48-52)
Finish the neckline in the same way as above.
**Please note: The original jacket includes interfacing that supports the lacing holes at the center fronts. I have omitted this from my version for the simple reason that I have found the interfacing to be unnecessary in my previous project. I used it in the first version for Ashley, but then somehow just forgot about it in the Indian cotton jacket (that was a really quick project), and despite lots of hard wear in camp over the summer, the holes remain perfect without the added support from any interfacing (and both of my fabrics in that jacket are fairly thin). Because all of the pressure of body movement falls on your stays and not your outer garment, the holes will not pull or tear, even without the interfacing layer. All of that is just to say that in the case of interfacing, I have consciously diverged from the original, and the choice to do so on your own piece is, of course, yours. It is easily added in before you begin turning under your edges; the finishing technique will not change with interfacing sandwiched between the two layers.**
That's it for this portion of the tutorial. Up next will be completing the eyelets and those front slits, setting the sleeves, and finishing the shoulders and neckline. We'll also cover making up the optional stomacher.
Subscribe to:
Posts (Atom)