
Reproducing the Costume Close-up Jacket, 1775-1785:
A Step-by-Step Guide
Part Two
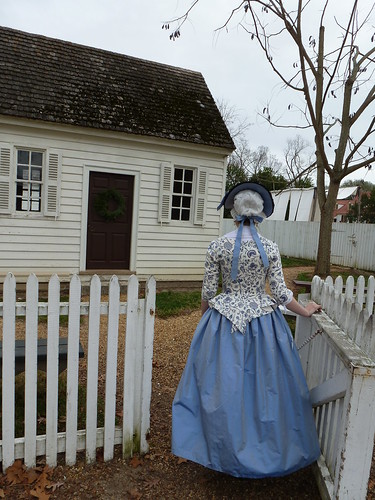
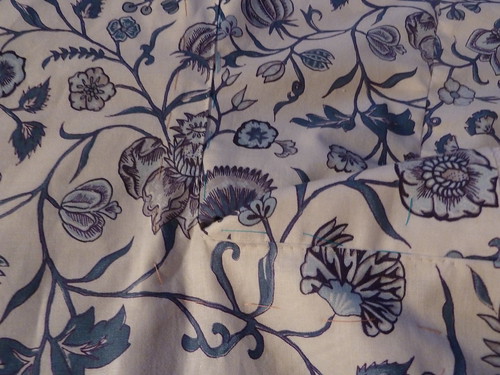
The back of the jacket.
Photo taken at Colonial Williamsburg, December 2011.
In the previous installment of this tutorial, the background information of this project, as well as the steps detailing the construction of the sleeves, were outlined. Don't miss that post before reading this one! This second part of our Costume Close-up jacket tutorial will cover the construction of the jacket's bodice.
Construction details: ...continued...
The Bodice:
There are two possible ways to do the center-back seam of the jacket. One is as a lapped seam, which is consistent with the technique used in the side seams of the original. The other is as a plain, backstitched seam, pressed open, with the lining constructed separately and the two laid wrong sides together (more similar to a gown center-back seam, in other words). Costume Close-up does not specify which method was used for the center-back seam and my pictures of the extant jacket, alas, aren't conclusive, either. Either method would be acceptable, so choose which look you prefer. On my first jacket, I used a lapped seam; on the blue chintz pictured here, I opted for a plain seam. Below, I'll detail both methods so you can choose.
Option A: Lapped Seam:
1) For one side of the back pieces, baste the outer fabric and lining together. On only the outer fabric of the other back piece, fold under the center back seam allowance (and crease it, baste it, or pin it in place, whichever technique you feel most comfortable with).
Position both back pieces with the outer fabric right-side up. Place the single-layer outer-fabric-only piece over the center-back seam allowance of the basted piece. Use the seam allowance you've just folded to match up this center back seam. Then sew through all three (well, actually it's four if you count the fold as two) layers - the folded outer fabric, and the basted outer and lining piece - using a backstitch or spaced backstitch to complete this lapped seam. Use whichever stitch you used to sew the lapped seam of the elbow darts, so that all of the seams remain consistent throughout the jacket. Begin sewing about 1/2" down from the neckline.
Fold under the seam allowance of the remaining lining piece. Matching it up at all key points to its coordinating outer fabric piece, place it over the seam you just sewed and slipstitch it into place to cover and protect those stitches. Then baste the lining and outer fabric together along all of the other edges.
Option B:
1) On the wrong side of one of your back pieces (outer fabric only), mark the seam allowance at the center back. Then place the two back pieces - outer fabric only for each - right sides together and backstitch the two back pieces together along the allowance line you just marked. Press the seam open.
Repeat for the two back lining pieces, so that you now have two backs: one in the outer fabric and one in the lining.
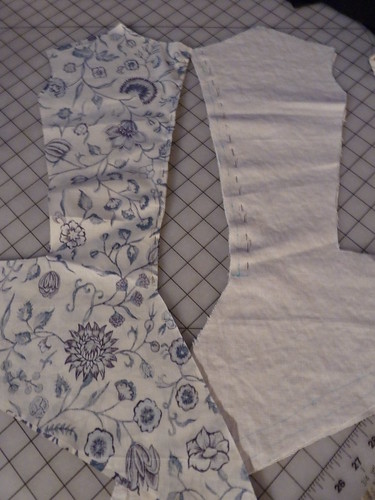
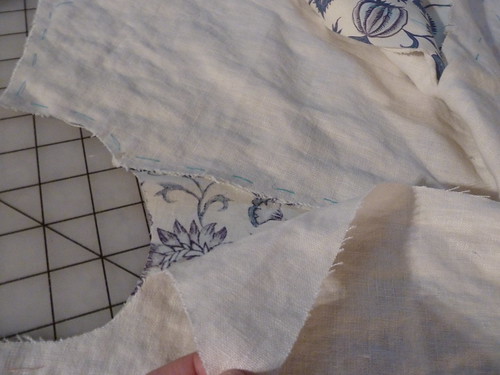
Outer back pieces pinned together at center back, and lining pieces
pinned together at center back. The seam allowances are marked
on each to guide the backstitched seams.
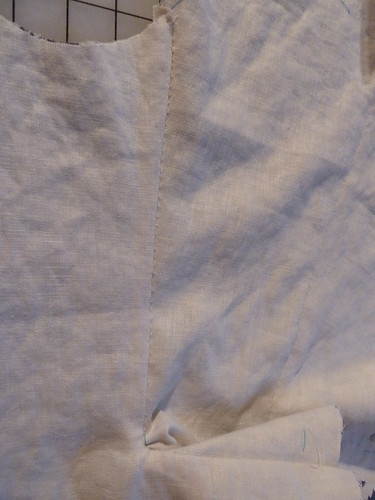
Lay the outer fabric back over the lining back, wrong sides together, and pin them along the center back seam so that they do not shift and remain perfectly in line with each other. Using a tiny running or combination stitch, sew down the center of that seam to join the two backs together. Your stitches will disappear into the seam line. The pieces should be joined from about 1/2" down from the neckline to 1/2" above where the waistline notch mark is (be sure this mark is transferred from the original pattern!). Once this is finished, baste together the outer fabric and lining around the edges to fully join them together so they won't shift in the next step. (#26-29)

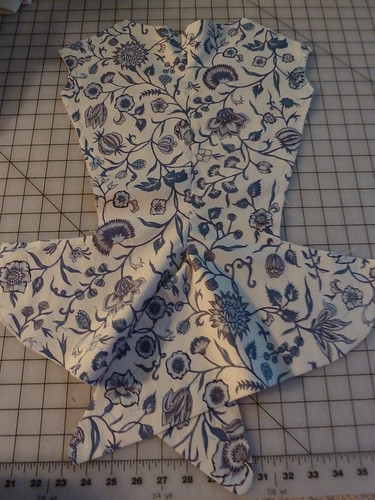
Joining the outer fabric back to the lining back along the center back seam.
The completed back seam!
That's it for the options. Now on to what we can confidently determine from the original jacket!
2) Baste together the outer fabric and lining pieces for each of the front/side pieces (wrong sides together). Along the side seams, make your basting stitches a couple of inches away from the edge. This will help with the next step: mark the side seam allowance on the wrong wide of the outer fabric and turn it under, clipping the corner slightly so that it lays flat. Be sure to turn under only the outer fabric! (#30-33)
Mark the seam allowance for the side seam and turn it under, clipping the corner.
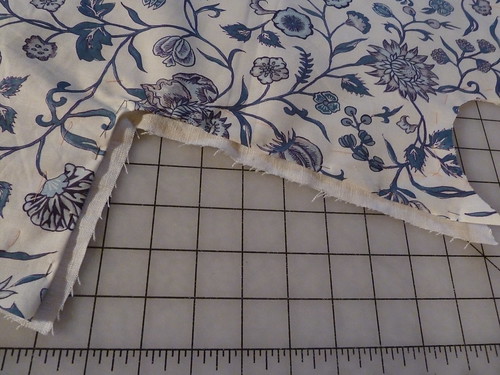
Turn under the seam allowance of the outer fabric only.
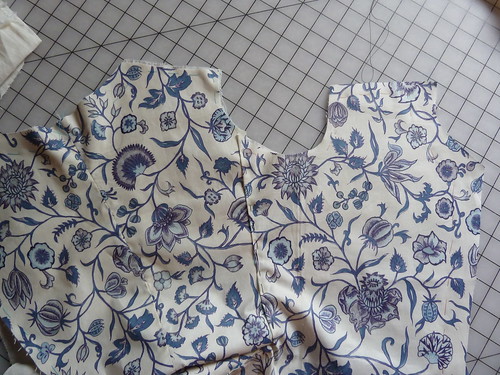
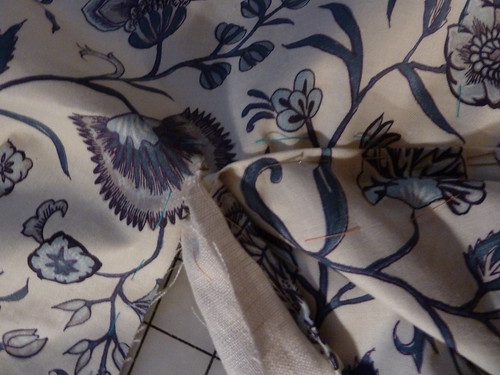
3) If you chose Option A for Step 1, this part will sound familiar! Position one of the front pieces and the back piece right sides up. Lay the seam allowance of the front piece over the side seam allowance of the back piece, using the turned under seam allowance of the former to match up your edges. Pin it into place, being careful not to catch the lining of the front piece in this seam. Using a spaced backstitch or a regular backstitich (whichever you've been using), sew this seam from the very top down to about 1/2" from the edge of the bottom hem line. The seam should be sewn through three (or four, if you're being technical about it!) layers: the front piece's outer fabric (and the bit of it that's folded under in the seam allowance), and the back piece's outer fabric and lining.
Fold under the seam allowance of the front piece (outer fabric only)
and place it over the side-seam allowance of the back piece.
As you proceed around corners at the waistline, carefully work the fabric so that it lays flat as you sew. (#34-42)
Carefully maneuver the fabric around the corner, so that it lays flat.
Backstitch through the three (or four!) layers of the seam,
being carefully not to catch the lining of the front piece in this seam.
A close-up of the spaced backstitch of the side seam.
Repeat for the other side.
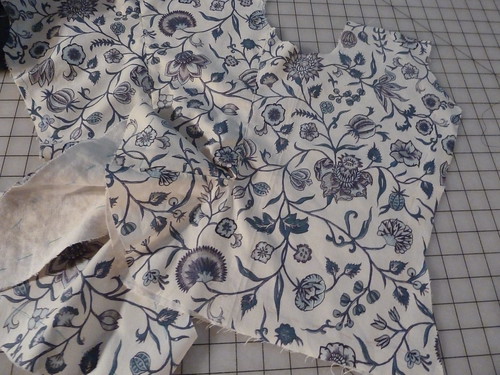
4) Flip the jacket so the lining side is up. Fold under the seam allowances of the front pieces' linings to cover the two seams you just sewed (again, clipping the corner slightly as necessary) and slipstitch them down. (#43-47)
Fold under the seam allowance of the front lining to cover
the seam you just sewed (clipping at the corner as necessary).
Using a slipstitch, secure down the front lining to the back lining,
being careful not to go through the outer fabric.
Again, sew from the top to 1/2" from the bottom - don't go all the way down!
The bottom 1/2" of this lapped seam remains unsewn for all layers.
This enables you to fold under each piece in the next step to finish the edges.
5) This step replicates what you did to finish the ends of the sleeves in Part One, Step 4. Fold under the seam allowances of both the outer fabric and the lining (i.e. fold them in towards each other, so the raw edges of each will be concealed) about 1/8"-1/4" down the straight fronts of the jacket (don't do the neckline curves yet) and all the way around the bottom skirt hem, over the points of the tails as well. Fold the lining in ever-so-slightly more so that the edge of the outer fabric peeks above it when viewed from the lining side of the sleeve.
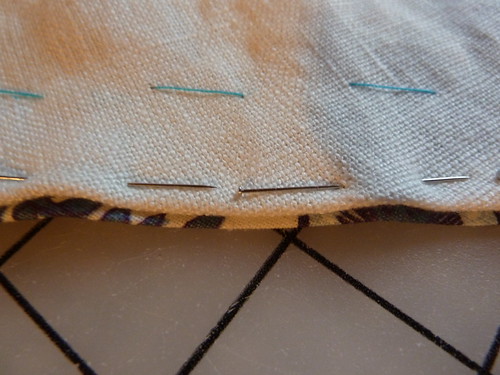
Fold the lining and the outer fabric under (i.e. in towards each other).
The lining should be folded in ever so slightly more than the outer fabric,
so that the outer fabric is visible when viewed from the lining side.
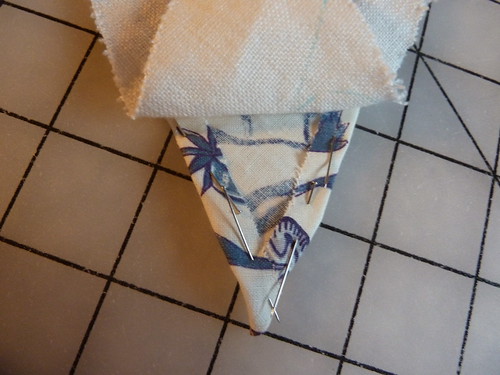
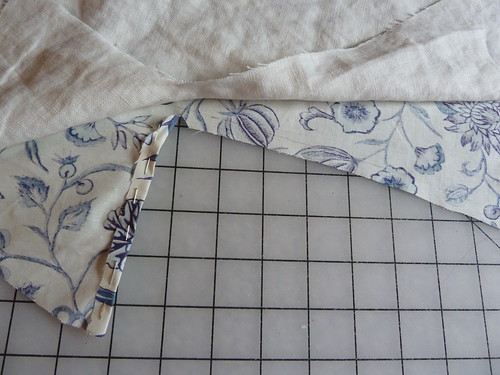
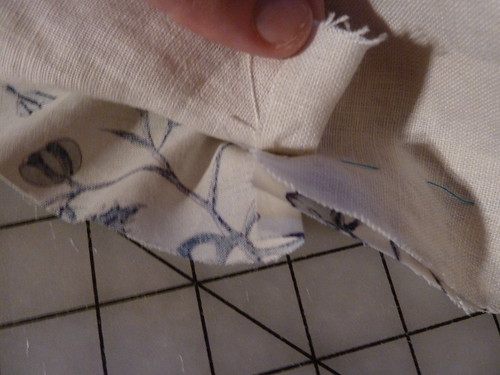
Folding in the corners of the tails. The lining is treated the same way
and then laid down on top and finished in the same way as below.
Using le point a rabattre sous la main, the stitch illustrated by Baumgarten on page 8 and identified as having been used on the original jacket, finish all of these edges. When you get to the vent/slit marking at the bottom of the front pieces (make sure you've transferred these marks from the original!), stop sewing about 1/4" away from it. Tie off your thread completely; otherwise, when you cut the slits, you'll break the seam you're working on. Begin sewing again on the other side of the slit, again about 1/4" away from the marked line.
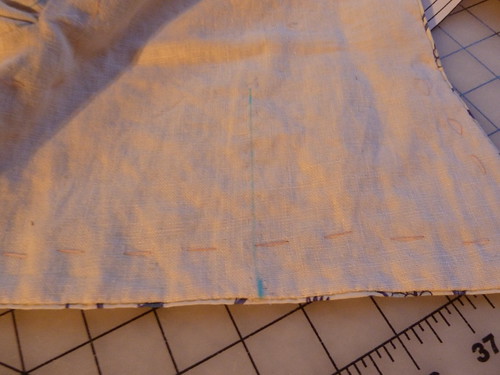
Do not sew over the mark of the front slits. Leave about 1/4" on either side of each
unsewn so that you won't snip your thread when you cut the slits later.
Then do the back neckline edge the same way. You only have to finish the top, curved edge of the joined back pieces - don't do the straight edges where the shoulder pieces will be joined. (#48-52)
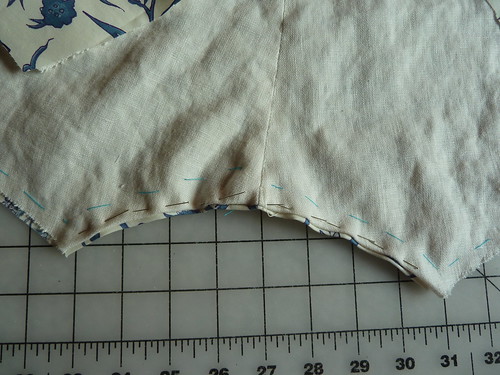
Finish the neckline in the same way as above.
**Please note: The original jacket includes interfacing that supports the lacing holes at the center fronts. I have omitted this from my version for the simple reason that I have found the interfacing to be unnecessary in my previous project. I used it in the first version for Ashley, but then somehow just forgot about it in the Indian cotton jacket (that was a really quick project), and despite lots of hard wear in camp over the summer, the holes remain perfect without the added support from any interfacing (and both of my fabrics in that jacket are fairly thin). Because all of the pressure of body movement falls on your stays and not your outer garment, the holes will not pull or tear, even without the interfacing layer. All of that is just to say that in the case of interfacing, I have consciously diverged from the original, and the choice to do so on your own piece is, of course, yours. It is easily added in before you begin turning under your edges; the finishing technique will not change with interfacing sandwiched between the two layers.**
That's it for this portion of the tutorial. Up next will be completing the eyelets and those front slits, setting the sleeves, and finishing the shoulders and neckline. We'll also cover making up the optional stomacher.
5 comments:
I'm going to highly recommend this web site!
I am truly thankful to the holder of this site who has shared this great post.
I blog frequently and i really thank you for your content.
The article has truly peaked my interest.
I do not know who you are but certainly you’re going to a famous blogger,
Post a Comment