Friday, November 30, 2012

Fashions from Godey's Lady's Book, May 1853

It's that time again! As we mentioned in the first post in this series, we recently stumbled across a bound volume of Godey's Lady's Book from 1853. Once a month, I'll post the collection of fashion-related plates and articles that appeared in each monthly issue. You can find the previous months here.

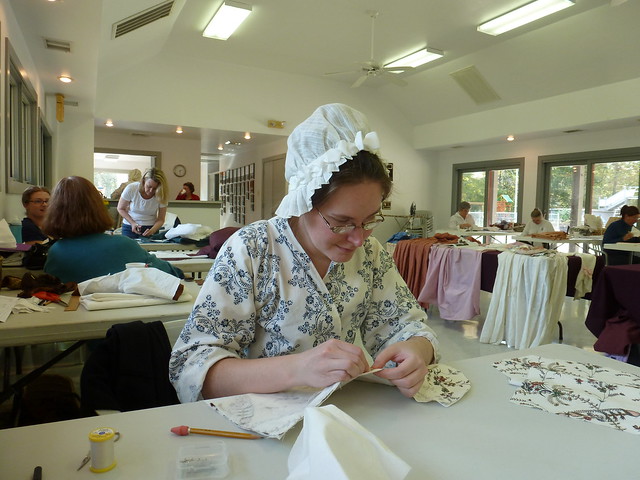
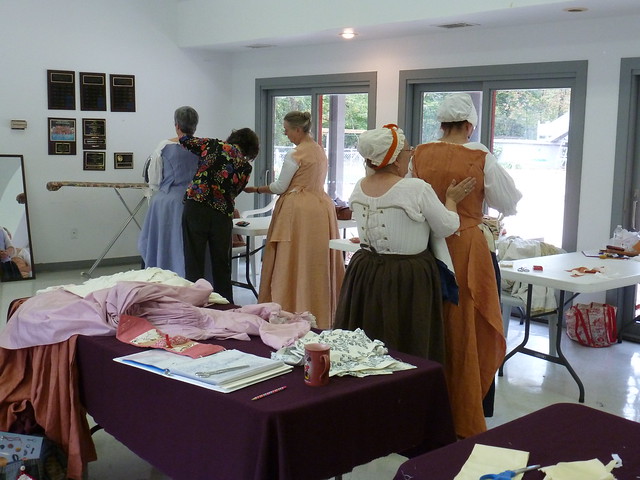
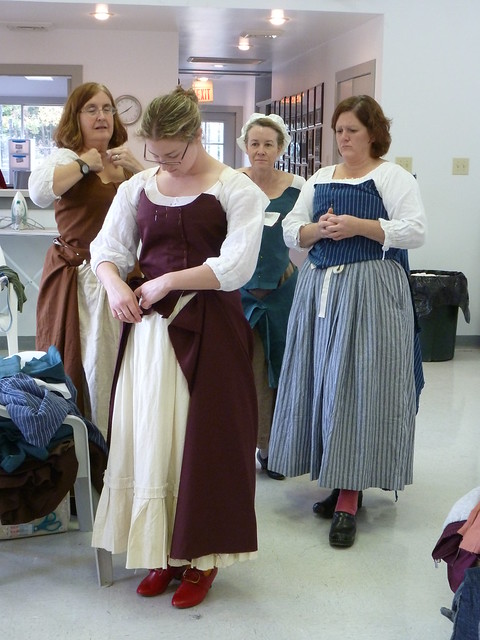
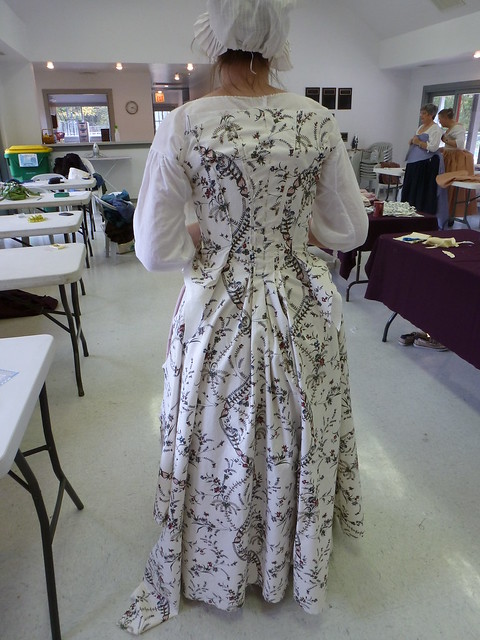
I apologize in advance for the quality of the images. Although I have a scanner, I've discovered that there's no way I can preserve the integrity of the already fragile binding of the book and lay it flat. That means photos are the only options, and even those are difficult to achieve because of the tightly bound pages. I've done my best to ensure that everything is as clear and visible and undistorted as possible, but if there's something you really can't read or see and would like to have clarified, just let me know and I'll see what more I can do. I've set the images up so that if you click on them, they'll link you to their flickr page, where you'll be able to enlarge them all considerably and thus more easily read each one. Enjoy!

Godey's Lady's Book, May 1853 1
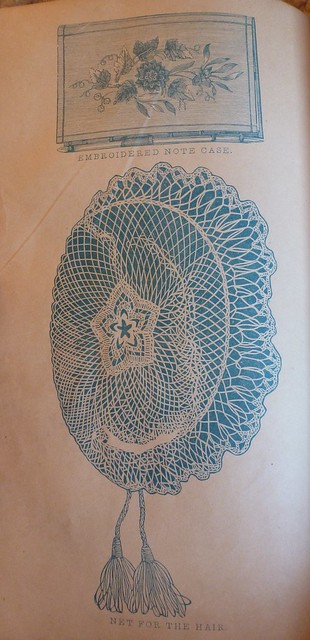
An embroidered note case and a hair net.  T
he pattern for the former is included in the fourth
image; the latter is in the seventh.

Godey's Lady's Book, May 1853 2
 
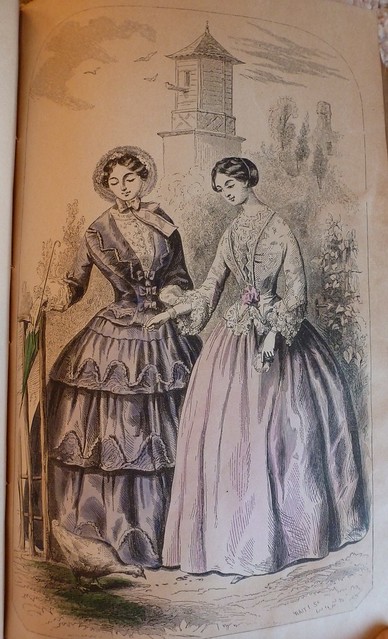
Fig. 1st. - Walking dress of violet-colored silk, the skirt trimmed with three graduated flounces.  The flounces are of moderate fullness, and edged by a trimming in scallops, they being inverted; that is, laid flat upon the flounce, instead of edging it.  The corsage is a basque and gilet, the first of silk, and trimmed to correspond with the skirt, having a rolling collar, and being fastened in front by three flat bows of thick satin-edged Mantua ribbon.  The vest, or gilet, comes close to the throat; it is of embroidered muslin, and fastened by small pearl or imitation opal studs, one in each scallop.  Bonnet of silk and crape a little lighter in hue, the brim is edged by narrow blonde and crape ruches, and ornamented only by a few white and Parma violets placed high up, and passing across the hair.  Small green parasol, lined with white Florence silk.
 
Fig. 2d. - Dinner-dress, the skirt of delicate rose-colored barege or mousseline, made full and plain.  Basque of white embroidered muslin, lined with very pale pink Florence silk.  Open in front, and edged by French muslin flouncing, in points of moderate width.  The sleeves are in a point on the forearm, and also edged with the flouncing, set on full like a ruffle, to avoid the necessity of under-sleeves.  Close chemisette of fine French work.  The back hair is arranged in a novel, yet classic and graceful style, smoothed into a broad band, which is upheld by a puff comb.  Front hair in light wavy bandeaux.  The whole dress is exceedingly simple and tasteful, the only ornament being a knot of rose-colored ribbon at the waist.

Godey's Lady's Book, May 1853 3
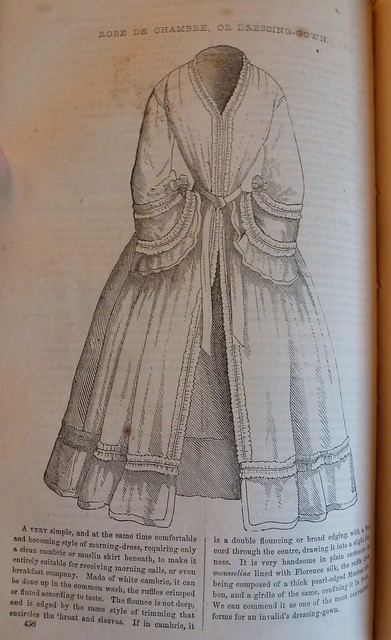
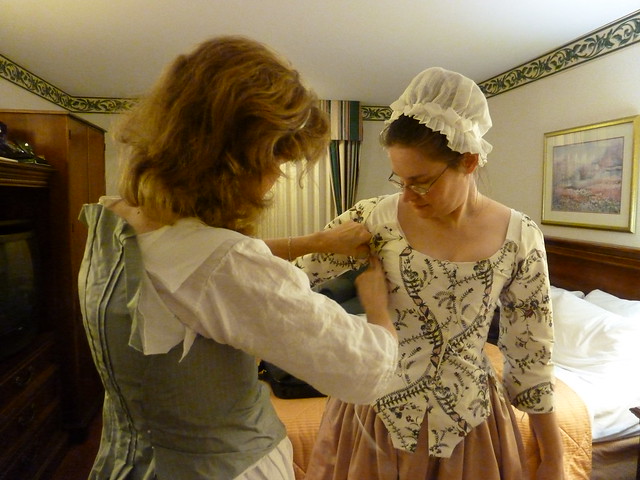
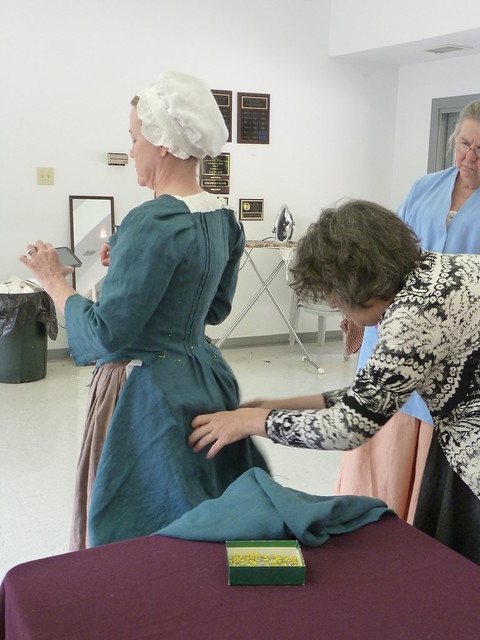
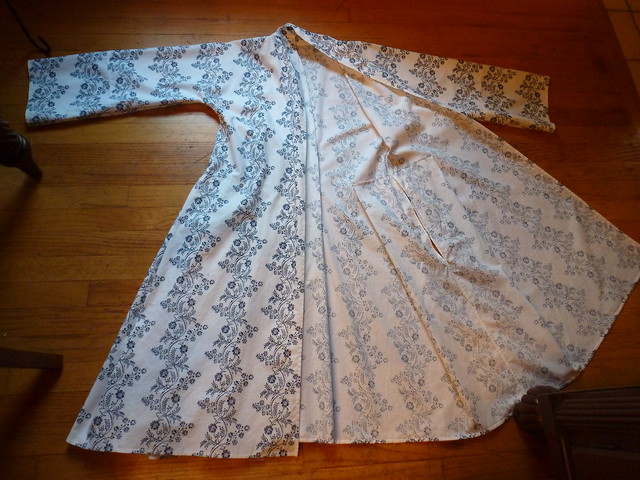
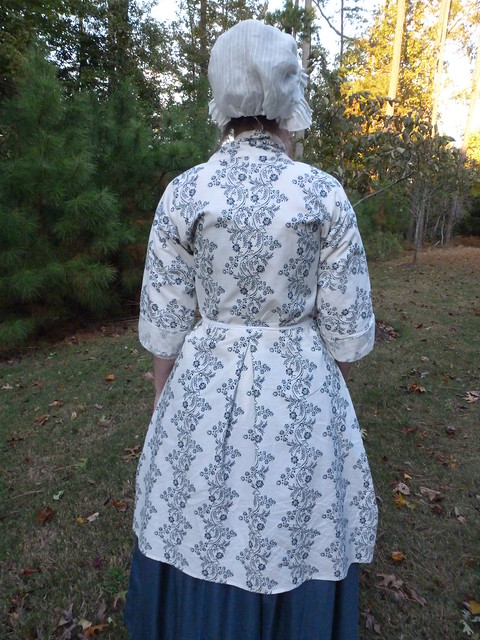
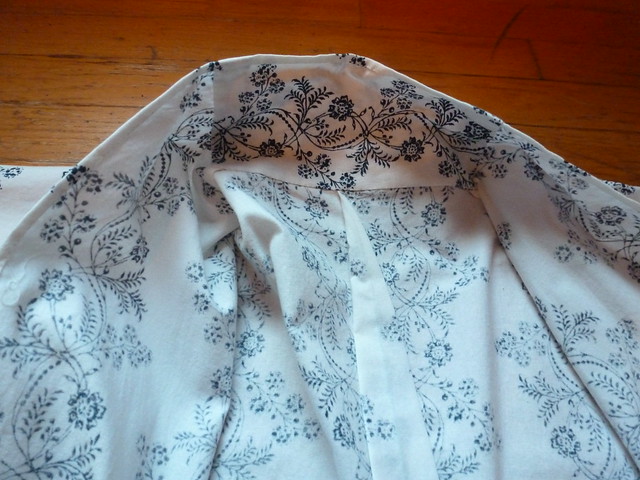
A dressing gown, to be made of white cambric.

Godey's Lady's Book, May 1853 4
Two bonnet-trimming ideas, one exterior and one interior.

Godey's Lady's Book, May 1853 5
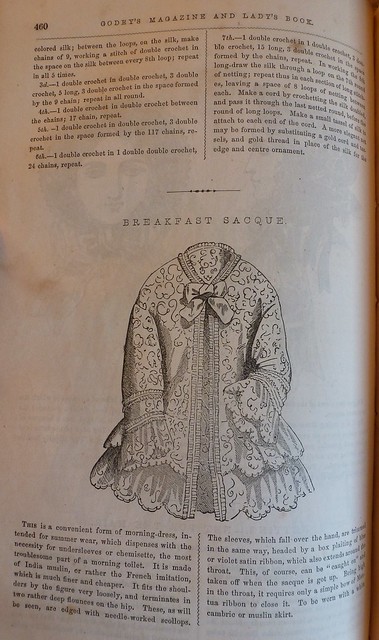
A breakfast sacque of India muslin, for use as
morning wear in the summer months.

Godey's Lady's Book, May 1853 6
The "Louisa mantilla," of a dark sea-green silk,
trimmed with matching scalloped ribbon and heavy fringe.

Godey's Lady's Book, May 1853 7
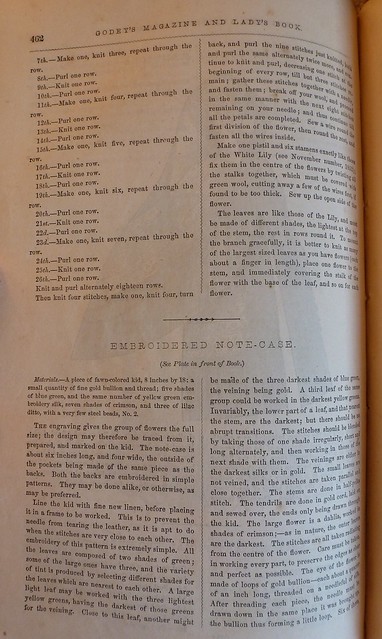
The end of the pattern for knitted flowers, and the
instructions for the embroidered note case in the first image.

Godey's Lady's Book, May 1853 8
Patterns for embroidery and braiding.

Godey's Lady's Book, May 1853 9
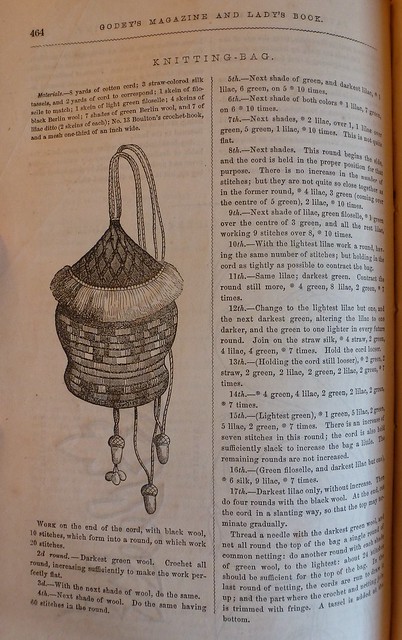
Pattern for a knitting bag.

If you'd like to use or re-post or share these images, you're certainly welcome to do so. The only thing we ask is that credit is given where due: please provide a link back to this blog with the re-posted picture. Thanks!

Tuesday, November 20, 2012

Encountering "Anna Karenina" on the Streets of NYC

Last weekend, I went with my mum and a couple of family friends to see the Radio City Christmas show in NYC, which is celebrating the 85th anniversary of the Rockettes this year (more on that - with some pretty cool costume pictures - in an upcoming post!).  After the show, we wandered around Rockefeller Center, previewing some of the window displays just going up for the holiday season.

As we strolled past Banana Republic on Fifth Avenue, this just happened to catch my eye:

P1040447

Does it look familiar?  It's the "poster gown" from the new Anna Karenina film, starring Keira Knightley and Jude Law!

Anna Karenina film poster.
Image linked from Just Jared.

The display included three costumes from the film: Anna/Keira Knightley's red gown, Vronsky/Jude Law's white uniform, and the gorgeous pearl grey ensemble with fur accessories below.  These are being showcased to complement and promote Banana Republic's new fall line, conceptualized by Anna Karenina's costume designer, Jacqueline Durran, and inspired by the 1870s-esque Russian fashions featured in the movie.

costume from "Anna Karenina"
Close-up of the bodice of the gown.  My apologies,
I couldn't get away from the reflective glare on the glass!

I haven't yet seen the film, but I've been following the tidbits trickling out about the costumes, and I have to say that I'm both intrigued by and incredibly skeptical about the approach the production has taken to its period setting.  Rather than doing a strict "costume drama" depiction of 1870s Russia, the film's designers elected to adopt a more interpretive stance, translating rather than transcribing the period fashions and sets to the screen.

Costume designer Jacqueline Durran wanted to represent the indulgent luxury of Anna's world in the character's dress style and appearance; as a member of Russia's social elite who moved in aristocratic circles, Anna Karenina kept abreast of the latest European trends.  Durran wanted to reflect Anna's height-of-fashion opulence in a way that would speak to both her unique identity as a nineteenth-century character, and as a technique to convey that chic luxuriousness to modern audiences.

Anna/Keira Knightley with director Joe Wright on set.  This is a
nice example of Durran's fusion of 1950s couture with the look
of the 1870s.  Does it work?  I'm not yet convinced...
Image linked from IMDB.

In an interview on the film's official website, she describes the thought process that justified her approach as follows:
"I thought that Joe [Wright]'s idea was genius because a lot of 1950s couture was itself looking back to an earlier time.  We looked at some images from the time next to fashion pictures from the 1870s and although there were eight decades apart, the two periods meshed together very well.
"We associate 1950s couture with chic elegance, and so this would be a signifier to the audience and a way in for them to the image Joe wants conveyed.  With Anna, I did keep an 1870s skirt shape all the way through - while pushing the bodices in the direction of the 1950s.  There is also a 1950s feel to several of the other costumes, such as Anna's gray silk jacket - it's very much a 1950s jacket shape, with buttons down the front, although even this is paired with an 1870s skirt."
(quoted from the official Focus Features website)
costume from "Anna Karenina"
Pearl grey jacket and skirt with fur accessories.  *sigh*

Durran goes to describe how the asymmetrical lines of a number of Anna's gowns (you can see it clearly in the red example here), along with their clever folding and draping of fabrics into elaborate necklines and bustles, were intended to pay homage to 1950s French couture, while keeping it in the restricted realm of being a clearly stylized element of an 1870s costume.  She also notes how she used color strategically throughout to reflect Anna's changing social and emotional status.  At the beginning, trapped in the stifling world of Karenin's social circle, her clothes exhibit a darker palate; as she falls in love with Vronksy and is swept into their whirlwind romance, the tone of her clothes becomes correspondingly lighter.  With the disintegration of her relationship with her lover, however, and her descent towards her tragic end, her outfits once more become somber, mirroring the intensity of her dark, brooding mood (this red gown, as you might expect, comes at the climax of the film).

costume from "Anna Karenina"
 
As I said, I have yet to see the movie, so I'm reserving judgment until I can see how these costumes work with the overall concept and look of the piece on screen.  These looks make my fashion heart go pitter patter, but my historical costume head replies with sadness at the lost opportunity for some pretty incredible truly accurate period pieces.  We'll see...
 
Has anyone seen the movie yet?  What did you make of the costumes?  Did you think the "fusion" of periods worked with the overall production?


Friday, November 16, 2012

Threaded Bliss

Blue-Green Worsted Stays, 1740-1760

P1040305

Perhaps you might recall this post, back in April of 2011, when we recounted our weekend spent at a Burnley and Trowbridge stays workshop.  Well, nineteen months later, I finally finished those stays!  I worked on them in fits and starts, sewing a panel here and panel there, boning a panel here and another there, and then putting them down for sometimes months at a time before picking them up again.  The announcement of the fall gown workshop, however, finally provided the motivation to finish them, which I miraculously managed to do a week in advance.  I'm so thrilled to have them completed, and even more thrilled by how comfortable they are!

The pattern: The pattern for the stays was taken directly from the infamous pink/lavender wool satin stays, dated 1740-1760, in the collection of Colonial Williamsburg (acc. no. 1966-188).

CW pink stays featured in Costume Close-up
Lavender (faded to pink) wool satin stays (acc. no. 1966-188).
On view at the DeWitt Wallace Museum at Colonial Williamsburg.
 
Mr. Hutter brought a vast array of show-and-tell materials, tools, and examples to the workshop.  Included was an exact reproduction of the above set of stays, made by the expertly skilled hands at the Margaret Hunter shop at Colonial Williamsburg.

P1040792
A reproduction of the extant stays above, produced by the
Margaret Hunter shop at Colonial Williamsburg.

Construction details: Every bit of these stays, including all of the channels, is sewn by hand.  Because this was a workshop project, I won't go into too much detail about the construction process, but here's a quick outline of how things went together.

The workshop was led by Mark Hutter, journeyman tailor at Colonial Williamsburg.  During the weekend, we learned how to take measurements using the tools and techniques of the eighteenth-century tailor and staymaker.  After choosing the stays pattern best suited to our body type (each pattern option was taken by the tailor off of originals in various museum and private collections), we applied these measurements to our pattern.

P1040851
Double-checking the fit at the workshop.  As you can see,
the sides met in the back, so I had some adjusting to do!

We cut and basted our panels together and then Mr. Hutter double-checked the fit, made adjustments, and sent us on our way to finish them.  Below you'll see the state of my stays at the end of the workshop weekend.

P1040817
A (upside-down!) glimpse of my stays on the final day of the workshop.

Each panel then had its boning pattern transferred onto it, and those lines sewn to create the channels. 

P1000832
All of the panels with their channels completed.

Then the panels were attached together and the stays were fully boned.  Believe it or not, it took me longer to bone than it did to sew the channels because I had to do so much smoothing and whittling to size my boning in order to get it to go into the channels.

P1030860
All boned and waiting to be trimmed...

The excess fabric was then trimmed from both inside and along the edges, and the leather welting and binding attached, and voila!  My stays!

P1040093
Edges and interior excess trimmed and ready to be bound.

I have not yet lined them, as you can see.  After all of this effort, I just didn't have the energy, and they're perfectly functional without it for now.  I already have the lining in my stash, though, so sooner (or later...!), I'll add it in.

P1040321
The completed stays.  They've already shaped themselves a
little after only a few days' wear, so they're really quite comfortable.

P1040330
Detail of the center front.

P1040332
Lots of backstitches!

P1040333
Back panels, with welting to cover the seams.

The fabric: A blue-green worsted wool from Burnley and Trowbridge.  The two interlayers that form the channels are linen.  The binding and welting is an off-white kid leather, also from Burnley and Trowbridge.  The boning is hand-pounded ash.

Finishing the look: The one thing - just one thing - that I would change about these stays is that the center front point should be a tad bit longer.  When I made my adjustments after the fit-check at the workshop, I took quite a bit of width out at center front and lost the space there to build in the necessary stomach-holding-in length.  I consulted Mr. Hutter about this issue, and we've remedied it nicely with the addition of a longer busk (which isn't in the pictures).  Next time, next stays, I know what to fix!  And yes, there will be another set of stays...:-)

P1040314
Center front.  The point should be just a tad bit longer.

The stays have an even 3" gap at center back.  This is a tad bit wider than the ideal gap, but still perfectly acceptable.  The goal is, of course, to get the sides parallel, and there was success there, so I won't let the extra bit of space bother me!

blue-green worsted stays, back
Back of the stays.  The tangled-looking tapes at the waistline
are the ties from my underpetticoat, not the lacing of the stays!

Stays are, of course, always worn over one's linen shift.  I also prefer to wear mine over an underpetticoat, just because that helps them sit more comfortably on my hips, but you certainly don't have to do things in that order; Ashley always ties her underpetticoat over her stays.

P1040317
Side view of the shape the stays produce.

P1040316
One side of the back panels.

Speaking of Ashley...now you all have to join with me in bugging her to get working more diligently on hers so she can finish them, too!

Additional photos can be found in this project's flickr set.

If you're interested in taking a stays workshop (and I highly recommend it!), visit Burnley and Trowbridge's website for the latest course listings.

Sunday, November 11, 2012

Burnley and Trowbridge Gown Draping Workshop

Last Friday, Ashley and I indulged ourselves with a weekend of pretty dresses, playing with fabric, and good company for Burnley and Trowbridge's latest gown-draping workshop.  We've been eagerly anticipating the opportunity to do a gown workshop for literally years now, but they've typically been held in the summer when neither of our schedules would permit us to attend.  This year's fall offering was a most welcome surprise and we jumped at the chance to go.  We were also thrilled that our friend Laurie was able to join us for the weekend of fun!

The workshop was led by Colonial Williamsburg's mistress of the trades of millinery and mantua-making, Janea Whitacre.  Janea arrived Friday morning looking like she just walked out of - you guessed it - Meet Felicity, so of course the entire room of ladies sighed and oogled her "Felicity fabric" gown.  What little girl at heart can resist that print?  Especially when at least two of us (ahem) in the room could very legitimately blame Felicity for our life-long obsession with history and historical fashion?  :-)

P1040157
Demonstrating the art of draping a sleeve.

Our first task, I was overjoyed to hear, would be learning to drape sleeves.  If you've read any of our previous "Threaded Bliss" posts, you know how much I struggle with sleeves, both patterning and setting them, and remedying that situation was one of the reasons I really wanted to take this workshop.  So here we are, diligently working on our sleeves...

P1040162
Ashley cutting her sleeves out.

P1040164
Me working on finishing my sleeves.

As you can see in the picture, Ashley chose to bring a gorgeous "bottle green" lightweight worsted for her gown. She's been saving it in her stash for a couple of years now, waiting to use it on the very first gown she'd make all by herself. I finally decided it was time to muster up the courage to cut into my stash of the CW reproduction print that's copied from the now infamous gown on pages 48 and 49 of What Clothes Reveal.  I'm so glad I saved it for a workshop rather than tackling it alone because Janea worked some serious miracles helping me figure out the ideal way to make this impossible print work.

P1040170
Discussing options and techniques for constructing the gown's back pleats.

Saturday began with finishing up our gown backs that we started the afternoon before, and then we proceeded to draping the bodice fronts.  Janea took a slightly different approach to the order of things this time around, opting to have us only concentrate on the top half of our gowns first, to be sure we'd have plenty of time to get adequate help with the perennial trouble spot of fitting shoulders and sleeves before the end of the weekend (I was so glad to know I'm not the only one wary of sleeves!).  This is why you see the bottom parts of our gown bodices not yet looking "normal" in most of these pictures!

P1040222
Draping buddies fitting bodice fronts to backs.

P1040220
Double-checking back symmetry.

P1040243
My gown as of Saturday afternoon!

Ashley doing my shoulder straps.
Photo very kindly taken and sent to us by Laurie.

Saturday evening, our homework was to work on shoulder straps and attaching our sleeves, so Ashley and I headed over to Laurie's hotel to see how far we could get.  More than slightly delirious from lack of sleep, that ended up not being very far at all...:-)...which was fine in the end because we had plenty of time the next morning to keep working and to get some extra help.  I still don't like sleeves, but I definitely feel much more confident about attacking them after all the guidance Janea gave on them throughout the weekend.  Laurie did a splendid job fitting mine, and I hope I was at least adequate in my efforts on hers!  :-)

P1040254
Saturday's late-night homework attempts.

Sunday, our final day, was spent finishing up sleeves, shaping the bodice along the waistline, and pleating in the gown skirts.  Neither Ashley nor I got that far, but we left well equipped with everything we'd need to finish on our own.  Many of the ladies were nearly done with their gowns by the end of the day; I was so impressed by their speed throughout the weekend, and their work came out so lovely.

P1040267
Finishing the waistline.

B&T gown workshop 11
Ashley attaching shoulder straps.

Although it was an incredibly busy weekend, it was certainly a productive one, and we're both eagerly anticipating finishing our gowns for upcoming holiday events.  Stay tuned for the finished products!  Many thanks again to Mistress Janea and the lovely folks at Burnley and Trowbridge for hosting yet another fantastic workshop.  We're already looking forward to the next one!

Additional photos from the workshop can be found in our flickr set.

If you're interested in participating in an upcoming historical fashion workshop, keep checking Burnley and Trowbridge's facebook page for the latest list of offerings and soon-to-come spring updates!

Monday, November 5, 2012

Threaded Bliss

Blue and White Cotton Print Bedgown,
1750-1790

P1040103

I've been meaning to make a bedgown for quite some time, for use at workshops and informal gatherings, but kept putting it off in favor of more "flashy" projects.  Last month, I just got one of those curious and pressing "must do it now before you lose the motivation" sewing project urges, so I went to the stash and rummaged around and pulled out one of last year's Colonial Williamsburg cotton prints and set to cutting.  It only took a couple of evenings to complete, and I love it!  I wore it for the first time the weekend before last for our Distaff Day and then again this past weekend at the Burnley and Trowbridge gown workshop, and it's so comfy!

P1040192

The pattern: Sketched and cut directly onto the fabric, based on the ubiquitous 1769 Garsault pattern, which is all over the internet, but also featured in Norah Waugh's Cut of Women's Clothes, 1600-1930, pgs. 108-9.

M. Garsault, Description des Arts et Metiers, 1769.
 
Waugh translates Garsault's written instructions as follows:
"The bed-gown (manteau-de-lit).  This is cut from two or four lengths of material according to the width.  The sleeves are cut en chemise, that is, in one with the body; the squares cut from the sides of the gown are added to the sleeves to give extra length.  Figs. 8, 9, the back, is cut straight across the top and has an inverted pleat centre back.  The front, Figs. 7, 10, 11, has an extra piece on top, a, which is formed into a pleat and folded to fit the neck, c, Fig. 11.  An inverted pleat is set each side the waist, d, Fig. 10."
The only alterations I made to this description was to cut the bedgown from one length of cloth, so that there is no shoulder seam, as I did with my pink shortgown.  This necessitated the insertion of an extra rectangular piece into the neck to create the shawl collar.

Inspirations: The color choice for my cotton was selected based on this original blue block-printed cotton bedgown in the collection of the Manchester Gallery, dated 1760-1780.

Blue block-printed cotton bedgown, 1760-1780 (acc. no. 1972.110).
Image linked from the Manchester Art Gallery.

I also referred to some of the images catalogued on Karen's 18th Century Notebook page on bedgowns.

Construction details: This is an amazingly simple project.  Because it is made of a single length of cloth folded to create the shoulders, the only seams that require sewing are those that run the length of the arms and down the sides.  These are flat-felled.  I added pocket slits, which are partially concealed by the inverted box pleats at the hips.  Garsault does not specify whether or not his pattern includes them, but I almost think they have to be a given in a garment like this, whose shape and length really impede pocket access through anything but side slits.

P1040105
Interior of the bedgown.

The center back of the bedgown has an inverted box pleat (similar to the one on the pink shortgown) sewn from the neckline to the waist to help control the fit of the upper part of the garment, while releasing excess fabric to fall over the petticoats.

P1040195

A small rectangular piece of fabric is added to create the shawl collar, and all of the bedgown's edges are simply folded and finished with a standard hem stitch.

P1040109
The rectangular piece added to the neckline to create the shawl collar.

Finally, two large rectangles of fabric are added to the ends of each of the sleeves to extend their length.  The seams are flat-felled to help protect from raveling, as I opted not to line or face the bedgown.  From images and extant examples, it appears that many bedgowns were either fully lined (some, it has been argued, might have even been reversible) or faced down the front and in the sleeves where these areas were frequently turned back to be exposed to view.

P1040104
The sleeve extension.

The fabric: White cotton printed in blue in a scrolling floral striped sort of design, in simulation of a block-printed or early roller-printed fabric.  This is part of last year's collection of prints released by Colonial Williamsburg.

Finishing the look: Although a bedgown is an informal garment, it should always be worn over all of the proper 18th century undergarments (shift and stays and a couple of petticoats).  For Distaff Day and during the first day of the workshop, I paired it with a blue stuff petticoat that Ashley made a couple of years ago, which had, for whatever reason, gotten buried in the closet and never worn.  That makes me quite sad, since I think it's one of my new favorites now!  I love the way the fabric drapes and moves, and I am really kicking myself now for not buying enough to do an entire gown out of it.  That ought to teach me never to let the size of the stash (er..."fabric collection"...) frighten me off of buying something new to add to it!

To keep the bedgown closed, I tied a semi-sheer corded cotton apron over it.  Of course, this being attire for the workshop, I accessorized with my ever-handy and always trusty, friendly sidekicks, my pinball and reproduction scissors.

P1040197
 
Additional photos can be found in this project's flickr set.