
Blue-Green Worsted Stays, 1740-1760
Perhaps you might recall this post, back in April of 2011, when we recounted our weekend spent at a Burnley and Trowbridge stays workshop. Well, nineteen months later, I finally finished those stays! I worked on them in fits and starts, sewing a panel here and panel there, boning a panel here and another there, and then putting them down for sometimes months at a time before picking them up again. The announcement of the fall gown workshop, however, finally provided the motivation to finish them, which I miraculously managed to do a week in advance. I'm so thrilled to have them completed, and even more thrilled by how comfortable they are!
The pattern: The pattern for the stays was taken directly from the infamous pink/lavender wool satin stays, dated 1740-1760, in the collection of Colonial Williamsburg (acc. no. 1966-188).
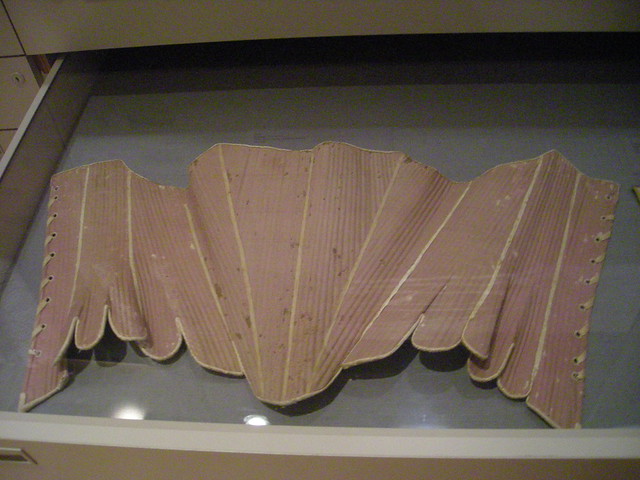
Lavender (faded to pink) wool satin stays (acc. no. 1966-188).
On view at the DeWitt Wallace Museum at Colonial Williamsburg.
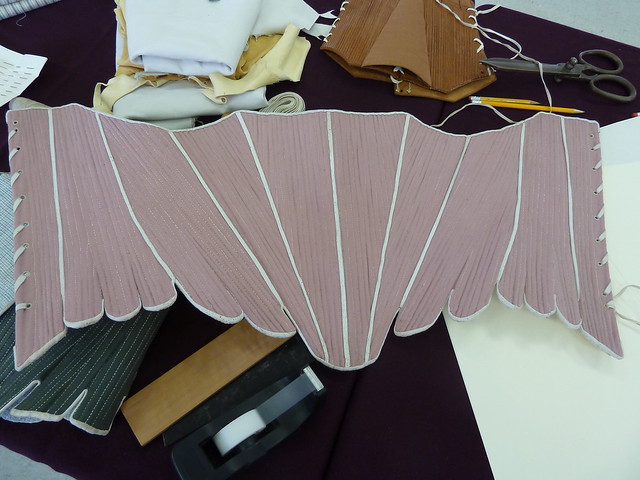
A reproduction of the extant stays above, produced by the
Margaret Hunter shop at Colonial Williamsburg.
Construction details: Every bit of these stays, including all of the channels, is sewn by hand. Because this was a workshop project, I won't go into too much detail about the construction process, but here's a quick outline of how things went together.
The workshop was led by Mark Hutter, journeyman tailor at Colonial Williamsburg. During the weekend, we learned how to take measurements using the tools and techniques of the eighteenth-century tailor and staymaker. After choosing the stays pattern best suited to our body type (each pattern option was taken by the tailor off of originals in various museum and private collections), we applied these measurements to our pattern.
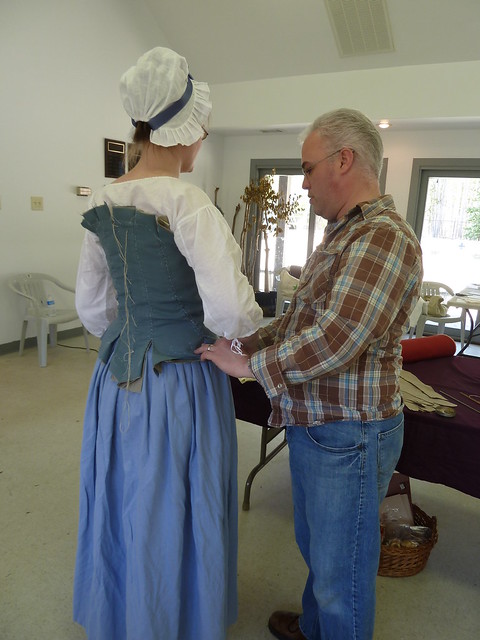
Double-checking the fit at the workshop. As you can see,
the sides met in the back, so I had some adjusting to do!
We cut and basted our panels together and then Mr. Hutter double-checked the fit, made adjustments, and sent us on our way to finish them. Below you'll see the state of my stays at the end of the workshop weekend.
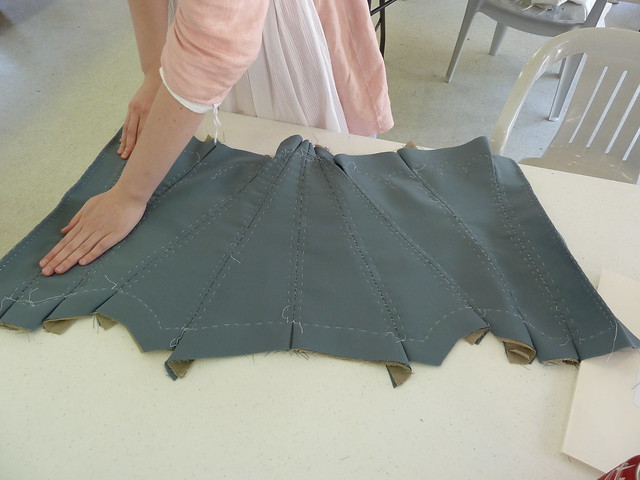
A (upside-down!) glimpse of my stays on the final day of the workshop.
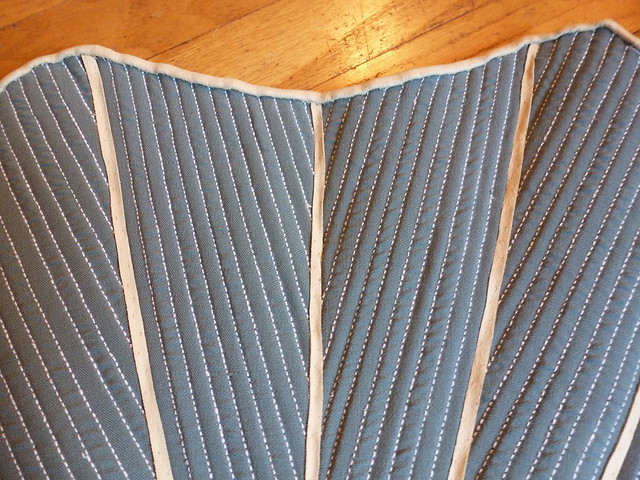
Each panel then had its boning pattern transferred onto it, and those lines sewn to create the channels.
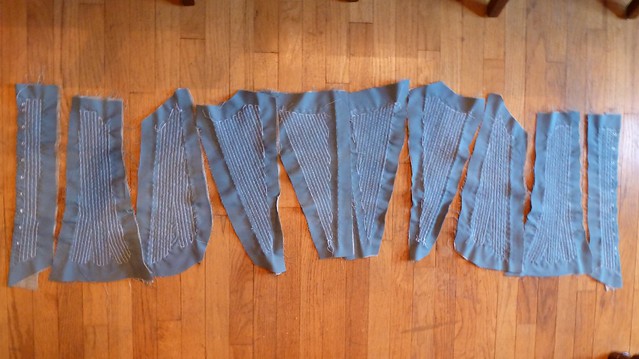
All of the panels with their channels completed.
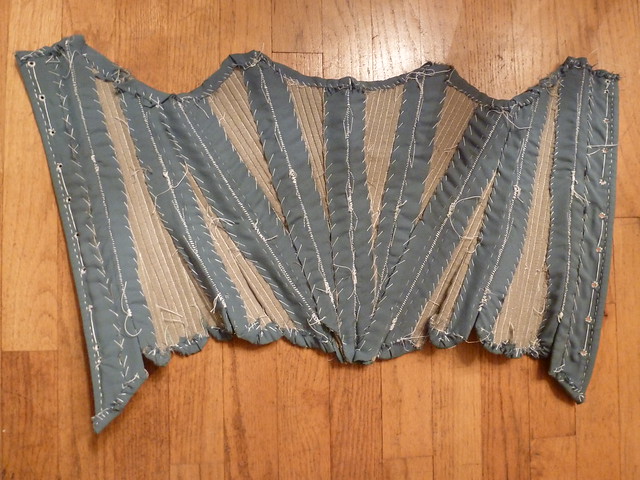
Then the panels were attached together and the stays were fully boned. Believe it or not, it took me longer to bone than it did to sew the channels because I had to do so much smoothing and whittling to size my boning in order to get it to go into the channels.

All boned and waiting to be trimmed...
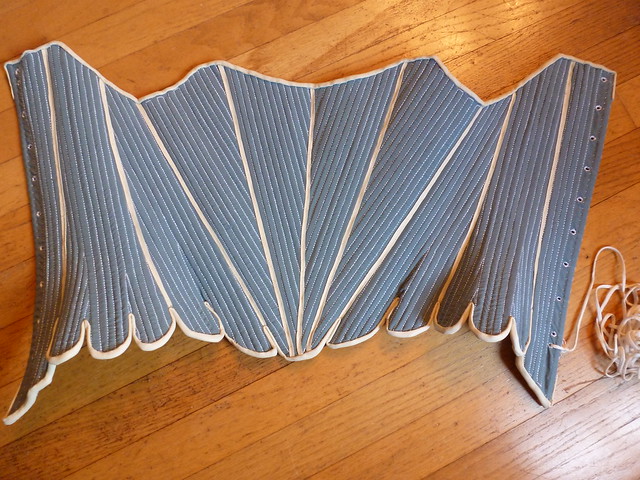
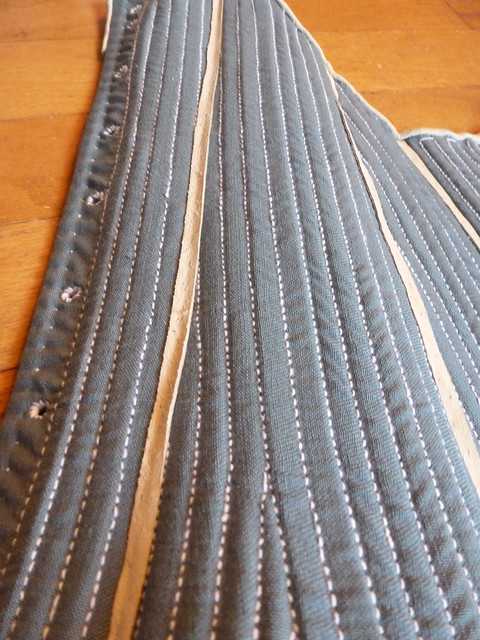
The excess fabric was then trimmed from both inside and along the edges, and the leather welting and binding attached, and voila! My stays!
Edges and interior excess trimmed and ready to be bound.
I have not yet lined them, as you can see. After all of this effort, I just didn't have the energy, and they're perfectly functional without it for now. I already have the lining in my stash, though, so sooner (or later...!), I'll add it in.
The completed stays. They've already shaped themselves a
little after only a few days' wear, so they're really quite comfortable.
little after only a few days' wear, so they're really quite comfortable.
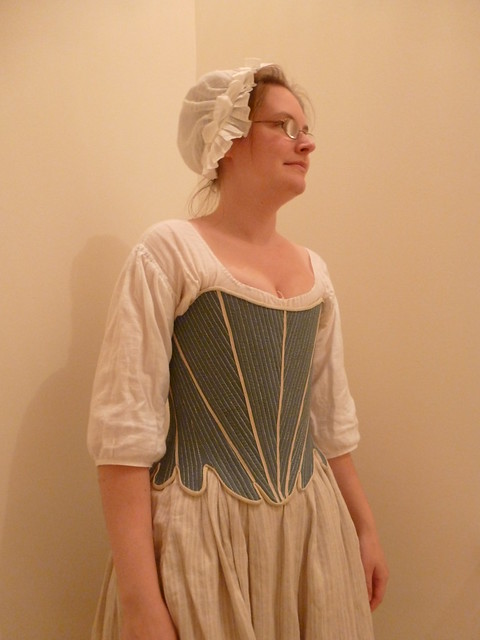
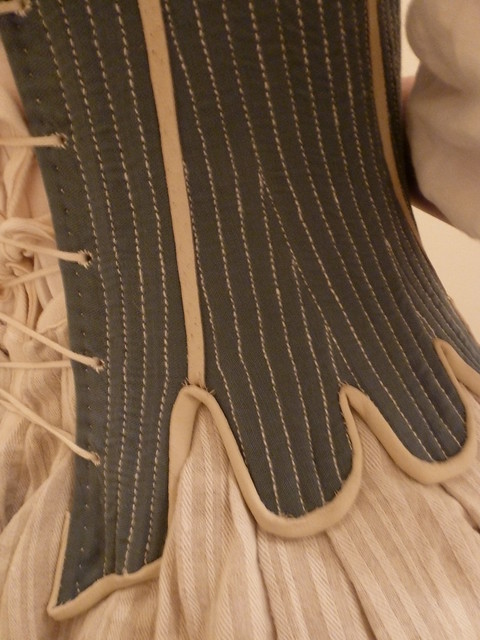
Detail of the center front.

Lots of backstitches!
Back panels, with welting to cover the seams.
The fabric: A blue-green worsted wool from Burnley and Trowbridge. The two interlayers that form the channels are linen. The binding and welting is an off-white kid leather, also from Burnley and Trowbridge. The boning is hand-pounded ash.
Finishing the look: The one thing - just one thing - that I would change about these stays is that the center front point should be a tad bit longer. When I made my adjustments after the fit-check at the workshop, I took quite a bit of width out at center front and lost the space there to build in the necessary stomach-holding-in length. I consulted Mr. Hutter about this issue, and we've remedied it nicely with the addition of a longer busk (which isn't in the pictures). Next time, next stays, I know what to fix! And yes, there will be another set of stays...:-)

Center front. The point should be just a tad bit longer.
The stays have an even 3" gap at center back. This is a tad bit wider than the ideal gap, but still perfectly acceptable. The goal is, of course, to get the sides parallel, and there was success there, so I won't let the extra bit of space bother me!

Back of the stays. The tangled-looking tapes at the waistline
are the ties from my underpetticoat, not the lacing of the stays!
Stays are, of course, always worn over one's linen shift. I also prefer to wear mine over an underpetticoat, just because that helps them sit more comfortably on my hips, but you certainly don't have to do things in that order; Ashley always ties her underpetticoat over her stays.

Side view of the shape the stays produce.
One side of the back panels.
Speaking of Ashley...now you all have to join with me in bugging her to get working more diligently on hers so she can finish them, too!
Additional photos can be found in this project's flickr set.
If you're interested in taking a stays workshop (and I highly recommend it!), visit Burnley and Trowbridge's website for the latest course listings.
4 comments:
Oh my goodness, they turned out beautiful! I love the color, I love the look. I bet you love the feel! I think you did a fantastic job!
Your stays look great!
-Emily
What sort of boning did you use? I'm thinking about making a more accurate set of stays (I used plastic boning last time).
Aww, thank you for the compliments, ladies! :-)
Rebecca, I used hand-riven ash splints. They're expensive, but most definitely worth the investment because they're both strong and flexible. Wood splints were typically a lower-class substitute for whalebone, so they're accurate to the period - not ideal, but the best we can really do today. Abby at "Stay-ing Alive" did a great demonstration of the different available materials for boning stays. Check out her blog for other options.
I've worked with German plastic whalebone in a couple of 1860s corsets, and I have to say I was pleasantly surprised by how sturdy it was. Wood splints would be my first option to do 18th century stays (for strictest accuracy's sake), but I think the German plastic could also come pretty close to serving the purpose as well.
I'm interested to hear what you decide on and seeing how your stays come out!
Post a Comment