
The first workshop, which concluded yesterday afternoon, focused on sacque jackets. Ashley opted not to do this one because she'd just attended the Threads of Feeling conference the week before (her post about that is coming soon!), so this was the first time I went into a workshop without my trusty fitting buddy. I missed her and it just wasn't the same without her, but I promised her that I'd console her for having to miss out by making her her own sacque jacket for Christmas. She's in the process of choosing fabric now, so stay tuned for that!
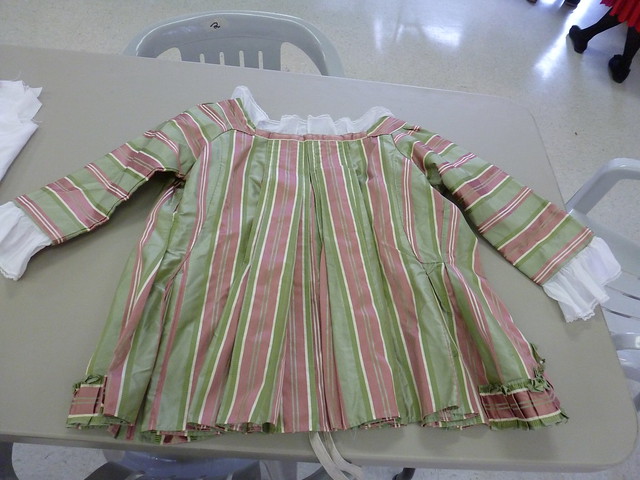
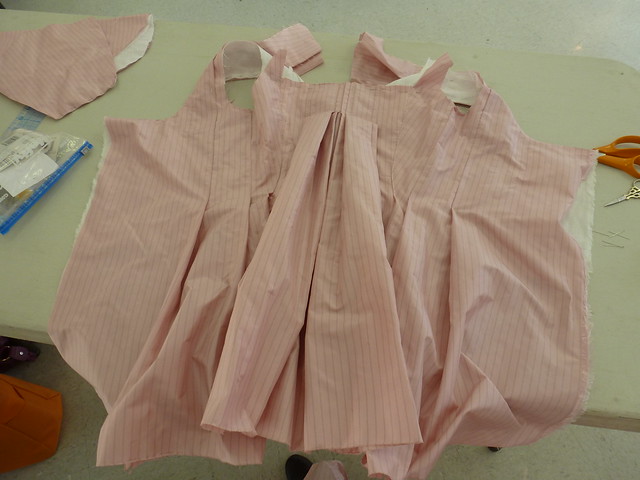
Our end goal for the workshop: a sacque jacket. This is the back of one recently
constructed by the ladies of CW's Margaret Hunter Shop. That fabric is to die for.
Our workshop was led by the incomparable Janea Whitacre, mistress of the Margaret Hunter Shop at CW, and one of her apprentices, Sarah. The ladies began on Friday afternoon with a brief lecture about the sacque jacket and its evolution through the second half of the 18th century. Like the full-length sacque gown and the fitted-back English "nightgown," the sacque jacket enjoyed a surprisingly long period of fashionability across almost four decades. Using images of extant originals and period prints and paintings, Janea and Sarah explained the stylistic differences between earlier sacque jackets and later ones; all of these would be options for us throughout the weekend as we worked on fitting and customizing our own projects.

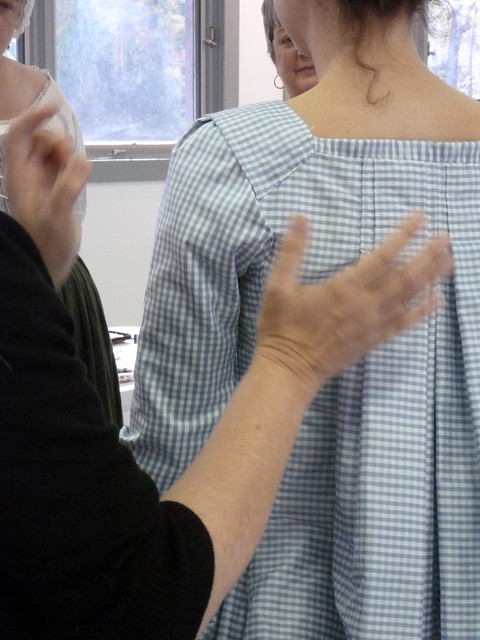
Sarah using a demonstration piece (modeled by Abby!) to outline
the steps of the construction process we'd be learning.
The remainder of Friday was spent cutting our back pieces and learning how to create the signature pleats that define the sacque style. We also draped sleeves (I'll take all the practice I can get when it comes to those!). Our homework that night was to finish up our back pleating and have our sleeves completed in preparation for continuing on to the next steps the following morning.
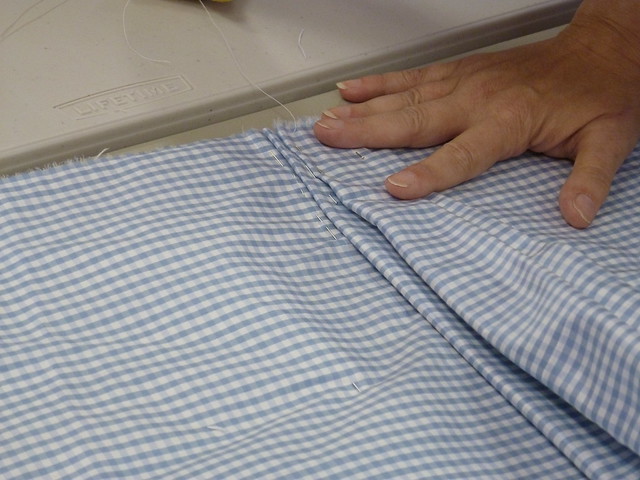
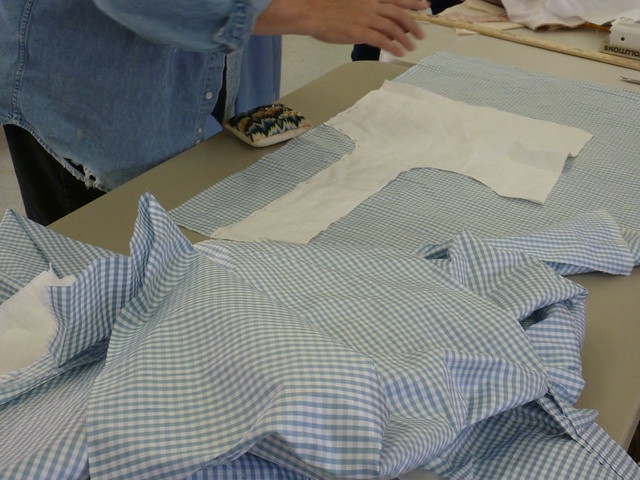
Beginning the backs with the lining...

...which is then used to cut the back piece.
Demonstrating how to lay the back pleats.
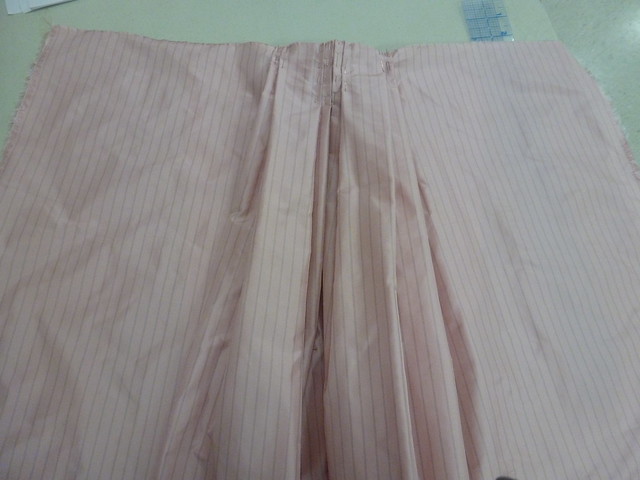
My back piece all pleated and pinned and ready to be sewn.
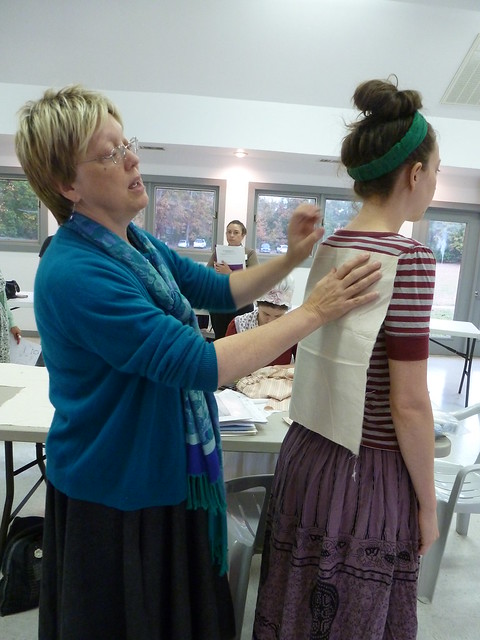
Saturday was a very busy day. We began by choosing our individual front closure details. Both I and my fitting partner elected to do ours in the later polonaise style with the fronts of the jacket falling away to reveal a stomacher beneath.

Fun with stomachers!
After patterning our stomachers, we moved on to draping the front of the jacket and then learning how to fit the outer fabric onto that draped lining to create the cute little flared shaping of the jacket's skirts. Our final step on Saturday was to fit the fronts to the backs, and it was so exciting to see everyone's jackets beginning to take shape. We all had jacket envy for each other as we walked around the room admiring all of the different fabrics and personalized styles.

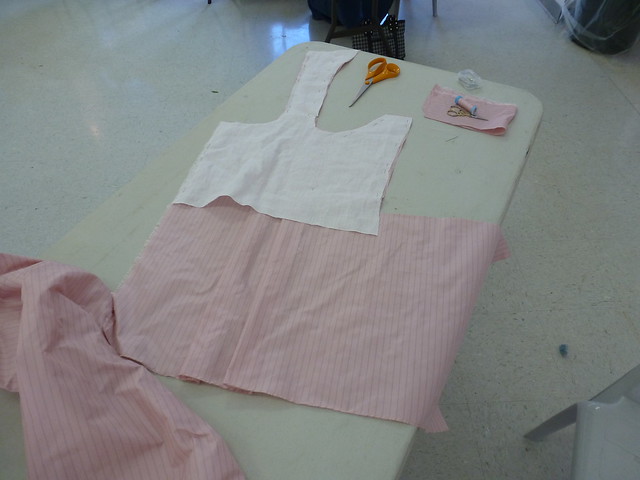
Draping the front lining...
...and cutting it out...
...and conforming it to the shape of the body.
One side of my jacket's front waiting to be attached.

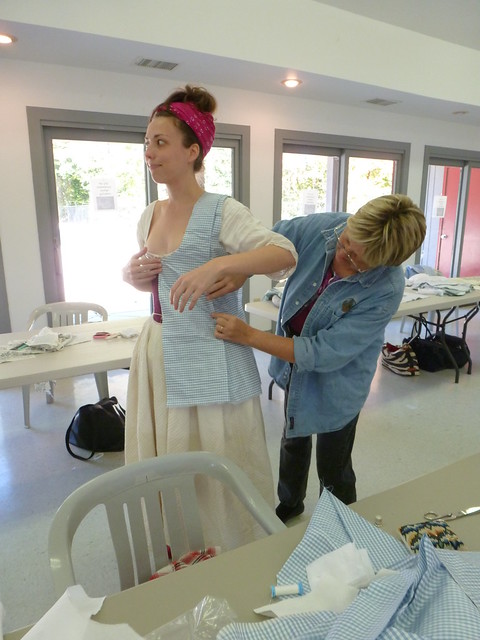
Fitting backs to fronts.
By Sunday morning, everyone arrived with fronts secured to backs, all ready to finish the shoulder straps and then begin to set the sleeves.
My jacket as of Sunday morning, finally looking like a jacket!
This is always the spot where my confidence begins to drop; sleeves and I have never been bosom buddies, and it always takes me forever to get to a point where I'm satisfied (but never completely happy) with them. This experience proved no different, though I'm always glad to have the additional practice and the chance to ask lots and lots of questions and have expert eyes to guide mine as I go along.
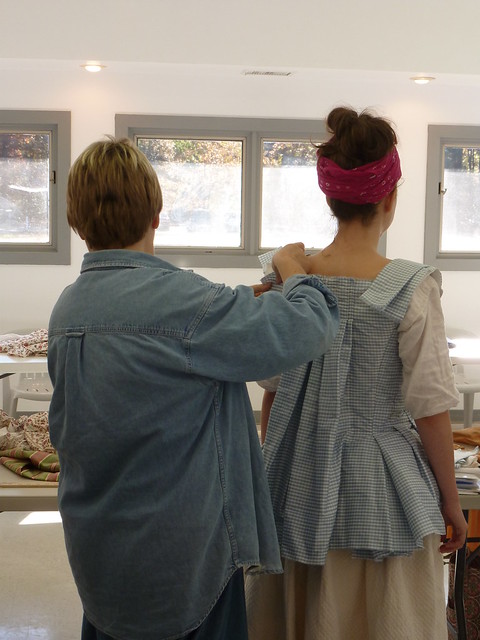
Setting sleeves.
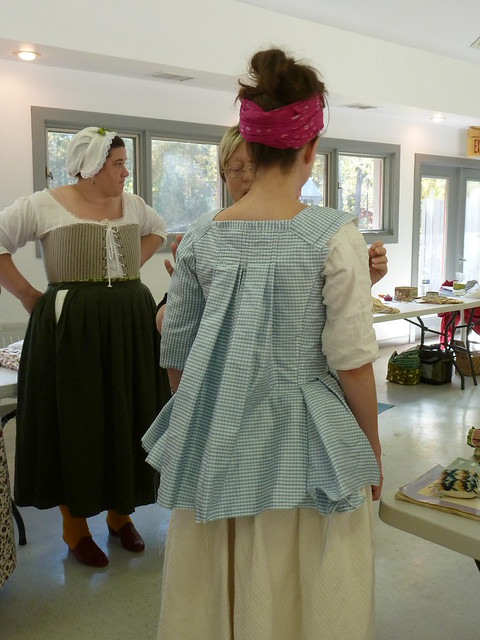
The back of Sarah's jacket. Ooooo, so pretty!
What made this workshop even better than the others we've done in the past was that Janea and Sarah decided to sew along with us and make Sarah a jacket in "real time." This meant that with each step, their own piece was in the same place as ours, so we could see how everything went together and what little trouble spots we might encounter as we went along. And I think Sarah was just as tickled about her new jacket as the rest of us were about our own! The blue and white checked taffeta she and Janea used made the most adorable jacket, and I look forward to seeing it finished and trimmed!
I didn't get a picture of my jacket with the sleeves attached, but there is a group shot that includes it in its workshop-ending state on Burnley and Trowbridge's Facebook page. If you're interested in seeing more step-by-step pictures, there are more on their page and also a bunch on the Margaret Hunter Shop page as well.
All that's left to be done on my jacket now are to finish sewing in the sleeves, to finish the hem, and to apply trim to the front and hem and to the sleeves. I'm also about half-way done with the trim for the petticoat. I think this jacket is well on its way to being my new favorite outfit. It's just so pink and puffy and pretty and girly and the style is so stinkin' cute! :-) Many many thanks to the folks at B&T for putting together yet another brilliant weekend, and to the Margaret Hunter ladies for sharing their expertise and guidance. I can't wait to see what they cook up for us for the next workshop season!
With three days now until the riding habit workshop, I'm going to challenge myself to see if can finish this before that next big project begins! Wish me luck!!!
13 comments:
Thanks Rebecca! We are glad you had such a great time!!!
I'm trying very hard not to be jealous and failing miserably. I so wanted to attend but couldn't. I really did want to make one of these for myself. =(
Laurie
This post actually made my day.
You can not believe simply how much time I had spent for this information! Thank you!
Good article. I absolutely love this site.
Thanks!
Hi there, yeah this post is truly nice.
I have learned lot of things from it about blogging. thanks.
Great!
Good checks. Jacket Back Digitizing Nice.
Hi there, You have done an excellent job.
I will certainly digg it and personally suggest to my friends
This is really helpful post and very informative there is no doubt about it.
Thanks for sharing with us this important Content.
Post a Comment